Frigidaire Refrigerator Error Code 2: Quick Fix Guide for Reliability
Understand Frigidaire error code 2, its urgent meaning, and quick fixes. This guide covers reset steps, sensor checks, and when to call a professional.

Frigidaire error code 2 points to a sensor or control fault that disrupts cooling. The quickest path to relief is a power reset and reseating the control-board connections. If the code returns, inspect the temperature sensor and its harness for damage, clean or reseat door switches, and confirm the module is receiving accurate readings before pursuing more in-depth service.
What Frigidaire Error Code 2 Means for Your Refrigerator
Frigidaire error code 2 is a diagnostic indicator that something in the sensor or control system is not communicating properly with the fridge’s cooling logic. While the exact internal fault can vary, the common thread is a mismatch between what the temperature sensors report and what the controller tries to do. This often translates to uneven cooling, warmer compartments, or periodic cycling rather than a steady temperature. For developers and technicians, the message is clear: verify sensor integrity, wiring, and the control module before assuming a refrigerant or compressor fault.
By understanding that Code 2 is a signaling fault rather than a dead device, you prioritize the diagnostic path: check connections, inspect the sensor, and test the control board behavior. In many cases, a simple reset clears transient glitches that trigger the code. If the reset doesn’t resolve it, prepare for a targeted inspection of the sensor harness and door switch inputs. This approach minimizes downtime and avoids unnecessary part replacements.
Note: Documentation and exact fault tree vary by model, so consult the specific Frigidaire service manual for your unit when possible. If your appliance is under warranty, avoid DIY damage-prone steps that could void coverage. The Why Error Code team recommends a cautious, methodical process to distinguish sensor faults from more serious PCB failures.
Symptoms to Look For That Tie to Code 2
Common symptoms associated with Frigidaire error code 2 include uneven cooling across compartments, inconsistent ice production, and the control panel flashing or locking up. You might notice doors not sealing properly or warm vents despite a set temperature, which can hint at a sensor reading discrepancy or a faulty control board. Some units also exhibit frequent compressor cycling without maintaining target temperatures.
Another clue is frost buildup near the evaporator or defrost region, suggesting the defrost sensor or heater is not communicating correctly with the controller. If you observe unusual noises from the rear panel, this can indicate a failed sensor connector or a loose harness connection. Documenting symptoms helps you and a technician isolate the root cause faster.
Lastly, confirm that external factors such as a wide temperature swing in the kitchen, a dusty condenser coil, or a blocked airflow path are not masquerading as an internal fault. A clean, unobstructed system supports accurate readings and reduces the chance Code 2 reappears after a reset.
Quick Wins: Urgent, Low-Risk Fixes to Restore Cooling
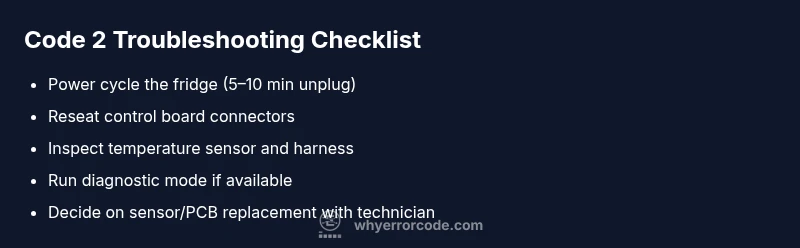
Performing a quick reset is the first line of defense against Code 2. Unplug the fridge for 5–10 minutes, then plug it back in and monitor for changes. This can clear transient misreads in the sensor data or a momentary control glitch. Second, inspect and reseat the main wiring harness connections on the control board. Loose or corroded contacts are common triggers for diagnostic codes.
Next, verify the temperature sensor path and its connector for signs of wear, pin damage, or cable abrasion. If you find obvious damage, replace the connector or segment of wiring. Finally, ensure door switches are not stuck and door gaskets seal properly; a poor seal can create temp readings that feed into the controller, causing Code 2 to appear again.
If these steps do not resolve the issue, proceed to the diagnostic flow and consider professional service for sensor or PCB replacement.
Step-by-Step Fix: Most Common Cause (Sensor/Controller)
Step 1: Power cycle the refrigerator
- Unplug the unit from the wall outlet and wait 5–10 minutes. This gives the system time to reset its microcontroller and clears transient faults.
- Plug the fridge back in and observe the display and temperatures for 1–2 cycles.
- If the code returns, proceed to Step 2. Tip: Keep a log of times when Code 2 appears to help with pattern recognition for service technicians.
Step 2: Inspect control board connections
- Access the rear or internal service panel per your model’s manual.
- Reseat all main harness connectors firmly, focusing on the control board cables and sensor harnesses.
- Look for corrosion, burns, or loose pins; replace damaged connectors as needed.
- Reconnect power and monitor for changes. Tip: Do not force connectors; if a connector won’t seat, stop and proceed to Step 3 or contact support.
Step 3: Check the temperature sensor harness
- Locate the temperature sensor and its wiring.
- Inspect for damaged insulation or exposed wires; inspect the sensor’s probe for damage.
- Reroute cables away from moving parts or hot surfaces to prevent future wear.
- Reconnect, then run a short cooling test. Tip: If you have a multimeter and service manual, test resistance values within specified range; otherwise, rely on visual inspection.
Step 4: Run a self-test or diagnostic mode (if available)
- Put the fridge into its built-in diagnostic mode following the manual.
- Note any additional codes or sensor fault messages that appear.
- Exit diagnostic mode and observe normal operation.
- If you see no improvement or new codes, escalate to professional service. Tip: Self-test results are more reliable when the fridge has stabilized at the set temperature.
Step 5: Decide on sensor/PCB replacement
- If sensor readings are clearly out of spec or the PCB shows physical damage, plan for component replacement.
- Compare prices for a new sensor or PCB (including installation costs) and check warranty applicability.
- Schedule service if you’re not comfortable performing electrical component replacement. Tip: Replacement should be done with proper ESD precautions and by following device-specific procedures.
Step 6: Verify operation and document
- After any replacement, verify that the fridge maintains target temperatures in both fresh food and freezer sections.
- Run a full cycling test overnight if possible.
- Update your service log to help prevent future Code 2 occurrences. Tip: If the code returns after a replacement, re-check all connections and consider PCB-level diagnosis.
Other Causes to Consider and How to Test Them
Safety Considerations and When to Call a Professional
Prevention: How to Reduce the Likelihood of Code 2
Steps
Estimated time: 45-75 minutes
- 1
Power cycle the fridge
Unplug the unit for 5–10 minutes, then plug back in and observe 1–2 cooling cycles. This clears transient faults that trigger Code 2.
Tip: Note the time of day Code 2 appears to help identify patterns. - 2
Inspect control panel connections
Access the control board and reseat all major harnesses and sensor cables. Look for corrosion or bent pins and replace damaged connectors.
Tip: Handle connectors by the plastic housing, not the wires. - 3
Check temperature sensor harness
Inspect the sensor wires for wear, test for continuity if you have the tools, and ensure the harness is firmly connected.
Tip: Avoid tugging on wires; disconnect power first. - 4
Run diagnostic mode (if available)
Enter the fridge’s diagnostic mode and note any additional fault codes or sensor messages that appear.
Tip: Follow the manual for exact steps; exit diagnostic mode after testing. - 5
Consider sensor/PCB replacement
If readings remain out of spec or codes persist after steps, plan for sensor or PCB replacement and check warranty.
Tip: Get a written estimate including parts and labor. - 6
Verify operation and log results
Ensure temperatures stabilize and record the outcome to prevent recurrence notes for future reference.
Tip: Keep a backup log for quick reference during service calls.
Diagnosis: Frigidaire refrigerator shows error code 2 and cooling is inconsistent
Possible Causes
- highFaulty temperature sensor
- highControl board glitch
- mediumDamaged wiring harness or loose connections
- lowDoor switch or door seal issue causing sensor misreadings
Fixes
- easyPower cycle: unplug for 5–10 minutes, then plug back in
- easyInspect and reseat main wiring harness connections on the control board
- mediumTest or replace temperature sensor if readings are out of spec
- hardConsult a professional for control board replacement or major wiring repair
Frequently Asked Questions
What does Frigidaire error code 2 mean exactly?
Code 2 signals a sensor or control fault that prevents proper cooling. It typically requires checking the temperature sensor, wiring, and control board. A reset often clears transient faults, but repeated codes indicate a component fault needing repair or replacement.
Code 2 means a sensor or control fault is interrupting cooling. Start with a reset, then inspect sensors and wiring; if it repeats, a professional repair may be needed.
Is Code 2 a safety risk for my family?
Code 2 itself is not typically a direct safety hazard like a gas leak, but prolonged malfunction can lead to spoiled food and potential electrical concerns. If there are burning smells, overheating, or visible damage, stop using the unit and seek professional help immediately.
Code 2 isn’t usually a direct safety threat, but avoid using the fridge if it overheats or you smell burning.
Can I fix Code 2 myself?
Some basic fixes, such as power cycling and reseating connectors, can be attempted safely. More advanced steps, like testing sensors or replacing the control board, should be done by a qualified technician.
You can try resets and reseating connectors, but complex tests are best left to a professional.
Should I replace the control board for Code 2?
Replacing the control board is a common remedy if sensor readings are unreliable and other fixes fail. Costs vary by model and region, typically ranging from moderate to high depending on parts and labor.
A control board replacement is a valid option if sensors and wiring check out fine but Code 2 persists.
Does Code 2 indicate a refrigerant leak?
Code 2 is not typically a direct indicator of a refrigerant leak. Leaks usually cause cooling failure with different symptoms. If you suspect a leak, stop using the unit and call a pro for leak testing and repair.
Code 2 isn’t usually a sign of a refrigerant leak, but if you suspect one, get a technician quickly.
What are typical repair costs for Code 2 fixes?
Costs vary widely: simple resets or sensor reseats may cost under $100 in parts/l Labor, while PCB or sensor replacement can range from $150 to $400 or more, depending on model and warranty status.
Costs can range from under $100 for simple fixes up to a few hundred dollars for PCB or sensor replacements.
Watch Video
Top Takeaways
- Identify Code 2 as a sensor/control fault
- Start with safe resets before deeper diagnostics
- Reseat harnesses and inspect the temperature sensor
- Call a pro for PCB or refrigerant issues to avoid risk