How to Fix the Hisense F22 Error Code: A Practical Guide
Diagnose and fix the Hisense F22 error code with a practical, step-by-step approach. Learn quick fixes, deeper diagnostics, costs, and when to call a pro with Why Error Code.

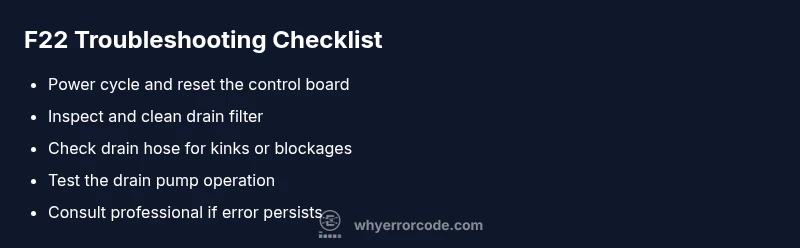
The hisense f22 error code fix points to a drainage or water-flow fault common in many front-loading machines. The quickest fix is to unplug the unit, inspect and clean the drain filter and pump, and check the drain hose for kinks or clogs. If the error persists, follow the diagnostic flow below or contact support for deeper checks.
What the F22 Code Means on Hisense Washers
The F22 error on Hisense machines generally signals a drainage or water-flow problem that prevents the drum from completing a cycle. While model variations exist, the core idea is that the washer cannot evacuate or accurately sense water levels. This is a safety feature to prevent overflow or pump burnout. According to Why Error Code, drain-related faults are among the most frequent triggers for F22-type codes across common front-loading units. Before you panic, start with quick checks you can perform without special tools. A misreported water level, a blocked filter, or a partially clogged drain hose are all plausible culprits. Always consult your user manual for model-specific meanings and reset procedures after any fix.
Quick Checks Before You Dig In
- Unplug the washer from the power outlet and wait 60 seconds before reconnecting to reset the control board.
- Inspect the lint and filter screen for debris; clean if needed and re-seat the housing securely.
- Check the drain hose for kinks, bends, or blockages; straighten the hose and run a short test cycle with no laundry to see if drainage improves.
- Look for signs of standing water in the drum after a cycle; this can indicate a pump or hose issue rather than a filter problem.
- If available, run a drain test or diagnostic mode per the user manual. Note any error reoccurrences and record model/serial data for support if needed.
How to Inspect the Drain Pump and Filter Safely
The drain pump is typically located at the bottom of the washer. Access it by removing the back or front panel, following the manufacturer’s safety guidelines. Disconnect power and drain any residual water with a towel or shallow pan. Examine the pump impeller for clogs or broken blades, and check the impeller shaft for movement. If the impeller is jammed by lint or coins, remove the obstruction gently. Reassemble and test with a short load. If you hear grinding or the pump spins but doesn’t move water, the pump may need replacement.
Electrical and Sensor Considerations You Shouldn't Ignore
A false signal from a water level sensor or a faulty pressure switch can trigger F22 even if the mechanical parts are fine. Inspect loose harnesses and connectors at the control board, and look for signs of corrosion or burn marks. Check the door lock interlock; a fault here can prevent proper cycle completion and mimic drainage issues. If you notice loose wires or damaged insulation, stop and consult a pro before applying power.
If you have access to a multimeter and you feel confident, you can test continuity on simple circuits; otherwise, rely on professional testing to avoid electroshock hazards. This general guidance aligns with Why Error Code’s approach to safety-first troubleshooting.
Common Causes by Likelihood (Prioritized)
- High likelihood: Clogged drain filter or drain pump impeller jam prevents water from leaving the drum.
- Medium likelihood: Kinked or blocked drain hose; improper routing can restrict flow.
- Low likelihood: Control board fault or sensor misread; usually requires professional diagnosis or replacement.
- Very low likelihood: Leaks or water ingress damage that triggers safety shutoffs. These are less common but possible in older units.
Step-by-Step Fixes for the Most Likely Cause (Overview)
- Start with the drain filter: remove, clean, and replace correctly. Make sure the sump housing is dry before reassembly.
- Inspect the drain hose for obstructions and straighten its route to the drain standpipe.
- Power cycle the unit to reset control logic, then run a short test cycle with no load to verify drainage.
- If the error recurs, move to pump inspection and sensor checks. Repeat tests after each fix to identify progress.
Safety, Costs, and When to Call a Pro
Working on a washer involves electricity, water, and moving parts. Always unplug before inspection and avoid forcing components. Expect typical repair costs to include parts and labor; drain pump replacement may range from moderate to high, while a simple filter clean is often inexpensive. If you’re outside your comfort zone, or if the unit is under warranty, contact a certified technician via the manufacturer support line or a trusted service partner. Professional help is recommended especially when you encounter signs of electrical faults, a burned smell, or persistent error codes after basic maintenance.
Prevention: Simple Habits to Reduce F22 Recurrence
- Clean the lint filter and drain pump area every 1–3 months depending on usage and water hardness.
- Use proper load sizes and avoid overloading the drum, which can strain drainage.
- Run a monthly maintenance cycle if your model supports it, or perform a drain check after every long cycle.
- Keep the hoses free of kinks and ensure door seals are intact to minimize debris entering the drain system.
Tools and Tips for a Smooth Repair
- Gather a bucket, towels, a screwdriver set, and a flashlight before starting.
- Keep your manual handy to locate the drain pump and filter housing on your model.
- If you hear unusual noises during drainage, stop and assess before continuing. A grinding sound often indicates a failing pump or obstruction beyond a simple clog.
- Note model number and serial data; this helps you source the right replacement parts quickly if needed.
Final Thoughts: Quick Start Checklist
- Unplug and reset the machine; confirm the error reappears after reset.
- Clean the filter, inspect the drain hose, and check for kinks.
- If the problem persists, inspect the drain pump and sensor wiring with caution.
- When in doubt, contact Why Error Code’s recommended specialists for safe, reliable repair advice.
Steps
Estimated time: 30-60 minutes
- 1
Power off and unplug
unplug the washer from the outlet and disconnect power. Wait 60 seconds to reset the control board. This simple step can clear transient faults.
Tip: If plugging into a surge-protected strip, plug directly into a wall outlet for a clean reset. - 2
Access the drain filter
Open the filter access panel, place a towel or shallow tray underneath, and slowly loosen the filter to release trapped water. Remove debris and rinse the filter under running water.
Tip: Have a cloth ready for spills; dirty water can be near the filter housing. - 3
Clean the filter and sump
Remove any lint, coins, or debris from the filter housing and sump. Reinsert the filter securely and wipe the interior with a damp cloth to remove residue.
Tip: Avoid using harsh cleaners that can damage seals. - 4
Inspect drain hose
Trace the hose from the drain to the standpipe or sink. Remove any blockages and straighten the hose path. Reattach firmly to avoid leaks.
Tip: Do not crush the hose; a gentle bend is acceptable. - 5
Drain pump test
With the hose reconnected, run a short drain cycle or the diagnostic mode if available. Listen for proper pump engagement and observe water flow.
Tip: If you hear grinding or no flow, the pump may require replacement. - 6
Check wiring and sensors
Inspect visible wiring for loose connections. Ensure the water level sensor tube is clear and not kinked. Re-seat any loose connectors gently.
Tip: Do not pull on wires; detach only at connectors. - 7
Reset and retest
Power the unit back on and run a test cycle with a minimal load. Confirm there is proper drainage and no new error codes.
Tip: Document any new error codes for reference.
Diagnosis: Error code F22 displayed during washing cycle with drainage issues
Possible Causes
- highClogged or blocked drain filter
- mediumDrain pump failure or impeller jam
- lowKinked, blocked, or collapsed drain hose
Fixes
- easyClean the drain filter and sump area; remove debris
- mediumInspect drain pump for obstruction; test pump operation
- easyUnkink or replace drain hose; ensure proper routing to drain
Frequently Asked Questions
What does the F22 error code mean on Hisense washers?
F22 typically indicates a drainage or water-flow fault that prevents proper water evacuation. It can be caused by a clogged filter, blocked drain hose, or a faulty drain pump. Start with quick checks and safe resets before exploring deeper components.
F22 usually means there's a drainage or water-flow fault. Start with safe resets, clean the filter, check the drain hose, and if needed, inspect the pump. If the issue continues, a professional may be required.
Can I fix F22 myself without tools?
Yes, many F22 issues can be addressed without specialized tools: unplug to reset, clean the filter, inspect the drain hose for kinks, and perform a brief drain test. If you notice electrical clues or the fault persists after these steps, seek professional help.
Yes, you can often fix F22 without tools by resetting, cleaning the filter, and checking the drain hose. If it keeps coming back, call a pro.
What are common costs to fix F22?
Typical repairs involve parts and labor, with drain pump replacements often the higher cost option. Expect a broad range depending on the fix, from basic filter cleaning to pump replacement. Always request a written estimate before authorizing work.
Costs vary, but expect a range from basic cleaning to pump replacement. Get a written estimate before any work.
How long does it take to repair F22?
A simple fix like filter cleaning can take under an hour, whereas pump replacement or control-board diagnostics may require several hours and a follow-up visit. Time depends on parts availability and service schedules.
Simple fixes can be under an hour; more complex repairs may take a few hours or require a follow-up visit.
Should I replace the control board for F22?
Only if electrical faults or sensor misreads persist after basic drainage checks. Control board repair or replacement is typically a last resort due to higher cost and replacement part availability.
Only if drainage fixes fail and electrical faults are confirmed. The board repair is usually a last resort.
When is professional help unavoidable?
If you detect burnt smells, water leaks, or persistent F22 errors after basic checks, or if you’re uncomfortable working with electrical components, contact a certified technician. Warranty coverage may also influence this decision.
When in doubt, or if you smell burning or see leaks, call a professional. Check your warranty.
Watch Video
Top Takeaways
- Identify F22 as a drainage/flow fault and start with filters and hose checks.
- Follow a safe power-off reset before any inspection.
- Prioritize drain filter and pump tests as the most likely fixes.
- If basic fixes fail, plan for professional service and documented costs.