Maytag Dryer AF Error: Quick Diagnosis and Fix
Learn what Maytag dryer error code AF means, how to diagnose airflow faults, quick fixes, step-by-step repair, safety notes, and when to call a professional for a durable solution.

AF on a Maytag dryer typically signals an airflow fault that blocks proper air movement, risking overheating. According to Why Error Code, airflow problems are the most common AF triggers, especially after long cycles or restricted vents. The quickest fix is to clean the lint screen, inspect the vent path, and re-test the dryer.
What AF Means on Maytag Dryers
AF is a common Maytag dryer error code that points to an airflow fault in the drying circuit. In practical terms, AF indicates that air is not moving freely from the drum to the exhaust, so the dryer cannot reach or sustain the required heat. According to Why Error Code, airflow problems are the most frequent culprits behind AF, especially after long drying cycles or in homes with restricted vent paths. The result is longer drying times, damp clothing, or an abrupt halt to the cycle. Airflow problems are easier to fix than many electrical faults, but they require a systematic approach to verify every link in the exhaust chain. If you see AF again after a fix, you may be dealing with a more stubborn blockage or an inside component. The importance of airflow cannot be overstated: heat without airflow is a recipe for overheating and a potential safety risk.
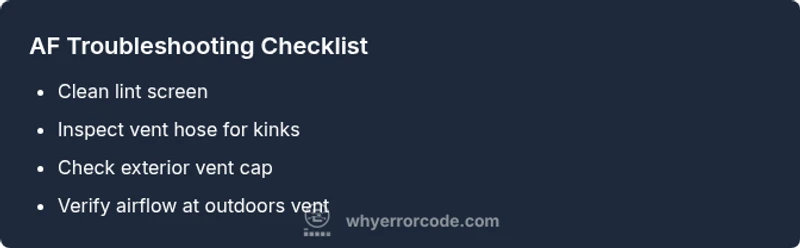
To begin, unplug the unit and perform a visual inspection: check the lint screen, remove any visible lint, and ensure the drum is rotating smoothly. Then inspect the vent hose for kinks and disconnect the hose to check for lint buildup inside the cabinet. Finally, look at the exterior vent cap for obstructions such as bird nests or insects. If you find a visible obstruction, clear it with a gloved hand or a long brush. If no obstruction is visible but AF persists, it’s time to move to a more thorough vent inspection.
Common Symptoms and What They Indicate
When AF appears, you may notice longer drying times, clothes that feel damp after a cycle, or the dryer stopping mid-cycle with the AF message. You might also hear the exhaust vent flapping or feel heat that seems insufficient. These symptoms all point to airflow restrictions rather than a burned element. If you run a few cycles and the error persists, this is a sign the blockage is not easily resolved by a single cleaning. If the dryer is in a tight space or within a long vent run, airflow issues become more likely, and AF can recur after routine cleaning. A persistent AF after basic cleaning often means the vent path needs a deeper inspection, including the ductwork inside walls or ceilings. Remember, airflow is a system—every link from the drum to the outdoors matters, and small blockages can have outsized effects on performance.
Primary Causes and Likeliest Fixes
-
Clogged lint filter: This is by far the most common cause. Lint buildup reduces air flow and can trigger AF even on a recently cleaned machine. Likelihood: high. Fix: remove and clean lint screen, then run a short cleaning cycle to dislodge any residue in the duct.
-
Blocked or restricted vent: A kinked hose, crushed ductwork, or a collapsed vent path reduces exhaust flow. Likelihood: high. Fix: inspect entire run from dryer to exterior vent; straighten kinks, replace damaged sections.
-
Exterior vent obstruction: Bird nests, debris, or insects at the vent cap can block airflow. Likelihood: high. Fix: clear exterior vent opening and verify airflow with a tissue test or a basic airflow check.
-
Sensor or control issues: A faulty moisture sensor or control board can misread dryness and trigger safety shutoffs. Likelihood: medium. Fix: reset the dryer, inspect sensor housing for lint, and consider professional testing if AF remains after a power cycle.
-
Blower or motor problems: A failing blower wheel or motor can hamper air movement. Likelihood: low to medium. Fix: professional assessment and potential replacement parts. A simple diagnostic can help decide whether to replace parts or call a pro.
Quick Fixes to Try Before Any Disassembly
- Clean the lint screen and housing thoroughly. Use a damp cloth to remove residue and ensure the slot is clear. 2) Inspect the vent hose for kinks and crushes; replace if necessary. Ensure it is not longer than recommended by Maytag guidelines. 3) Check the exterior vent cap and ensure it opens fully when the dryer runs. Remove any bird nests, leaves, or lint buildup. 4) Run a vent check: with the dryer running, feel for strong airflow at the exterior vent. If you feel weak air movement, stop and revisit the vent path. 5) Confirm the ductwork inside walls or ceilings is intact; look for disconnected sections. Safety reminder: unplug the dryer before any inspection and avoid forcing dislodged lint into the cabinet.
Steps
Estimated time: 30-60 minutes
- 1
Power down and access lint path
Unplug the dryer; remove lint screen; locate lint housing; use a brush to remove debris from the housing. Ensure the area behind the lint trap is clear and dry.
Tip: Keep a container handy for collected lint to avoid making a mess. - 2
Clean lint screen thoroughly
Wash the screen with warm water and mild detergent; scrub the slot with a soft brush to remove residue; dry completely before reinstalling.
Tip: Drying completely prevents lint from sticking and recirculating. - 3
Inspect vent hose and duct run
Disconnect the vent hose at both ends and visually inspect for kinks, crushing, or disconnections; straighten or replace sections as needed.
Tip: Take photos during disassembly to ensure correct reassembly. - 4
Test airflow along the vent path
Reconnect and run a short cycle while feeling air movement at the exterior vent; compare to a healthy baseline if available.
Tip: If air feels weak, stop and inspect the interior ducts for blockages. - 5
Check exterior vent cap
Ensure the damper opens and closes smoothly; remove any nests or debris; verify unobstructed airflow to the outdoors.
Tip: Do not force the damper; if it sticks, replace the cap. - 6
Power cycle and re-test
Plug back in, reset the dryer if required, and run a test cycle to confirm AF no longer appears.
Tip: If AF reappears, escalate to a professional assessment for potential internal faults.
Diagnosis: AF code displayed on a Maytag dryer; dryer stops mid-cycle due to airflow fault
Possible Causes
- highClogged lint screen or housing
- highBlocked or restricted vent hose/duct
- highBlocked exterior vent cap or vent path
- lowMoisture sensor or control board fault
Fixes
- easyClean lint screen and interior lint housing
- easyInspect vent hose for kinks and replace if necessary
- easyClear exterior vent cap and verify steady airflow
- mediumReset power and test; service control/sensor if AF returns
Frequently Asked Questions
What does AF mean on a Maytag dryer?
AF signals an airflow fault in the dryer system, usually caused by blockages or restricted venting. The result is reduced airflow, longer dry times, or an overnight shutdown. Addressing airflow is the first and most important step.
AF means airflow problem. Check lint screen and vent path, then re-test the dryer.
Is AF dangerous?
AF is not typically dangerous, but persistent airflow problems can cause overheating and potential fire risk. Treat AF as a maintenance alert and address airflow promptly.
AF is usually not dangerous, but fix airflow quickly to stay safe.
Can AF be cleared by unplugging the dryer?
Power cycling can clear the error, but it does not fix the underlying airflow issue. If AF returns after a reset, proceed with vent inspection and consider professional help for internal faults.
Yes, a reset may clear it, but the root cause may remain.
What parts are commonly needed for AF issues?
Lint screen and vent hose are the most common parts involved. In some cases, the exterior vent cap or even the moisture sensor or control board may require attention.
Lint screen and vent hose are usually the culprits.
When should I call a technician?
If airflow paths are clear and AF persists, or you notice burning smells, electrical issues, or overheating, contact a professional for a thorough inspection and safe repair.
If AF sticks around after checks, call a pro.
Watch Video
Top Takeaways
- Inspect ventilation first to fix AF.
- Regular lint screen maintenance prevents future AF codes.
- If AF persists after checks, call a pro.
- Use safety steps and proper disassembly techniques.
- Document vent paths and checks for future reference.