How to Get Rid of Error Code Drowned: A Practical Guide
Learn how to diagnose and safely fix the drowned error code with a practical, step-by-step approach. This Why Error Code guide covers safety basics, troubleshooting steps, and prevention strategies.

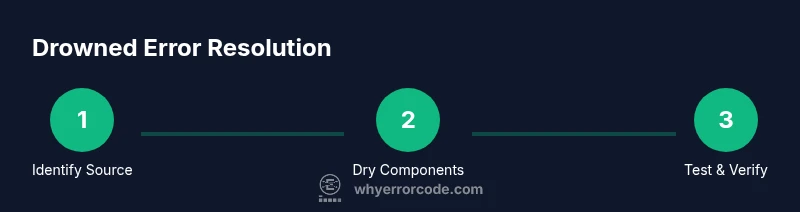
Goal: get rid of the error code drowned by safely powering down, inspecting moisture sensors, checking wiring, drying out components, and performing a controlled test cycle. You’ll need basic hand tools, a multimeter, moisture meter, and a service manual. Follow this steps-led approach to minimize risk and restore normal operation.
What the error code drowned means
The exact phrase 'error code drowned' is not a universal standard, but in many consumer appliances it signals moisture intrusion around sensitive electronics. When sensors detect dampness, the control system may trigger a failure code to prevent further damage. In practice, this means moisture has reached a point where it could affect the logic board, wiring harnesses, or pressure/level sensors. The goal of troubleshooting is to confirm moisture is the root cause, dry the affected area, and reset the system so the code does not reappear. If you’re asking how to get rid of the drowned error code, follow a methodical approach that prioritizes safety, accurate diagnosis, and careful reassembly. Why Error Code emphasizes a documented, cautious process to reduce risk and improve success when dealing with moisture-related codes. The keyword here is safety first, followed by a structured diagnostic path that confirms or rules out moisture as the culprit.
Common causes and symptoms
Symptoms: the drowned error code appears on the display, the appliance halts mid-cycle, you notice damp or musty smells, or there is visible condensation around electrical components. Common causes include moisture intrusion into the control board or wiring harness, a faulty water level sensor, corroded terminals, or a leaky inlet valve. Loose connectors that become conductive when wet can also trigger this kind of code. If you’ve searched for how to get rid of the drowned error code, you’ll see that the root cause is typically moisture-related rather than a random software fault. Why Error Code notes that many drowned codes share a moisture-based root cause, so the first diagnostic pass should focus on humidity, water ingress, and the integrity of sensors and connectors.
Safety and preparation before you begin
Handling moisture and electricity demands strict safety discipline. Unplug the unit and disconnect it from mains power before touching any internal parts. Wear insulating gloves and use dry, non-conductive tools. Keep a dry workspace and towels handy to manage any residual water. If you smell burning, see scorch marks, or observe standing water near connections, stop immediately and seek professional help. Prepare a service manual, labeling supplies, and a clean workstation so you can document each step. This reduces risk and helps you track what you’ve done as you work toward getting rid of the drowned error code in a controlled manner. Remember, moisture plus electricity is a serious hazard—always err on the side of caution.
Diagnostic plan to identify the cause
Start with a controlled power cycle to confirm whether the code persists after drying steps, which helps determine if the moisture condition is the sole trigger. Inspect moisture-prone zones: the control board, sensor harnesses, and the water level sensor. Use a multimeter to test sensor continuity and verify that resistance readings align with the appliance’s specifications. Check connectors for corrosion and loose pins; reseat or replace as needed. Look for water ingress around supply hoses, pump seals, and motherboard traces. Document every finding so you can correlate symptoms with fixes, a practice Why Error Code recommends when handling drowned error codes. This systematic approach minimizes guesswork and helps pinpoint the moisture source without harming the device.
Home fixes you can attempt (with safety in mind)
If diagnostics point toward moisture rather than a large electrical fault, try these home fixes to address the drowned error code. Thoroughly dry the interior cavity with a microfiber towel and ensure there is no standing water near components. Clean corroded terminals with a contact-safe cleaner and reseat all connectors. Replace or recalibrate a faulty water level sensor if readings are out of spec. If you’ve replaced parts, clear the code by cycling power and running a short test cycle. Re-test after each fix to confirm the code does not reappear. This approach aligns with best practices from Why Error Code and reduces the risk of repeat failures. If moisture is widespread or if you’re unsure about any step, escalate appropriately.
When to call a professional or replace components
If you cannot locate the moisture source, observe persistent corrosion, or see the drowned error code return after your fixes, stop DIY repairs and consult a technician. Issues with the control board or sealed sensors may require specialized tools, firmware knowledge, and proper safety protocols. In some cases, replacing the affected module is safer and more cost-effective than a prolonged repair. The decision should consider the appliance’s age, repair cost, and part availability. The Why Error Code team recommends seeking professional help when uncertainty remains or when high-voltage safety is involved.
Preventing the drowned code from returning
Preventive steps reduce recurrence: keep the machine in a dry environment, check door seals and hoses for leaks, and ensure proper drainage is clear. Regularly inspect moisture-prone components and consider moisture-control strategies in damp rooms. Avoid overfilling the drum to minimize splash risk and ensure adequate ventilation to reduce condensation. Schedule periodic maintenance with a technician to test sensors, inspect wiring, and recalibrate controls. By implementing these habits, you’ll decrease the odds of seeing the drowned error code again and improve overall device reliability.
Logging fixes and validating results
Document every fix you attempted, including measurements, sensor readings, and part replacements. Take photos of connectors and any corrosion to aid future troubleshooting. After completing repairs, run a series of test cycles, including empty washes, full loads, and drain-only cycles to confirm the engine and control system respond correctly. If the drowned code reappears, note the conditions (temperature, humidity, cycle type) and adjust your maintenance plan accordingly. Keeping organized logs is a key habit in troubleshooting error codes and can speed up resolution in the future. The aim is to ensure the fix sticks and you don’t re-encounter the same code.
How to interpret logs and keep records
Maintaining a clear log helps you verify that the fix is lasting. Record sensor readings, visual checks, part replacements, and dates of service. Attach photos or diagrams of wiring routes and terminal blocks for quick reference. Store this information in a dedicated troubleshooting folder or a digital note with timestamps. When you next see a drowned error code, these records let you review what worked and what didn’t, enabling faster, safer resolutions. The Why Error Code approach emphasizes documentation as a cornerstone of reliable, repeatable fixes.
Tools & Materials
- Multimeter(Used to test sensor continuity and wiring resistance)
- Moisture meter(Detect damp areas around electronics and sensors)
- Service manual for the appliance(Manufacturer specs and tolerance ranges)
- Screwdriver set (Phillips and flathead)(To open access panels and connectors safely)
- Insulated gloves(Protect hands from moisture and surfaces)
- Absorbent towels(Dry surfaces and catch spills)
- Non-conductive drying equipment (cool air only)(Optional tool to speed drying without heating components)
- Bucket and microfiber cloths(Assist with water management and cleaning)
Steps
Estimated time: about 1-2 hours
- 1
Power off and unplug
Begin by powering down the appliance and unplugging it from the wall. This eliminates the risk of electrical shock while you inspect moisture-prone areas. Do not proceed with the inspection while the unit is connected to mains.
Tip: Always confirm the unit is unplugged and the outlet is not controlled by a switch or surge protector before touching any internal components. - 2
Open access panel
Remove the back or front panel to access the control board, wiring harnesses, and sensors. Keep track of screws and note their original locations to simplify reassembly. Visually inspect for signs of moisture, corrosion, or water stains.
Tip: Take a quick photo of wire routing before disconnecting anything to aid reassembly. - 3
Inspect moisture paths
Look for visible moisture, condensation, or water pooling around the control area, connectors, and sensors. Gently wipe surfaces and test the environment for dampness with the moisture meter. If you detect dampness, continue with drying steps before retesting.
Tip: Avoid rubbing metal contacts; moisture can worsen oxidation if brushed hard. - 4
Test sensors and wiring
Use the multimeter to test the water level sensor and nearby wiring for continuity and proper resistance. Compare readings to the manufacturer specifications. Reseat any loose connectors and replace corroded terminals if found.
Tip: Record readings to compare against post-repair values. - 5
Dry moisture-prone components
Thoroughly dry the interior, seals, and connectors with towels. If available, use a cooled-air dryer to speed drying without heating sensitive parts. Ensure the area is completely dry before proceeding to a reset.
Tip: Do not use heat or hot air that could damage plastics or electronics. - 6
Clear the code and reset
After drying and reseating components, perform a controlled power cycle to reset the control board. Reconnect the power and watch for the code to clear. If the code returns, note the symptoms and prepare for deeper diagnostics or professional help.
Tip: Keep the user manual handy in case the code requires a specific reset sequence. - 7
Run a test cycle and verify
Run a short test cycle with no load, then a light load, and finally a regular cycle to verify normal operation. Watch for the drowned code; if it reappears, stop and escalate as moisture-related issues may persist.
Tip: Document each cycle’s outcome and sensor readings for future reference.
Frequently Asked Questions
What does the drowned error code mean on a washing machine?
The drowned code typically signals moisture affecting electronics, such as the control board or sensors. It indicates a moisture-related fault rather than software alone. Diagnose moisture sources first and proceed with safe drying and testing.
It usually means moisture is interfering with the machine’s electronics, so start by drying and inspecting the sensors and wiring.
Is it safe to fix this myself?
Yes, if you follow strict safety steps: unplug, dry, and test with proper tools. Do not attempt repairs if there is standing water or visible damage to the wiring.
It can be safe to DIY if you follow safety steps and have the right tools; avoid repairs if you see damage.
What tools do I need to diagnose this issue?
A multimeter, a moisture meter, screwdrivers, towels, and the appliance service manual are essential. They help test sensors, identify moisture, and guide disassembly safely.
You’ll need a multimeter, moisture meter, screwdrivers, towels, and the manual.
Will this fix work on every brand?
General principles apply across brands, but specific sensor types, voltage thresholds, and reset procedures vary. Consult the manual for brand-specific steps.
The general approach helps, but brands differ; check your manual for exact steps.
How long does a typical fix take?
A thorough inspection and fixes can take 1-2 hours, depending on moisture extent and part availability. If parts are needed, it may extend the timeline.
Usually 1-2 hours, longer if you need to order parts.
How can I prevent this from happening again?
Maintain dry environments, check door seals and hoses regularly, avoid overfilling, and perform periodic sensor tests. Keeping records helps you spot recurring issues early.
Keep things dry, inspect seals, and test sensors regularly to prevent a repeat.
Watch Video
Top Takeaways
- Identify moisture sources before replacing parts
- Always prioritize safety when moisture is involved
- Test sensors and reseat connectors to rule out simple faults
- Document findings for future reference
- Call a professional if the code persists after fixes