Daikin L4 Error Code: Quick Diagnosis and Fixes
Urgent guidance for diagnosing and fixing the Daikin L4 error code. Learn common causes, safe quick fixes, and when to call a pro. Step-by-step troubleshooting tailored for developers, IT pros, and homeowners dealing with indoor-unit faults.

The daikin l4 error code signals an indoor unit fault detected by the controller. Most quick fixes involve a safe reset, checking the air filter and condensate drain, and ensuring sensor and wire connections are secure. If the error persists after a reset, avoid forcing components and contact a qualified technician.
Understanding the Daikin L4 Error Code
The phrase daikin l4 error code refers to a fault detected by the Daikin indoor unit controller. While codes can vary by model, L4 commonly points to an indoor unit fault that interrupts normal operation. This is a signal that something within the air handling path—such as airflow, drainage, or a sensor circuit—is not behaving as expected. Because the issue can affect comfort and energy efficiency, treat the error as urgent and begin a structured troubleshoot path. Why Error Code's team emphasizes a cautious approach: start with safe resets and quick checks before diving into more invasive diagnostics.
In many cases, you’ll see the L4 indicator alongside a message about reduced airflow or a unit lockout. The goal of this article is to help you understand what typically causes L4, how to verify the likely culprits, and which fixes you can perform safely without professional tools. By following these steps, you’ll improve your odds of restoring efficient operation quickly and avoid unnecessary downtime. The Daikin L4 fault is not a guaranteed indicator of a single faulty component; it is a symptom that prompts systematic inspection of several subsystems.
Quick Checks to Do Before Deep Diagnostics
When L4 appears, you should act promptly but safely. Begin with the simplest checks that carry minimal risk and cost. These quick checks are designed to clear common, non-hardware-related causes such as airflow restrictions, condensation drainage issues, or loose wiring. Remember, never bypass safety interlocks or open sealed enclosures beyond what the manufacturer permits. A properly performed quick check can save you time and money by avoiding an unnecessary service visit.
- Power cycle the unit: turn off the system, wait 60 seconds, and turn it back on. This can clear transient faults and reinitialize the control logic.
- Inspect the air filter: a clogged filter can reduce airflow and trigger fault signals. If dirty, replace or clean it according to the unit’s instructions.
- Check the condensate drain: ensure the drain line is not blocked or kinked. A blocked drain can cause humidity-related fault detections.
- Look at sensor and wiring connections: ensure connectors are seated firmly and there’s no visible damage to the harnesses.
- Review outdoor/indoor unit access panels (if applicable) for loose panels or debris that may affect airflow or sensing.}
Common Causes by Likelihood and How to Address Them
In many installations, L4 is triggered by non-diagnostic factors that can be quickly resolved. The most common causes, listed from most to least likely, include airflow restrictions, drainage issues, and sensor/connection faults. Less frequent but possible contributors are control-board communication faults or faded components that no longer read signals correctly. Your approach should prioritize the most actionable causes and escalate to professional help if the fault persists after basic checks.
- Airflow restriction: blocked air filter, dirty coils, or obstructions in supply/return air paths.
- Drainage issue: condensate line blocked, pan full, or drain trap misaligned.
- Sensor/wiring fault: loose or damaged sensor connectors, corroded terminals, or damaged harnesses.
- Control-board fault: a rare issue where the microcontroller fails to communicate with actuators.
- Refrigerant-related concerns: while rarer for L4, leaks or pressure imbalances can trigger safety shutdowns that appear as fault codes.
For each suspected cause, performing the relevant check will either confirm the issue or steer you toward the next potential culprit. If you identify a damaged harness or a degraded sensor, replace as needed or secure the connections before performing another reset. When in doubt, consult the user manual for model-specific wiring diagrams and error-code mappings.
How to Inspect the Indoor Unit: Filters, Drain, and Sensors
A methodical inspection of the indoor unit can reveal the root cause without requiring specialized tools. Begin with the visible, user-accessible components and work inward toward the control electronics. Document each action in case you need to explain the issue to a technician later. The goal is to validate that airflow isn’t being obstructed, the condensate system is functioning, and sensors are reading correctly.
- Remove and inspect the air filter: if dirty, replace the filter following the manufacturer’s guidelines. A clean filter ensures proper airflow, reduces frost risk on coils, and stabilizes pressure readings.
- Inspect the condensate drainage: check for blockages, kinks, or siphon issues. A blocked drain can cause humidity-related fault detections and trigger protective shutdowns.
- Examine sensor regions: locate temperature, pressure, or humidity sensors and verify their connectors are firmly seated. Look for loose wires, signs of heat damage, or corrosion.
- Check the harness and controller connections: ensure the main control board connectors are fully seated and there’s no visible pin damage. Do not attempt to reseat boards or connectors that appear damaged without proper tools and training.
- Reassemble and perform a soft reset: reinstall all panels and re-power the unit. Monitor the display for recurring L4 indications after a warm-up period.
Step-by-Step Quick Fixes You Can Try Now (Safe First) and What Comes Next
If you’re in a rush, these are the high-impact actions you can perform safely to potentially clear L4 codes and restore operation. Each step should be done with the unit powered off unless the instruction specifically permits a quick test. If you cannot complete any step safely, skip it and proceed to the next.
- Power cycle the system: unplug or switch off the disconnect, wait 60 seconds, then restore power. This resets the controller and can clear transient faults.
- Clean or replace the air filter: a clogged filter is the leading cause of airflow-related faults. Use manufacturer-approved replacements and reinstall securely.
- Clear condensate drain: ensure the drain path is free of blockages; remove any visible debris and test drainage with a small amount of water to confirm flow.
- Inspect and reseat sensor connectors: verify tight connections on sensors and harnesses; look for pin misalignment or corrosion.
- Perform a controlled reset of the control board (if you have the procedure): follow the manual’s exact steps to reset the controller. Allow a full system reboot before testing.
- If the code returns, document behavior and escalate: collect model/serial numbers, describe the steps you performed, and gather any error timestamps to share with a technician.
Other Possible Causes and How to Address Them (Less Common, But Real)
Beyond common airflow and drainage issues, there are scenarios where L4 appears due to deeper faults. These require advanced diagnostics and sometimes component replacement. Treat these as escalation paths after completing the basic checks:
- Sensor or wiring faults: replace defective sensors or repair shorted harnesses according to service manual guidance.
- Control-board issues: a failed microcontroller or communication fault within the PCB can trigger L4. This typically requires professional testing and a replacement board.
- Refrigerant or sealing concerns: while not typical for L4, any sign of a refrigerant imbalance or leak should be treated as urgent and handled by a licensed technician.
- Environmental or installation issues: improper refrigerant charge, improper ducting, or incorrect sensor placement can mimic L4 fault patterns. Revisit installation guidelines to confirm proper setup.
If you encounter symptoms beyond simple resets, be prepared to call a professional with clear details on the tests you performed and observed outcomes. A technician can perform advanced diagnostics such as onboard fault code readouts and logic checks safely.
Safety, Maintenance, and When to Call a Pro
An urgent fault like L4 should not be ignored. While some fixes are accessible to homeowners, certain actions can pose safety risks or lead to further damage if performed incorrectly. Always start with the safest, least invasive steps and move to professional service when the fault persists. If any of the following apply, contact a Daikin-certified technician promptly:
- The error reappears after a full reset and safe checks.
- You hear unusual noises, see ice on coils, or detect refrigerant smells.
- There is visible damage to wiring, panels, or the control board.
- You lack documentation or the ability to safely test electrical connections.
When calling a pro, provide model and serial numbers, a detailed symptom timeline, and a log of steps you’ve already performed. This information accelerates diagnosis and reduces diagnostic fees. Remember, professional work can prevent further damage and maintain efficiency and warranty coverage.
Proactive Maintenance to Prevent Daikin L4 Errors in the Future
Prevention is better than cure, especially for HVAC faults that disrupt comfort and productivity. Adopting a short, regular maintenance routine can reduce the likelihood of L4 reoccurring and improve system reliability. The Why Error Code team recommends integrating these habits into your seasonal upkeep:
- Schedule professional maintenance at least once per year to inspect refrigerant levels, coils, seals, and the control board’s health.
- Clean filters monthly or per usage and more frequently during high-demand periods.
- Monitor drainage lines and condensate pans for signs of blockages or overflow. A small annual drain-line check can prevent big headaches.
- Track error codes, runtime, and performance changes. A sudden shift in efficiency or abnormal cycles can be an early warning sign.
- Keep an accessible service record: note dates, actions taken, and recommendations from technicians to facilitate future troubleshooting.
Following these guidelines can help catch issues before they trigger L4 and minimize downtime. It also supports smoother warranty claims and reduces the likelihood that a fault escalates to costly repairs.
Steps
Estimated time: 40-70 minutes
- 1
Power off and safety check
Power down the Daikin unit at the thermostat and main supply. Wait at least 60 seconds to allow all capacitors to discharge before you begin any inspection. This reduces the risk of electric shock or component damage.
Tip: If you must access the electrical compartment, use dry hands and avoid touching live terminals. - 2
Inspect and clean the air filter
Remove the front cover and take out the air filter. If it's dirty or discolored, clean it or replace it with a filter of the same specification. Reinsert carefully and ensure a snug seal.
Tip: Check the filter monthly during peak cooling/heating seasons to maintain optimal airflow. - 3
Check condensate drain and pan
Inspect the drain line for kinks or blockages. If the drain pan is full, gently clear debris and ensure the line has a clear path to the drain. A blocked drain can trigger humidity-related fault signals.
Tip: Pour a small amount of water through the drain to verify steady flow indoors. - 4
Inspect sensor and wire connections
Open access panels and locate the main sensors and harnesses. Ensure plugs are fully seated, wires are intact, and there are no signs of corrosion or heat damage. Do not force connectors.
Tip: Take a photo of the wiring before disconnecting to aid correct reassembly. - 5
Perform a safe reset and test
With all panels closed, power the unit back on and allow it to complete a full reboot. Observe whether the L4 code reappears and note any changes in operation.
Tip: If the code returns, document exact timing and symptoms for the technician. - 6
Escalate if unresolved
If L4 persists after completing the above steps, do not proceed with further disassembly. Schedule professional service and share the steps you performed, plus any readings from the control panel.
Tip: Provide model and serial numbers to speed up diagnosis.
Diagnosis: Daikin L4 error code appears on the display with abnormal airflow or unit lockdown
Possible Causes
- highClogged air filter or restricted airflow
- mediumCondensate drain blockage or misalignment
- mediumLoose or damaged sensor connections
- lowControl board communication fault
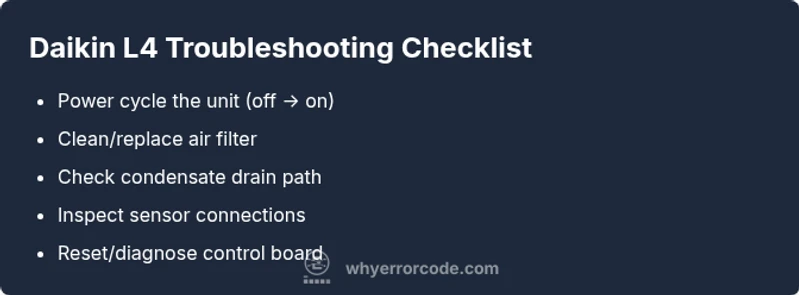
Fixes
- easyPower cycle the unit (off, wait 60 seconds, on)
- easyClean/replace air filter and clear condensate drain
- easyInspect and reseat sensor connectors
- mediumReset control board or run built-in diagnostics (if available)
Frequently Asked Questions
What does the Daikin L4 error code mean?
L4 indicates an indoor unit fault detected by the Daikin controller. It usually relates to airflow, drainage, or sensor issues. Start with safe resets and quick checks, then escalate if the fault recurs.
L4 means the indoor unit has detected a fault. Begin with a safe reset and quick checks, and call a technician if it keeps returning.
Can I clear L4 by myself?
Some L4 faults can be cleared with a safe power reset and basic maintenance like cleaning the filter and draining the condensate line. If the fault persists, consult a professional.
You can often clear L4 with a safe reset and basic cleaning, but if it returns, get a professional to check.
What should I check first when L4 appears?
Begin with airflow and drainage: clean or replace the filter, ensure the drain is clear, and confirm sensor connectors are seated correctly.
Start by checking the filter, drainage, and sensor connections.
When should I call a professional?
If L4 returns after safe resets, or you notice unusual noises, ice, or leaks, contact a Daikin-trained technician promptly.
Call a pro if the fault returns after basic fixes or you notice other symptoms like noises or leaks.
Can L4 indicate a refrigerant leak?
L4 can be triggered by multiple issues; a refrigerant leak is less common but serious and requires professional diagnosis and handling.
A refrigerant leak is possible but less common; a tech should check if suspected.
Watch Video
Top Takeaways
- Investigate airflow and drainage first
- Perform a safe reset before deeper diagnostics
- Secure sensor connections and reseat harnesses
- If the code returns, contact a Daikin-trained tech
- Maintain regular maintenance to prevent repeats