Dryer Error Code LOC: Troubleshooting and Fix Guide
Urgent guide to diagnose and fix dryer error LOC with quick fixes, diagnostics, step-by-step repair, safety tips, and prevention.

According to Why Error Code, dryer error code LOC indicates a lockout or control-communication fault in the dryer's electronics, stopping operation until the issue is cleared. The fastest path to regain function is a power reset, lint/vent cleaning, and door latch inspection. If LOC persists after these steps, follow the diagnostic flow or call a technician. This guide from Why Error Code helps you fix LOC safely.
What the LOC code means on your dryer
The LOC error code is a generic signal used by many dryer brands to indicate a lockout or communication fault between sensors, the control board, and the door interlock. Because manufacturers implement LOC differently, you should consult your user's manual for brand-specific meaning. In practice, LOC usually appears when the dryer detects an unsafe condition or a failure to exchange information across modules, so the unit refuses to start until the fault is cleared. Treat LOC as a safety-first alert: do not bypass safety checks or force a run. If you see LOC after a normal cycle, stop the machine, unplug it for a minute, and recheck basic conditions like door latch and vent.
Symptoms and indicators that LOC is active
A dryer showing LOC might lock the door, display LOC on the panel, and refuse to run even with clothes loaded. You may notice the start button not responding, lights flickering, or the display indicating a fault code. In some models, LOC appears during a vent-restriction alarm, a door interlock failure, or a board reset state. The key is to observe patterns: is LOC triggered after heat cycle begins, or immediately after pressing Start? Document the exact sequence to help a technician diagnose quickly and accurately. Remember: LOC is a symptom, not a fixed fault; the underlying cause could be mechanical, electrical, or software-based.
Immediate quick fixes you can try now (safe and low effort)
First, unplug the dryer for at least 60 seconds to perform a power reset. Reconnect and start a test without any clothes to rule out overload. Clean and dry the lint screen and inspect the vent hose for kinks or blockages; a restricted vent can trigger safety locks. Inspect the door latch and door switch for alignment, wear, or debris—clean or replace as needed. If your model supports a soft reset or self-test, use the menu to run that diagnostic. Do not open the control panel or attempt component replacements unless you are comfortable with basic electronics.
Diagnostic flow: symptoms → causes → fixes
Symptoms: LOC appears when starting or mid-cycle, unit locks and won’t restart.
Possible causes (by likelihood):
- Door latch or switch fault — high
- Vent obstruction or lint buildup — medium
- Control board communication error — low
Fixes (prioritize easy wins):
- Clean lint trap and vent ducts; ensure airflow is clear
- Inspect and replace faulty door latch or door switch
- Perform a full power reset and run a self-test if available
- If LOC persists, seek professional service for control-board diagnostics
Step-by-step repair: the most common LOC cause (door latch or interlock)
- Unplug the dryer and wait 60 seconds to discharge capacitors.
- Remove the access panel per your model’s manual and locate the door latch/switch assembly.
- Inspect for bent linkage, loose connectors, or debris; reseat connections and clean contacts.
- If worn or damaged, replace the latch or switch with an OEM-compatible part.
- Reassemble, plug in, and run a dry cycle without clothes to confirm LOC is cleared.
- If LOC returns, schedule professional service for a deeper electrical diagnosis.
Tip: Always disconnect power before touching electrical components. Expected time: 45–60 minutes.
Other possible LOC causes and how to handle them
Beyond the door latch, LOC can be triggered by vent restrictions that cause overheating protection to engage, a failing door interlock, sensor faults, or a flaky control board. Check the lint filter and exhaust vent for obstructions; ensure the vent path is straight and not compressed. If the door interlock feels loose or loose wiring harnesses are detected, inspect or reseat connectors. For control-board symptoms like intermittent responses or random code changes, avoid DIY board repair unless you have electronics experience; a trained technician should test continuity and voltage rails.
Pro tip: label any loose wires before disconnecting so you can reattach them correctly.
Safety, costs, and when to call a professional
LOC faults can involve electrical components and high-heat areas; never bypass safety interlocks or operate a dryer with visible damage. Typical costs vary by root cause: basic lint-vent cleaning and latch replacement can be relatively inexpensive (parts and labor often in the range of $60–$180), while control-board work or sensor replacement may run higher (roughly $150–$350). If the model is under warranty, contact the manufacturer first. When the LOC persists after basic repairs, or if you smell burning, hear sizzling, or notice melted wiring, stop using the unit and call a professional immediately.
Maintenance tips to prevent LOC in the future
Regular maintenance dramatically lowers LOC risk: clean the lint screen after every load, clean the vent duct regularly, and ensure the exterior vent hood is free of obstructions. Periodically inspect the door latch and hinge alignment; replace worn parts promptly. Keep the control panel area dry and free from moisture; use proper load sizes to avoid overheating. Consider scheduling a preventive service every 1–2 years to catch developing faults early.
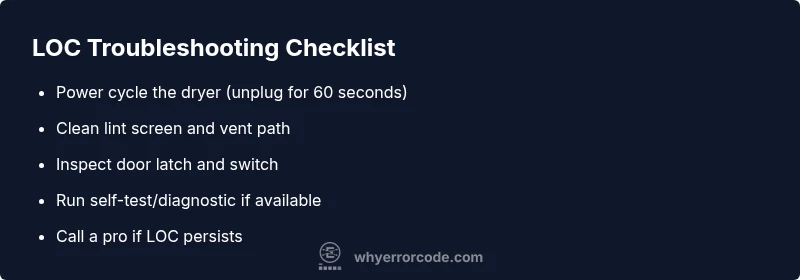
Quick reference LOC troubleshooting checklist
- Unplug and reset the dryer; re-test
- Inspect lint screen and vent for blockages
- Check door latch and door switch for wear
- Run diagnostic self-test if available
- If LOC persists, contact a professional
Steps
Estimated time: 45-60 minutes
- 1
Power down and safety check
Unplug the dryer and wait 60 seconds to clear residual power. Confirm there is no physical damage or burned smells before proceeding.
Tip: Always disconnect power before handling electrical components. - 2
Inspect lint path and vent
Remove the lint screen and check the vent hose for kinks or blockages. Clean thoroughly if buildup is present. Poor airflow can trigger safety locks.
Tip: Use a vacuum to remove stubborn debris around the vent inlet. - 3
Check door latch and switch
Examine the latch for physical wear and test the door switch with a multimeter if available. Replace if contact is worn or the switch fails to engage.
Tip: Ensure connectors are fully seated and not corroded. - 4
Reset and self-test
Plug the unit back in and perform a basic self-test or diagnostic via the control panel if your model supports it.
Tip: Refer to your manual for exact navigation to the self-test mode. - 5
Run a dry-cycle without clothes
Run a short cycle to verify that LOC does not reappear. Observe panel for any new error codes or abnormal behavior.
Tip: Do not overload the drum during tests. - 6
Escalate if LOC returns
If LOC recurs, document the symptoms and contact a professional for a deeper electrical or control-board diagnosis.
Tip: Keep a log of symptoms and steps taken for faster service.
Diagnosis: Dryer displays LOC error code and won't start
Possible Causes
- highDoor latch or door switch fault
- mediumLint buildup or vent restriction
- lowControl board communication error
Fixes
- easyInspect and replace faulty door latch or door switch
- easyClean lint filter and check vent path for obstructions
- easyReset the dryer's power and perform a basic self-test
- hardIf LOC persists, call a pro for control-board diagnostics
Frequently Asked Questions
What does LOC mean on a dryer?
LOC usually indicates a lockout or controller communication fault. It signals an unsafe condition or failure in the control system, causing the dryer to stop. Check basic safety interlocks, vents, and perform a power reset before deciding on further repairs.
LOC on a dryer signals a lockout or control fault. Start with safety checks and a power reset before pursuing deeper repairs.
Can LOC be caused by a clogged vent?
Yes. A clogged vent can trigger safety protections and trigger LOC. Clear lint, check the duct, and ensure proper airflow. If LOC persists, deeper electrical diagnostics may be needed.
A clogged vent can trigger LOC. Clean the vent and check for airflow; if it remains, seek professional help.
Is LOC worth repairing or should I replace the dryer?
Most LOC issues are repairable, especially if caught early. Basic fixes like lint cleaning and door latch replacement are cost-effective. If recurring LOC occurs after professional repair or if the dryer is old, replacement could be more economical in the long run.
Many LOC problems can be repaired, but if it repeats after repair or the unit is old, replacement might be wiser.
Will running a dryer with LOC cause damage to clothes?
LOC itself does not typically damage clothes; it prevents operation for safety. Avoid forcing the unit to run; instead, address the underlying fault before using again.
LOC usually won’t ruin clothes, but forcing operation can be unsafe. Fix the fault first.
How much does LOC repair typically cost?
Costs vary by root cause. Simple fixes like lint cleaning or latch replacement often cost around $60–$180 in parts and labor; control-board diagnoses can run higher, roughly $150–$350 depending on parts.
Most LOC repairs range from about $60 to $350, depending on the fault and parts needed.
When should I replace the dryer instead of repairing LOC?
If LOC recurs after multiple repairs, or if energy efficiency and reliability are poor, replacement may be more economical in the long term. Consider age, usage, and warranty status when deciding.
If LOC keeps returning and the dryer is old, replacement could be the smarter choice.
Are there brand-specific meanings for LOC?
Yes. The exact meaning of LOC can vary by brand and model. Refer to the user manual for your specific model to interpret LOC accurately and follow manufacturer-recommended procedures.
LOC meanings differ by brand; check your manual for model-specific guidance.
Can I perform a DIY control-board diagnosis?
Basic electrical testing (voltage checks, continuity) should only be performed if you have proper training and safety equipment. For most users, a professional diagnosis is safer and more reliable.
Only proceed with control-board tests if you’re trained; otherwise, hire a pro.
Watch Video
Top Takeaways
- Start with a power reset and vent check
- Door latch and interlock are common LOC culprits
- Control-board issues are harder and pricier
- Prevent LOC with routine vent cleaning
- Call a pro when LOC persists after basic fixes