Error Code 0x800f0831 Hyper-V Troubleshooting: Quick Fix Guide
Diagnose and resolve error code 0x800f0831 when enabling Hyper-V on Windows. This urgent guide covers quick fixes, diagnostics, common causes, and when to call a professional.

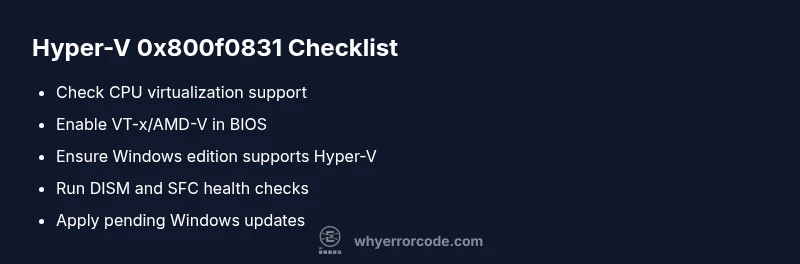
Error code 0x800f0831 Hyper-V means a required Windows component failed to install or initialize when enabling Hyper-V. The most common fix is enabling the feature via Settings or DISM, ensuring virtualization is enabled in BIOS/UEFI, and that your Windows edition supports Hyper-V. If problems persist, run Windows Update and perform health checks like SFC and DISM before seeking professional help.
What This Error Means for Hyper-V
Error code 0x800f0831 appears when Windows cannot enable Hyper-V because a required component failed to install or initialize. This often shows up as the Hyper-V feature fail to turn on, or a cascading failure during the enablement process. Treat this as a feature-activation issue rather than a generic OS error, and follow a focused troubleshooting path to restore virtualization.
Common Causes (Most Likely First)
The following causes are the most frequent culprits, listed in order of likelihood:
- Missing or corrupted Windows component store due to incomplete updates
- Hardware virtualization disabled in BIOS/UEFI or incompatibility with VT-x/AMD-V
- Running Windows Home edition without Hyper-V support or insufficient licensing
- Outdated or pending Windows updates that block feature activation
- Conflicts with security software / third-party virtualization tools
Each cause has a distinct fix, so verify them one by one.
Quick Fixes You Can Try Now
Apply these fixes before diving into advanced repair steps:
- Reboot and retry enabling Hyper-V via Settings or DISM
- Confirm virtualization is enabled in BIOS/UEFI and that Secure Boot is configured properly
- Run Windows Update to install missing components and reboot
- Run elevated commands: sfc /scannow and dism /online /cleanup-image /restorehealth
- If you’re on Windows Home, upgrade to a Pro/Enterprise edition if Hyper-V is required
If the quick fixes fail, proceed to the Step-by-Step section.
How the Diagnostic Flow Helps You Find the Real Cause
By outlining symptom, likely causes, and practical fixes, this flow helps you avoid guesswork. Start with the highest-likelihood issues (Component Store, BIOS virtualization, and edition support) and move down the list only if earlier fixes do not resolve the problem. Document each change and reboot to validate whether the error reappears.
Safety, Warnings, and When to Seek Help
Modifying BIOS/UEFI and Windows features carries risk if you are not careful. Always back up important data before changing virtualization settings or performing OS repairs. If the device is a business-critical server, consider professional support to minimize downtime and data loss.
Steps
Estimated time: 60-90 minutes
- 1
Check hardware and OS prerequisites
Confirm CPU supports VT-x/AMD-V, 64-bit OS, and that your edition supports Hyper-V. Review system specs and edition limitations before proceeding.
Tip: Use system information tools to verify virtualization support. - 2
Enable virtualization in BIOS/UEFI
Enter BIOS/UEFI setup, locate the virtualization option, enable it, save changes, and reboot. If you can't find the setting, consult the motherboard manual or vendor support.
Tip: Some vendors hide VT-x behind advanced processor settings. - 3
Verify Hyper-V prerequisites in Windows
Turn on required Windows features (Hyper-V) via Windows Features or PowerShell, and ensure no conflicting hypervisors are installed.
Tip: Use Get-WindowsOptionalFeature -Online -FeatureName Microsoft-Hyper-V-All to verify. - 4
Run health checks (DISM and SFC)
Open an elevated command prompt or PowerShell and run DISM health checks followed by SFC to repair components.
Tip: Run with internet access to fetch necessary components. - 5
Enable Hyper-V and test
Enable Hyper-V via Windows Features or DISM, reboot, and verify Hyper-V Manager can open and create a test VM.
Tip: Check Event Viewer for related errors if it fails.
Diagnosis: Error code 0x800f0831 appears when enabling Hyper-V on Windows 10/11/2026
Possible Causes
- highMissing or corrupted Windows Component Store / Windows Update components
- highVirtualization disabled in BIOS/UEFI or hardware incompatibility
- mediumWindows edition does not support Hyper-V (e.g., Windows 11 Home)
- mediumPending or failed Windows updates that block feature activation
- lowCorrupted system files or Hyper-V prerequisites
Fixes
- easyRun DISM /Online /Cleanup-Image /RestoreHealth
- easyRun sfc /scannow to repair system files
- easyEnable virtualization in BIOS/UEFI and re-enable Hyper-V via Windows Features or DISM
- mediumUpdate Windows to a supported edition and install pending updates
- hardPerform a repair install or clean install of Windows as a last resort
Frequently Asked Questions
What does error code 0x800f0831 Hyper-V mean?
It's a Windows feature installation error that often appears when Hyper-V cannot be enabled due to missing components, BIOS virtualization settings, or edition limitations.
0x800f0831 is a Windows feature error that blocks Hyper-V activation due to missing components or virtualization settings.
Is Hyper-V available on Windows 11 Home?
Hyper-V requires a Pro/Enterprise edition; Windows 11 Home does not support it natively.
Hyper-V isn’t supported on Windows 11 Home.
What if BIOS virtualization is enabled but the error persists?
Ensure Windows features and the component store are healthy, run DISM/SFC, and verify there are no pending updates.
If BIOS is enabled but the error remains, run system checks and ensure updates are complete.
Will upgrading Windows fix this error?
Upgrading to a supported edition can unlock Hyper-V; back up data and verify compatibility before upgrading.
Upgrading to a supported edition can unlock Hyper-V.
Are there risks enabling Hyper-V?
Hyper-V can conflict with other virtualization tools; backup and test VM configurations carefully.
Hyper-V can interfere with other virtualization software; back up first.
When should I contact a professional?
If BIOS changes or OS repairs are beyond your comfort level, seek professional assistance to minimize downtime.
Call a pro if BIOS changes or OS repair steps feel risky.
Watch Video
Top Takeaways
- Verify system requirements before enabling Hyper-V.
- Update Windows and repair system files.
- Enable hardware virtualization in BIOS/UEFI.
- Consult a professional if fixes fail.