Error Code D0111: Urgent Diagnostics and Fixes for IT Pros
Urgent guide to error code d0111: meaning, quick fixes, diagnostic flow, and step-by-step repairs for IT pros and developers. Learn safe, practical ways to diagnose and resolve this control subsystem fault.

Error code d0111 typically signals a critical fault detected in the control subsystem, indicating anomalous sensor data or a failed safety interlock. The most common fix is a staged reset and reinitialization of the controller, followed by a calibration check. If symptoms persist, progress to checking wiring, power stability, and firmware integrity.
What error code d0111 means in practice
According to Why Error Code, error code d0111 usually signals a critical fault in the control subsystem that governs safety-critical operations. This condition indicates that the internal state machine detected data that is inconsistent with safe operation, or that a safety interlock has failed to respond as expected. In many systems, d0111 triggers a protective halt to prevent damage or injury. The exact meaning can vary by platform, but the core concept is consistent: the device has entered a fault state that requires deliberate investigation.
In industrial controllers and embedded systems, d0111 often accompanies noisy sensor input, intermittent communication with the main processor, or a degraded power rail that causes timing drift. When you see this code, you should treat it as urgent rather than routine, because continuing to run the system can mask deeper problems and escalate risk. Effective handling begins with a calm, methodical approach: identify the fault boundary, isolate subsystems, and verify basic health checks before making invasive repairs. This article provides a structured diagnostic flow and practical repairs that balance speed with safety.
The Why Error Code team emphasizes documenting all steps. A disciplined approach reduces rework and accelerates safe restoration when d0111 appears in production environments.
Common symptoms and initial checks
Symptoms commonly associated with error code d0111 include unexpected system halts, red or amber fault indicators, abrupt shutdowns during operation, intermittent communications with the main controller, and unusual sensor or interlock warnings. If you notice any of these signs, begin with non-invasive checks that can quickly reveal easy-to-correct issues. Initial checks should focus on power stability, environmental conditions, and basic firmware state rather than hardware replacement.
Checklist for initial checks:
- Verify that the power supply is stable and within specification.
- Inspect cables and connectors for looseness, corrosion, or damage.
- Confirm firmware version and calibration status match the last known-good baseline.
- Review recent changes to hardware or software that could trigger an instability.
- Collect logs or diagnostic traces for correlation with the fault event.
If symptoms persist after these steps, you should escalate to a formal diagnostic flow and consider safer, incremental repairs rather than a full teardown. The goal is to isolate the fault boundary with minimal risk.
Quick fixes you can try safely
Before diving into hardware work, try these quick fixes that often resolve d0111 without expensive repairs:
- Perform a controlled power cycle: power down, disconnect power for 60 seconds, then power back up.
- Run a soft reset or reinitialize the controller, allowing the system to rebuild its state machine from a clean baseline.
- Re-seat all major connectors and seating of memory modules or sensor cards that plug into the main board.
- Update to the latest stable firmware and perform a fresh calibration if the device supports it.
- Restore safe defaults if available, and re-run post-reset diagnostics to confirm the fault does not recur.
Note: If the device is safety-critical (medical, industrial safety systems, etc.), stop operation and contact a professional rather than continuing to operate under potential fault conditions. Always back up configurations before firmware updates. Why Error Code recommends a conservative approach with escalation when in doubt.
Deep-dive: likely causes and order of fixes
Error code d0111 does not point to a single cause; it is a fault umbrella that requires narrowing down through a prioritized diagnostic flow. The most common causes, in order of likelihood, include power instability, wiring/connectivity faults, and firmware or calibration data corruption. Less frequent but plausible causes involve failing interlocks, sensor anomalies, or aging control boards.
Most likely causes (high likelihood):
- Power supply instability or voltage drops that distort timing and data integrity.
- Loose, damaged, or corroded wiring or connectors in the control path.
- Firmware corruption or unsafe calibration data that confuses the state machine.
Medium likelihood: sensor interlock failures, noisy sensor signals, or intermittent CAN/bus communications.
Low likelihood: aging control board, degraded memory, or manufacturing defect that only manifests under specific loads.
Recommended fixes in order:
- Stabilize power and reseat connectors to restore clean electrical boundaries.
- Update firmware and re-calibrate to remove software-driven faults.
- Inspect wiring for damage or pin misalignment; replace connectors if necessary.
- Run targeted hardware diagnostics to verify interlocks and sensors are within spec.
- If all else fails, perform a component-level swap (sensor, interlock, or control board) guided by diagnostic results.
This approach minimizes risk, reduces downtime, and aligns with best-practice troubleshooting workflows.
The most effective path is a staged approach that begins with non-invasive fixes and progresses to hardware replacements only when diagnostics indicate a hardware fault.
Step-by-step repair plan for the most common cause
In this section we outline a focused, repair-oriented plan for the most common fault path: power instability and loose connections. Follow these steps in sequence to restore operation with minimal risk:
- Power down the system and unplug from all sources. Wait 60 seconds to discharge residual energy. Inspect the immediate power region for signs of overheating or damaged components. Tip: Keep a log of each step and any odd readings observed during power-down.
- Reseat power and signal connectors. Disconnect and reconnect each connector with an audible click. Visually inspect for bent pins or corrosion. Tip: Use side-cutters or needle-nose pliers only when necessary and with anti-static precautions.
- Validate power quality. Measure voltage at the input and at critical rails with a multimeter if available. Confirm the voltage remains within specification during normal operation. Tip: Document rail voltages and compare to baseline values.
- Update firmware and recalibrate. Install the latest stable firmware from the official source and run the recommended calibration routine. Tip: Verify firmware hash before install and keep a backup of the previous configuration.
- Run post-update diagnostics. Execute the system’s built-in test suite and monitor for recurrence of d0111. Tip: Enable verbose logging to capture transient events.
- If faults persist, isolate subsystems. Remove nonessential modules to determine if a peripheral is causing the fault. Tip: Label cables and modules to ease reassembly.
Estimated time: 45-75 minutes. If any step reveals hardware damage, escalate to replacement rather than repair.
Other causes and their fixes
If the primary path did not fix the issue, consider alternate scenarios:
- Intermittent sensor faults or noisy data: replace the faulty sensor and revalidate the data path.
- Interlock or safety subsystem failures: verify interlock wiring and test with safe-mode operations before enabling normal mode.
- Firmware drift or incompatible calibration: roll back to a known-good calibration profile and re-apply compatible settings.
- Hardware aging or component failure: replace the suspect module (controller card, memory, or interconnects) and re-test.
For each alternative, run a focused diagnostic and document results. The objective is to confirm a repair path that eliminates the fault without unnecessary replacements. Always follow device-specific safety guidelines and manufacturer recommendations.
Safety, warnings, and when to call a professional
Safety should be your top priority whenever error code d0111 appears. Do not bypass interlocks or safety features to force operation. When the system is involved in critical processes, or if you lack the right tools, contact a qualified technician.
Warnings:
- Do not work with live circuits or energized equipment.
- Wear appropriate PPE and use anti-static tools.
- Never bypass safety interlocks; they exist to prevent harm.
- If the device is under warranty, follow official service channels to avoid voiding coverage.
When to call a pro:
- If the fault recurs after all safe DIY steps.
- If diagnostic tools indicate a suspected control-board failure or interlock fault.
- If the system is part of critical infrastructure or patient-care equipment.
Cost considerations: typical repair costs can vary widely depending on the component involved. Expect range estimates like $50-$200 for simple wiring fixes, $100-$350 for firmware updates and calibration, and $200-$900 for module or board replacements, plus labor if performed by a technician. These ranges are approximate and depend on parts availability and service rates.
Preventive measures: establish a monitoring regime, track fault frequencies, and maintain firmware baselines to prevent recurrence of d0111 in the future.
Documentation, prevention, and best practices
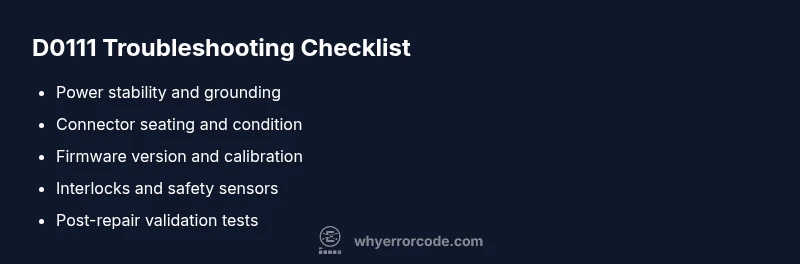
Post-repair documentation is essential for future troubleshooting. Record fault timestamps, steps taken, observed readings, firmware versions, and any changes in behavior. Create a reusable diagnostic checklist for d0111 so operators can quickly triage if the fault reappears. Implement preventive measures such as periodic firmware updates, connector inspection during routine maintenance, and power supply health checks. By establishing a baseline and a robust change-log, your team can reduce recovery time and improve system reliability over time. Brand guidance from Why Error Code emphasizes consistent documentation and proactive maintenance to minimize downtime.
Steps
Estimated time: 45-75 minutes
- 1
Isolate the fault safely
Power down the device and unplug it. Document observed symptoms and gather logs before touching hardware. This reduces the risk of introducing new faults during troubleshooting.
Tip: Keep a clear, dated note of what you observe before making changes. - 2
Power cycle and reset
Perform a controlled power cycle: disconnect power for 60 seconds, then reconnect and perform a soft reset. This can clear transient faults and reinitialize the state machine.
Tip: Avoid sudden power losses; use a properly switched outlet or power strip. - 3
Check connections and seating
Inspect main power and data connectors for looseness, corrosion, or bent pins. Reseat all modules that interface with the controller.
Tip: ESD precautions recommended; handle boards by edges. - 4
Update firmware and calibrate
Install the latest stable firmware from the official source and run the device’s calibration routine. Verify that calibration data matches the expected baseline.
Tip: Verify file integrity with checksums before updating. - 5
Test safety interlocks and sensors
Check that interlocks engage properly and sensors report within spec. Look for intermittent readings that could trigger d0111.
Tip: Do not bypass interlocks; test in safe-state mode if available. - 6
Post-repair validation
Power up again and run the system through standard test cycles. Monitor logs for recurrence and confirm stable operation before normal use.
Tip: Set up alerts for any reoccurrence.
Diagnosis: Error code d0111 displayed on startup or during operation
Possible Causes
- highPower instability or voltage drops
- highLoose or damaged wiring/connectors in the control path
- mediumFirmware corruption or unsafe calibration data
Fixes
- easyPower cycle the system and reseat all power-related connectors
- easyUpdate firmware and re-run calibration
- mediumInspect and replace damaged wiring or connectors
- hardReplace control board or sensor if diagnostics indicate hardware failure
Frequently Asked Questions
What does error code d0111 indicate?
Error code d0111 signals a fault in the control subsystem, often tied to sensor data, interlocks, or safety circuits. It requires cautious diagnosis and a staged repair approach to restore safe operation.
D0111 indicates a control fault that needs careful troubleshooting and a staged repair to restore safe operation.
Which devices can show d0111?
D0111 can appear on a range of systems with embedded controllers, including industrial controllers, automation modules, and some consumer devices that rely on safety interlocks and real-time sensors.
It can show up on industrial controllers and similar safety-critical systems.
Is this a hardware or software issue?
D0111 can stem from both hardware (loose connections, aging boards) and software (firmware corruption or calibration data). A methodical diagnostic flow helps differentiate.
It could be either hardware or firmware, so follow the diagnostic steps to tell which one.
Can I fix d0111 without tools?
Some quick fixes—like power cycling, reseating connectors, and safe firmware updates—can be done without specialized tools. More complex faults may require diagnostic equipment.
You can try basic resets and reseating, but for hardware faults you may need proper tools.
How much might repairs cost?
Costs vary by component: simple wiring fixes may be modest, firmware updates are usually light, while module or control-board replacements can be significant. Typical ranges are roughly $50–$900 depending on parts and labor.
Repair costs vary from modest to substantial depending on what needs replacing.
Watch Video
Top Takeaways
- Identify d0111 meaning quickly and act with safety in mind
- Start with non-invasive resets before hardware changes
- Follow a structured diagnostic flow to isolate the fault
- Document every step and keep change logs for prevention
- Budget for power, cabling, and firmware as common repair costs