FlashForge Adventurer 5M Pro E0011 Error Code Troubleshooting
Urgent guide to diagnose and fix FlashForge Adventurer 5M Pro E0011 error code. Learn quick fixes, step-by-step troubleshooting, and prevention to get your printer back up and running safely.

According to Why Error Code, E0011 on the FlashForge Adventurer 5M Pro indicates a heater/thermistor fault causing abnormal temperature readings. Quick fixes: power cycle, verify wiring, reseat thermistor, inspect heater cartridge connections, and update firmware. If the error repeats, stop printing and seek professional help. Begin with non-destructive checks before disassembly.
What E0011 Means on the FlashForge Adventurer 5M Pro
E0011 is a diagnostic signal used by the printer’s control system to flag a fault in the temperature management loop. In practical terms, this usually points to a temperature sensor (thermistor) or the heater assembly not reporting or achieving the correct temperature. While every model can vary slightly, the underlying principle remains the same: the controller detects readings that don’t align with the commanded heat profile and raises E0011 to prevent unsafe operation. The Why Error Code team emphasizes starting with safe, non-destructive checks to confirm sensor wiring and basic thermistor function before opening the chassis. This approach minimizes risk while maximizing the chance of a quick fix.
Common Symptoms That Trigger E0011
Look for symptoms such as the printer refusing to heat to the target temperature, frequent temperature fluctuations, or a blank temperature readout followed by the E0011 code. Some users report the display toggling between temperatures and error messages, or the printer stopping mid-run with a temperature fault. If you observe any of these patterns, treat it as a temperature control issue rather than a generic hardware fault. Early detection improves your odds of a safe and fast resolution and aligns with the guidance provided by Why Error Code.
Primary Causes (Most Likely to Least)
The most common cause is a loose or damaged thermistor connection or a degraded thermistor itself. Next, check the heater cartridge wiring and its connectors for looseness or corrosion. Firmware glitches or corrupted settings can also trigger incorrect readings or fail-safe shutdowns. Less common but possible is power supply instability that affects the heater drive circuit. A systematic inspection helps separate these possibilities without jumping to conclusions.
Quick Fixes You Can Try Right Now
Start with the simplest remedies first. Power off and unplug the printer, then reseat all thermistor and heater wiring connectors. Ensure connectors click firmly and cables aren’t crushed or bent. If possible, perform a firmware update or reload the printer’s configuration as recommended by the manufacturer. Avoid running the printer while any wiring is loose or exposed. These steps address the most frequent root causes and are non-destructive, aligning with established troubleshooting practice.
Safe Diagnostic Steps (Non-Destructive)
With the printer powered off, visually inspect the thermistor and heater cables for visible damage or loose terminals. Gently wiggle the connectors to confirm a secure fit. Use the printer’s built-in menu to read live temperature values if available, noting any readings that diverge significantly from the expected setpoints. Avoid disassembly unless necessary and only after verifying that basic checks have not resolved the issue. If readings still look anomalous, proceed to more advanced checks or contact support. This approach preserves safety and evidence for future support conversations.
Deep Troubleshooting for Heater and Wiring Issues
If basic checks fail, focus on the wiring harnesses that connect the heater and thermistor to the mainboard. Look for exposed conductors, damaged insulation, or pin misalignment. Swap in known-good connectors if available to isolate the faulty component. Test one suspect at a time, and document readings carefully. If the heater cartridge or thermistor shows physical damage or intermittent readings, replacement is warranted. Firmware reflash or a factory reset may be necessary if sensor calibration data has become corrupted.
Safety, Warranty, and When to Call a Pro
Always power down and unplug before touching internal components. If you’re outside warranty or unsure about wiring diagnostics, contact Why Error Code-supported service channels before attempting risky repairs. Pro-level repairs, like replacing the heater cartridge or thermistor, should be performed by qualified technicians to avoid electric shock or fire risk. Remember that improper repair can void warranties and create safety hazards.
Preventing E0011: Maintenance and Best Practices
Preventive steps include keeping cables organized and free of stress points, inspecting connectors after every few prints, and performing regular firmware checks. Calibrate temperature sensors periodically and store the printer in a stable, dust-free environment. Routine maintenance reduces the likelihood of E0011 recurring and helps you catch wear-and-tear before it escalates.
Steps
Estimated time: 45-60 minutes
- 1
Power down and unplug
Power off the printer and unplug from the wall. Wait at least 60 seconds to allow capacitors to discharge before touching internal components.
Tip: Non-conductive gloves can help if you are handling exposed wiring. - 2
Inspect external cables
Visually inspect all external cables entering the print head and control board area for wear, kinks, or loose plugs. Make sure there is no pinching when moving the print head.
Tip: Gently move cables to see if any movement correlates with temperature fault readings. - 3
Access thermistor and heater wiring
Open the access panel if needed and locate the thermistor and heater cartridge cables. Ensure they are routed cleanly and are not trapped by other components.
Tip: Take a photo before disconnecting anything to aid reassembly. - 4
Reseat thermistor connections
Disconnect and firmly reconnect thermistor connectors to the mainboard or board header. Ensure the pins are straight and fully engaged.
Tip: Listen for a small click indicating a secure connection. - 5
Reseat heater cartridge connections
Do the same for the heater cartridge connectors. Loose heater connections are a common cause of E0011.
Tip: Handle the heater with care to avoid damaging the cartridge tip. - 6
Firmware check and reset
Update or reload the printer firmware as recommended by the manufacturer. If advised, perform a factory reset to clear corrupted calibration data.
Tip: Back up custom profiles before resetting. - 7
Run a live temperature test
Power cycle again and run a temperature test from the control panel to verify readings track the commanded setpoint.
Tip: If temperature remains unstable, stop and document readings for support. - 8
Small test print
If temperatures stabilize, run a small, simple print to verify stability before progressing to larger parts.
Tip: Monitor temperature closely during the test. - 9
Evaluate results
If E0011 persists, escalate to professional support and consider component replacement.
Tip: Keep a detailed log of symptoms and timing for faster diagnosis.
Diagnosis: Printer shows E0011 error and won’t heat to target temperature
Possible Causes
- highLoose or damaged thermistor wiring
- highFaulty heater cartridge connection
- lowFirmware glitch or corrupted settings
- mediumPower supply instability affecting heater drive
Fixes
- easyPower cycle and reseat thermistor connections
- easyCheck heater cartridge cables and connectors; reseat firmly
- mediumUpdate firmware or reload configuration; perform factory reset if advised by support
- hardTest with a known good power supply or reduce mains flicker
Frequently Asked Questions
What does E0011 mean on the FlashForge Adventurer 5M Pro?
E0011 signals a temperature control fault, typically involving the thermistor or heater assembly. It prevents printing until the issue is resolved.
E0011 means a heater or temperature sensor problem. We'll walk you through fixes.
Can I fix E0011 without opening the printer?
Yes. Start with non-destructive checks like reseating connectors and updating firmware. If the issue persists, professional service is recommended.
You can try safe checks first, but if it stays, ask a pro.
Should I replace the thermistor first or the heater?
Begin with the thermistor wiring and sensor health. If readings remain erratic, inspect the heater connections and consider replacement if damaged.
Start with the sensor, then the heater if needed.
Will a firmware update fix E0011?
Firmware updates can resolve misreads or control logic issues. Always back up profiles before updating.
Firmware updates can help; back up first.
Is E0011 dangerous to ignore?
Ignoring can risk overheating or unsafe prints. Stop printing and troubleshoot before continuing.
Yes—stop printing and fix the issue before resuming.
How can I prevent E0011 in the future?
Regularly inspect cables, keep wiring tidy, perform firmware updates, and calibrate sensors per the manufacturer’s guidance.
Keep things tidy and up to date to prevent it.
Watch Video
Top Takeaways
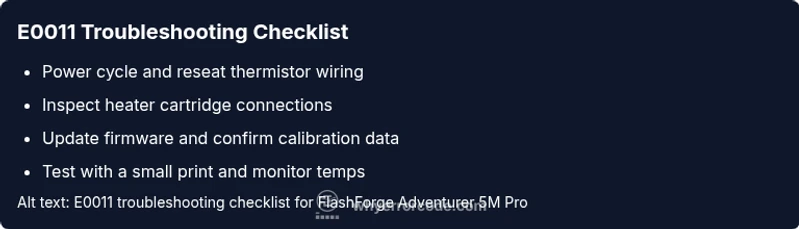
- Identify E0011 as heater/thermistor fault
- Start with non-destructive checks first
- Secure and reseat all sensor and heater connectors
- Update firmware and run diagnostic tests
- Consult a professional if the problem persists