GE Dryer Error Code 20: Diagnosis and Fixes
Urgent troubleshooting guide for ge dryer error code 20. Diagnose sensor, door switch, and control board issues, with step-by-step fixes and safety tips for quick resolution.

GE dryer error code 20 means a fault detected by the moisture sensor, door switch, or control board, causing the drum to stop. According to Why Error Code, start with a quick reset and inspect the moisture sensor and door switch wiring. If the error reappears, proceed to the diagnostic flow and plan a service call if needed.
What ge dryer error code 20 Really Means
The ge dryer error code 20 signals a fault in the dryer's sensing and control loop that keeps the drum running safely. In practical terms, the machine detected an abnormal condition that stops the cycle to prevent damage or a fire risk. On GE units, this code often points to a moisture sensor, a door switch, wiring, or a control board as the culprit. The urgency is real: ignoring the error can lead to longer drying times, increased energy use, or further component wear. The Why Error Code approach emphasizes a quick triage: confirm power, perform a reset, and verify key sensors before moving to deeper testing. While some users will clear the code with a simple restart, many situations require inspecting sensors and connectors. This article walks you through a safe, methodical process to diagnose, fix, and prevent ge dryer error code 20 from recurring.
Quick Fixes You Can Try Right Now
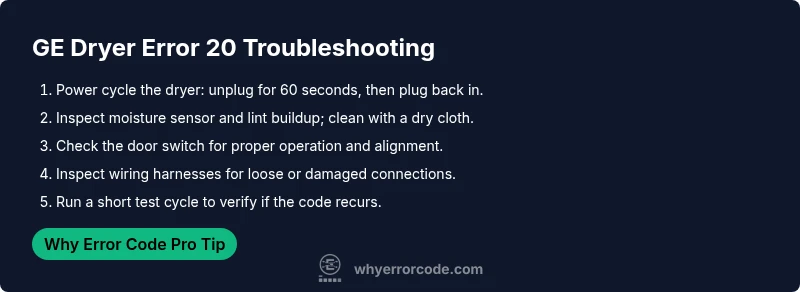
- Power cycle the dryer: unplug or switch off the unit for 60 seconds, then plug back in. This simple reset can clear transient faults that trigger code 20.
- Reset the control board: many GE models will clear a stale fault after a full reboot. If your model supports a manual reset option, use it as directed in the user guide.
- Inspect the moisture sensor: lint and residue can falsely trigger the code. Gently wipe the sensor strip with a dry microfiber cloth and ensure the area around the lint screen is clean.
- Check the door switch and latch: misalignment or worn contacts can appear as a fault. Test the switch with the door closed and open; replace if the switch feels loose or sticky.
- Look for obvious wiring damage: loose connectors, frayed wires, or a damaged harness can cause intermittent faults. Disconnect power before inspecting.
- Run a short test cycle: after completing the above steps, run a quick dry to verify if the code returns. If it does, the issue likely lies deeper in the sensor or control circuitry.
Diagnostic Flow: Symptom → Possible Causes → Solutions
Symptoms: The display shows GE dryer code 20 and the cycle stops unexpectedly.
Possible causes (ordered by likelihood):
- Moisture sensor fault (high): buildup or damage can trigger the sensor to think clothes are wet, stopping the cycle.
- Door switch fault (medium): a faulty or misaligned door switch can falsely indicate the door is open.
- Control board or wiring fault (low): a fault in the main board or loose harness can produce erratic behavior.
Solutions: clean and test the moisture sensor; inspect door switch and harness connections; if the issue persists, consider a replacement control board or sensor, depending on model and age.
Step-by-Step Fix: Most Common Cause
- Power down and unplug the dryer for 60 seconds to reset the electronics.
- Access the moisture sensor: locate the sensor strip inside the drum near the lint screen.
- Clean the sensor with a dry microfiber cloth; ensure there is no lint or residue on the sensor area.
- Reassemble, plug in, and run a short cycle to test.
- Inspect the door switch and latch for proper operation; replace if the switch is loose or unresponsive.
- If the error persists, check the main control board connectors for tightness and look for visible damage. If still present, plan for professional service or board replacement.
Tip: Always unplug before handling electrical components to reduce shock risk. If you’re unsure about handling the control board, skip to professional assistance.
Other Potential Causes and Fixes
Beyond the moisture sensor and door switch, other common culprits include damaged wiring harnesses, corroded contacts, and failing triacs or relays on the control board. Visual inspection for loose or burnt connectors can reveal easily fixable issues. For sensor-related faults, replacement sensors are typically the last resort after cleaning and testing have been exhausted. If you must replace a component, ensure you purchase the exact GE model-compatible part and follow service manual instructions to avoid further damage. If the dryer is under warranty, contact GE support before attempting major repairs.
Safety Considerations and When to Call a Professional
This fault involves electrical components and the potential for overheating. Always unplug the unit before inspection, and avoid working near wet surfaces. If you notice burning smells, sizzling sounds, or if the dryer becomes unusually hot, stop immediately and seek professional service. Do-it-yourself fixes on the control board or heater assembly should be reserved for experienced technicians. Cost ranges vary by model and region, but expect sensor or wiring work to fall in the lower-to-mid hundreds, while board replacements can reach higher amounts. A professional diagnosis can save time and prevent inadvertent damage.
Maintenance to Prevent Code 20 in the Future
Preventive care can reduce the chances of code 20 returning. Regularly clean the lint screen and the exhaust vent to maintain proper airflow and sensor accuracy. Wipe the moisture sensor periodically with a dry cloth and inspect door seals and gaskets for wear. Keep the interior drum free of detergent residue and fabric softener buildup that can affect sensors. Schedule routine professional inspections every 1–2 years if your unit is heavily used or aging. These steps help sustain performance and reduce downtime.
How GE Models Handle Error 20 and Model-Specific Tips
GE dryers that display error code 20 share a common triad of potential faults: moisture sensor, door switch, and control board. However, the exact behavior can vary by model. Some units perform a quick self-test after a reset, while others require a service mode entry to view sensor readings. Check your model’s manual for any model-specific diagnostic steps or test modes. If you’re unsure about which parts to test first, prioritize the sensor and door switch, as they are the most common culprits across multiple GE series.
Quick Troubleshooting Checklist
- [ ] Power cycle the dryer (unplug for 60 seconds).
- [ ] Clean the moisture sensor with a dry cloth.
- [ ] Inspect the door switch for proper operation.
- [ ] Inspect wiring and connectors for damage or looseness.
- [ ] Run a short test cycle to confirm the code does not reappear.
- [ ] If code 20 recurs, consider professional evaluation.
Steps
Estimated time: 45-60 minutes
- 1
Power cycle and safety check
Unplug the dryer for 60 seconds and plug back in to reset the electronics. This simple step clears transient faults that may trigger code 20.
Tip: Always unplug before touching any internal components. - 2
Access moisture sensor
Open the drum and locate the moisture sensor strip near the lint screen. Gently remove any lint or residue.
Tip: Use a dry microfiber cloth; avoid liquids near electronics. - 3
Clean and test sensor
Wipe the sensor clean and run a quick test cycle to see if the code returns. If it does, continue troubleshooting.
Tip: If unsure, proceed to door switch inspection. - 4
Inspect door switch
Check for loose connectors, broken internal parts, or misalignment that may falsely indicate door open.
Tip: Test with the door open and closed to confirm switch response. - 5
Check wiring harnesses
Inspect the main harness and any serviceable connectors for corrosion or damage. Re-seat any loose connections.
Tip: Take a photo before disconnecting wires for reference. - 6
Decide on replacement
If the fault persists after sensor, switch, and wiring checks, plan for sensor or control board replacement by a tech.
Tip: Ask for a model-specific part and labor estimate.
Diagnosis: GE dryer displays error code 20 and stops mid-cycle
Possible Causes
- highMoisture sensor fault
- mediumDoor switch fault
- lowControl board malfunction
Fixes
- easyClean the moisture sensor and test
- easyInspect/replace door switch or latch
- hardCheck control board connections or replace board
Frequently Asked Questions
What does GE dryer error code 20 mean?
Code 20 indicates a sensor or door switch fault causing the dryer to stop. It often points to the moisture sensor, door switch, or control board. Proper diagnostics should start with the sensor and switch checks.
Code 20 means a sensor or door switch fault is stopping the dryer; start by checking the sensor and the door switch.
Can I fix GE dryer error code 20 myself?
You can perform simple checks like resetting the unit, cleaning the moisture sensor, and inspecting the door switch. If the error persists, a professional diagnosis is recommended, especially for wiring or board issues.
You can try a reset and sensor cleaning, but if it continues, call a professional.
How do I reset GE dryer to clear the code?
Unplug the dryer or switch off the circuit for about a minute, then plug back in and run a short cycle. Some models also offer a reset option in the control panel settings.
Unplug for a minute, plug back in, and run a quick test cycle.
Are there safety risks if I ignore code 20?
Yes. Ignoring the fault can lead to longer drying times, potential overheating, or further damage to sensors or wiring. If signs of overheating appear, shut off and seek professional help.
Ignoring it can cause overheating or further damage; get it checked if it persists.
When should I call a technician for code 20?
If the error reappears after resets, if you notice burning smells, or if the dryer becomes hot during operation, contact a technician. Persistent faults likely require component replacement.
Call a technician if the code returns or you smell burning or see overheating.
Will cleaning the moisture sensor help prevent code 20?
Yes, cleaning the moisture sensor is a common preventative measure. Residue can trigger false readings, so regular cleaning reduces false positives and helps maintain accurate sensing.
Cleaning the moisture sensor helps prevent false Code 20 faults.
Watch Video
Top Takeaways
- Reset, test, and clean sensors first.
- Door switch and wiring are common fault points.
- If code persists, plan professional diagnostics.
- Preventive maintenance reduces recurrence.