Hardware Error Code 117: Urgent Troubleshooting and Fix Guide
Diagnose and fix hardware error code 117 quickly with practical steps, safe quick checks, and guidance on when to call a professional. Urgent help from Why Error Code for 2026.

Hardware error code 117 signals a hardware fault disrupting normal operation. The quickest path to relief is a controlled power cycle, reseating removable components, and inspecting connections. If issues persist after those checks, consider a firmware update or consulting a professional for a definitive repair.
Understanding hardware error code 117
Hardware error code 117 is a generic signal that a critical hardware component or its interface has faulted, interrupting standard operation. Because the exact fault can vary across devices—from desktop hardware to embedded systems—the first priority is to confirm basic health: power stability, clean power delivery, and secure connections. In 2026, devices increasingly integrate self-diagnostic routines; however, error code 117 still often requires a structured teardown to isolate the failing domain. Think of it as a warning that something in the hardware path—power, memory, processor, or storage—has stepped outside expected parameters. When you see 117, act quickly but methodically to avoid secondary damage and to preserve any reported logs for deeper analysis.
Quick symptoms to spot and how they guide you
Symptoms of hardware error code 117 can vary by device, but there are common signs to act on immediately. Look for sudden shutdowns, failure to POST (power-on self-test), unexpected reboot loops, abnormal fan behavior, or intermittent freezing during boot. Some systems emit LED blink codes or display diagnostic messages before shutting down. If you notice any combination of these symptoms, prioritize steps that restore stable power and inspect critical connections before proceeding to more invasive tests.
Primary causes and how likelihood guides fixes
Understanding the likely causes helps you triage efficiently. High likelihood causes typically include power supply instability, loose motherboard or connector cables, or failed memory modules. Medium likelihood may involve degraded storage devices or aging capacitors. Low likelihood often covers rare control-board faults or firmware misconfigurations. Start with the high-likelihood items for quick wins, then expand your checks if the problem persists. This prioritization minimizes downtime and avoids premature component replacements.
Quick checks you can perform safely
Begin with non-destructive checks that don’t require specialized tools. Ensure the device is powered down and unplugged before any inspection. Reseat memory modules and expansion cards, reseat all power cables, and verify that all internal fans spin freely. Inspect for obvious signs of damage or bulging capacitors, swollen batteries, or burnt odors. If you’re comfortable, reseat the motherboard, CPU cooler, and RAM in their slots. Document any changes and re-test. Always handle components with anti-static precautions.
Step-by-step repair overview (most common cause)
This section outlines a practical, repair-focused approach for the most common cause of error code 117—power/connections and memory-related faults. You’ll follow a sequence designed to minimize risk while maximizing the chance of a successful repair. The steps below assume standard consumer hardware but are adaptable to enterprise gear with safe handling. When possible, use the device’s built-in self-test to validate each stage before proceeding to the next.
Other potential causes and alternate fixes
If the primary fixes do not resolve error code 117, expand your scope to other subsystems. Check for degraded storage, firmware out-of-date, BIOS/UEFI misconfigurations, or failing peripheral devices. Replace or re-seat wear-prone connectors and consider testing with minimal configurations (e.g., run with essential components only). In some cases, environmental factors like overheating or dust buildup contribute to intermittent faults. Keep a log of events to correlate symptoms with hardware changes.
Safety considerations and professional guidance
Always prioritize safety. Disconnect power and discharge capacitors when working with high-voltage components, and never work on live power supplies. If you lack experience with soldered components, high-value memory, or power-supply repair, seek professional help. Costs for diagnostics and repair can vary widely based on the device and region; typical ranges might be $100–$400 for diagnostics, with higher costs for part replacements or labor. If warranty coverage applies, contact the manufacturer first.
Prevention and maintenance to avoid error code 117
Preventing this error involves proactive maintenance and monitoring. Schedule regular hardware diagnostics, keep firmware up to date, and ensure clean, stable power. Implement environmental controls to reduce overheating and dust accumulation. Maintain a hardware health log and establish proactive replacement thresholds for wear-prone components.
Steps
Estimated time: 45-90 minutes
- 1
Power down and unplug
Shut off the device and unplug from the wall. If possible, hold the power button for 10 seconds to discharge residual power. Wait 60 seconds to ensure capacitors have discharged before touching internal components.
Tip: Keep a photo of cable routing before unplugging to aid reassembly. - 2
Check the power supply and outlet
Test the outlet with another known-good device. If available, swap in a known-good power supply or use a different power strip with surge protection. Look for abnormal warmth or smells from the power supply area.
Tip: Use an isolated area to test; don’t run in a cramped cabinet during testing. - 3
Reseat memory and expansion cards
Open the chassis and carefully remove and reinsert RAM sticks, PCIe cards, and any modular components. Ensure they click firmly into place and are free of dust or debris. If the device has user-accessible RAM slots, try a different slot or a known-good module to verify.
Tip: Ground yourself with an anti-static wrist strap if available. - 4
Run diagnostics
Power on and enter the system’s diagnostic menu or BIOS/UEFI self-test. Run complete memory tests and storage checks if available. Note any error codes or LED indicators that can guide further action.
Tip: Record the exact diagnostic messages for later troubleshooting or support. - 5
Update firmware/BIOS
If diagnostics pass, check for firmware or BIOS updates from the device manufacturer. Apply the latest release following the official instructions, then re-test to see if error 117 reappears.
Tip: Back up configuration settings before updating firmware. - 6
Test with minimal configuration
Disconnect non-essential peripherals and expanders. Run the system with only core components (CPU, one RAM stick, storage). If the issue resolves, gradually reintroduce components to identify the root cause.
Tip: Label cables so reassembly is accurate. - 7
Check environmental factors
Ensure proper cooling, clean air pathways, and a dust-free environment. Overheating can trigger hardware error codes. Verify fans and thermal sensors operate correctly.
Tip: Improve airflow with dust filters and clean fans if needed. - 8
Call professional support if unresolved
If the fault persists after all checks, professional service is advised. Provide diagnostic logs, LED codes, and a record of steps tried to speed up the repair.
Tip: Check warranty status and manufacturer support options first.
Diagnosis: System shows intermittent shutdowns and fails to complete POST with error code 117
Possible Causes
- highPower supply instability or fluctuating input voltage
- highLoose or damaged internal cables/connectors
- highFaulty memory modules or improperly seated RAM
Fixes
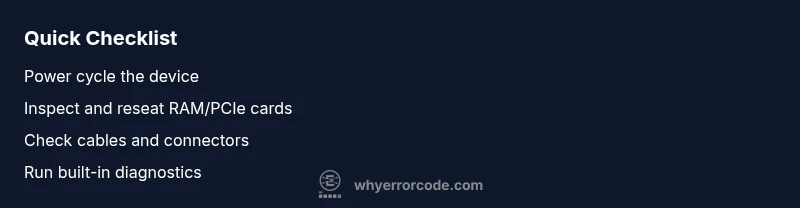
- easyPower cycle the device and test with a stable outlet/power strip
- easyInspect and reseat all critical cables and RAM modules
- hardRun built-in diagnostics and replace failed memory or power components as needed
Frequently Asked Questions
What does hardware error code 117 mean and how urgent is it?
Error code 117 indicates a hardware fault that interrupts normal operation. It’s urgent to diagnose and address promptly to prevent data loss or further damage. Start with safe power checks and basic reseating before deeper repairs.
Error code 117 means a hardware fault is interrupting operation. Act quickly: power-cycle, reseat components, and run diagnostics before calling a technician.
Can I fix error code 117 myself without specialized tools?
Yes, for many devices you can perform safe, non-destructive checks such as power cycling, reseating RAM, and verifying cables. If the fault persists after these steps, use manufacturer instructions for firmware updates or seek professional service.
You can try basic checks like power cycling and reseating RAM. If it persists, get professional help.
What’s the typical cost to diagnose and fix hardware error 117?
Diagnostics usually range from $100 to $400 depending on the device and location, with parts and labor increasing the total. Complex repairs or component replacements can exceed this range.
Diagnostics typically cost between one hundred and four hundred dollars, with higher costs if parts or labor are needed.
What are common root causes behind error 117?
Common roots include power supply instability, loose cables, and memory faults. Less common causes involve firmware issues or failing storage. Start with power and seating checks, then run diagnostics for confirmation.
Typical roots are power instability, loose cables, and faulty memory. Start with checks and then diagnostics.
Should I replace hardware or can it be a firmware issue?
Often firmware updates resolve misconfigurations, but persistent error 117 after updates usually indicates a hardware fault. If diagnostics show no issue in firmware, plan for component replacement if required.
If updates don’t fix it, hardware fault is likely; consider replacement after diagnostics.
Watch Video
Top Takeaways
- Identify symptoms early to prevent escalation
- Prioritize power and memory checks for 117
- Use diagnostics before component replacement
- Document changes for future reference
- Call a pro when in doubt or if warranty applies