HP Printer Error 71.02 4a: Urgent Fix Guide
Urgent guide to diagnosing and fixing HP printer error code 71.02 4a. Learn quick fixes, diagnostic steps, and when to contact HP support for escalation.

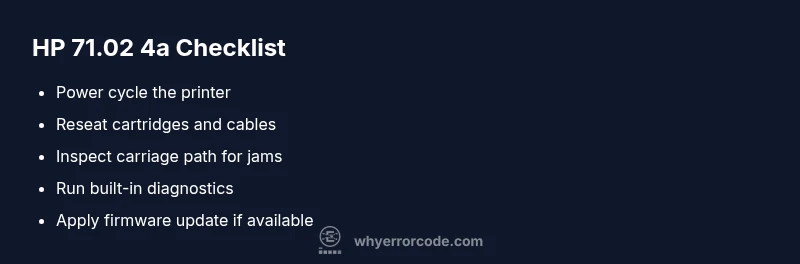
HP printer error code 71.02 4a signals a hardware or communication fault that disrupts the print engine. In most cases, the quickest fixes are a power cycle, reseating cartridges and cables, and running the printer’s built-in diagnostic. If the error persists, update firmware, perform a factory reset if available, or contact HP support for escalation.
What the error means for HP printers
The error code 71.02 4a on HP printers generally points to a hardware or communication fault affecting the print engine or the sensors that guide it. This is not a simple misalignment; it often signals a disruption in how the printer talks to its internal components. According to Why Error Code, these faults tend to arise when the device detects an inconsistency in carriage movement, sensor feedback, or firmware communication. The quick takeaway is this: the printer cannot complete a routine print cycle until the fault is isolated and cleared. Being proactive about diagnostics helps reduce downtime and preserve your work-in-progress documents.
When you encounter 71.02 4a, start with non-destructive checks first and reserve more invasive steps for later. This approach helps avoid potential warranty voids or unnecessary part replacements. A calm, methodical process is especially important in high-volume environments where uptime matters.
Symptoms to recognize early
Typical signs of the 71.02 4a fault include a dedicated status light pattern or error notification on the LCD panel, an abrupt halt mid-job, and occasional reboots or error resets after power cycling. Some users notice inconsistent print quality just before the error code appears, suggesting a marginal carriage alignment or sensor drift. If the printer sounds like it is pausing at intervals, or if jobs stall without completing, these symptoms align with a hardware-communication fault rather than a simple print queue issue. Document the exact error message, clock time, and the last action performed, which helps when you escalate to support.
Quick wins you can try now (non-destructive)
- Power cycle: Turn off the printer, unplug from the outlet for 60 seconds, then plug back in and power on. This resets internal microcontrollers and can clear latent error flags.
- Reseat consumables: Remove and reseat ink or toner cartridges, print heads (if applicable), and any removable modules. Poor seating can trigger sensor faults that resemble 71.02 4a.
- Inspect for obvious jams: Look for small paper pieces in the carriage path and around sensors. Clear any obstruction gently with the printer’s manual guidelines.
- Check cables and connections: Ensure all internal cables to the print head and control board are seated firmly. A loose connector can mimic a hardware fault.
- Run built-in diagnostics: Use the printer’s onboard menu or HP software to run a diagnostic routine. Save any error codes that appear for reference when seeking support.
- Update firmware: If an update is available, apply it via HP’s official site or the printer’s firmware update tool. Firmware fixes can resolve communication inconsistencies contributing to 71.02 4a.
Common causes in order of likelihood
- Carriage/motion sensor fault or misalignment (high likelihood): Sensor drift or debris on the carriage can produce erroneous signals.
- Loose or damaged internal cables (medium likelihood): A partially connected cable can cause intermittent communication faults.
- Firmware corruption or outdated firmware (low likelihood but plausible): Outdated or corrupted firmware can misinterpret sensor data and report errors.
- Mechanical wear on drive belts or gears (low likelihood): Rare, but over time mechanical wear can cause communication mismatches.
Diagnostic flow to isolate the fault
To isolate the cause behind HP printer error code 71.02 4a, start with observable symptoms and then test components in a logical order. First, perform a power reset and run the built-in diagnostics. If the error persists, inspect the carriage path for jams, reseat all relevant cables, and check cartridge seating. If you still get the error after these steps, update firmware and re-run diagnostics. If the fault remains, the issue is more likely a hardware fault within the carriage or control board, which warrants professional support or replacement.
When to escalate and what to expect from a repair professional
If the error continues after completing all quick fixes and confirmed firmware updates, plan for a professional service visit. A technician typically diagnoses with a combination of onboard tests and software-based diagnostics, then inspects the carriage, sensors, and control board. Expect cost ranges for parts and labor to vary by model and region, often replacing a carriage assembly or control board for higher-end printers. Warranty coverage and service level will determine final costs and timelines.
Steps
Estimated time: 30-60 minutes
- 1
Power down and reset
Turn off the printer and unplug from the wall. Wait 60 seconds to allow capacitors to discharge, then plug back in and power up. This resets microcontrollers and clears transient error flags.
Tip: Always perform resets with the device unplugged for safety. - 2
Inspect for jams and debris
Open access panels and visually inspect the carriage path for paper scraps or dust. Gently remove obstructions with a lint-free cloth or compressed air if recommended by HP.
Tip: Avoid touching sensitive sensors or belts with tools. - 3
Reseat consumables and cables
Remove and reseat cartridges or print heads. Check that all internal cables to the carriage and control board are firmly connected. Re-seat any modular components per the service manual.
Tip: A loose cartridge can trigger sensor fault errors. - 4
Run diagnostics and update firmware
Navigate to the printer menu or HP software and run the built-in diagnostic. If an update is available, install it to ensure correct communication between components.
Tip: Back up important print jobs before applying firmware. - 5
Test print and observe
Run a short test page to verify if the error reappears. If it does, proceed to firmware reinstallation or contact HP support.
Tip: Document the exact error code and steps you took for the technician. - 6
Escalate if unresolved
If the error persists, prepare for professional service or parts replacement. Provide your printer model, serial number, and a detailed fault log.
Tip: Check warranty status before paying for service.
Diagnosis: Printer shows error code 71.02 4a and stops mid-job.
Possible Causes
- highCarriage/motion sensor fault causing false detection
- mediumLoose or damaged internal cable between control board and print engine
- lowFirmware corruption or outdated firmware
Fixes
- easyRun the built-in diagnostics and clear jams
- easyReseat the carriage, print head, and reconnect cables
- mediumUpdate or reinstall firmware from HP's official site
- hardReplace faulty control board or carriage assembly
Frequently Asked Questions
What does HP printer error code 71.02 4a mean?
The code generally indicates a hardware or communication fault affecting the print engine. It often involves the carriage, sensors, or firmware communication. Start with non-destructive fixes like power cycling and reseating consumables, then run diagnostics.
Error 71.02 4a usually means a hardware or communication fault affecting the print engine. Begin with a power cycle and reseating components, then run diagnostics.
Can I fix this myself, or do I need a tech?
Many users can resolve the issue with quick fixes such as resets, reseating cartridges, and updating firmware. If the error persists after these steps, a professional diagnosis is recommended to avoid further damage.
You can try the quick fixes first, but if it stays, call a technician.
Will firmware updates solve error 71.02 4a?
Firmware updates can resolve communication issues that trigger 71.02 4a in some cases. Ensure you download updates only from HP’s official site and follow the manufacturer’s instructions carefully.
Firmware updates can help in some cases—download from HP’s official site and follow instructions.
What information should I gather before contacting HP support?
Note the exact error code, model and serial number, recent actions (buttons pressed, resets, firmware changes), and a brief log of when the error occurred. This speeds up diagnosis and resolution.
Have the model, serial number, and exact error code ready when you call support.
Is this error covered by warranty?
Warranty coverage depends on the printer’s terms and purchase date. If your device is still under warranty, HP support or service may cover diagnostics and repairs.
Check your warranty status with HP to see what’s covered.
Watch Video
Top Takeaways
- Resolve quickly with a power reset and diagnostics
- Inspect carriage path and reseat components for common faults
- Update firmware to fix communication issues
- If unresolved, professional service is recommended