Mitsubishi 7107 Error Code: Quick Diagnosis and Fixes
Urgent guide to understand Mitsubishi 7107 error code, its meanings, quick fixes, and step-by-step diagnostics to get your appliance back online fast.

Meaning: The Mitsubishi 7107 error code signals a fault in the appliance’s control network, typically a sensor or communication issue. According to Why Error Code, the quickest fix is a safe power cycle, reseating the main harness, and checking sensor connectors. If the code persists, follow the diagnostic flow to identify the exact cause.
What Mitsubishi 7107 Error Code Means
The Mitsubishi 7107 error code is a generic fault indicator used by Mitsubishi appliances to signal a disruption in the control system. In practical terms, it usually points to a sensor reading discrepancy, a data communication error between the main processor and one or more modules, or a fault in the wiring harness that connects core components. Because modern appliances rely on frequent digital handshakes, a mismatch—even for a split second—can trigger the 7107 code and cause the unit to halt or enter a protective mode. For technicians and careful DIYers, the key to resolution is to identify whether the fault is local (one sensor) or systemic (multiple subsystems share a data line). The Why Error Code framework emphasizes starting with the simplest checks first and escalating to more involved tests as needed.
Common Symptoms You Might See
Typical manifestations of Mitsubishi 7107 include an immediate shutoff after a cycle starts, a flashing display, or a static fault screen that prevents normal operation. You may notice inconsistent readings from sensors such as temperature, water level, or door interlock status, or an error message that appears only when the unit communicates with the display board. In some models, the code appears after power-up or when attempting to run a self-test. If you observe poor motor response, abnormal beeps, or the unit staying in standby while still showing error text, treat it as a high-priority signal that the control network has detected a fault.
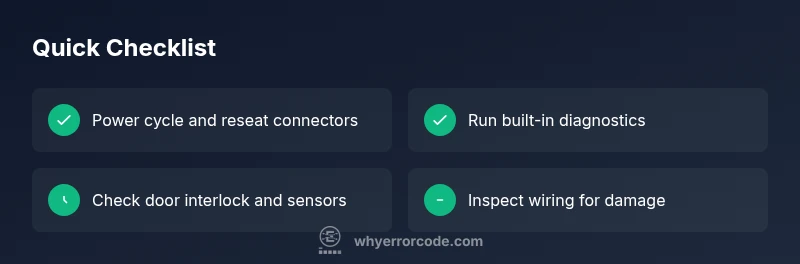
Quick Fixes You Can Try Now
Before diving into diagnostics, try these quick checks:
- Power cycle: unplug the unit for 60 seconds, then plug back in.
- Inspect the main harness: unplug and reseat connectors at the control board and the door switch.
- Check for obvious wiring damage or loose wires around the motor, sensor, and user interface.
- If you have access to self-test or diagnostic mode, run it and note any fault codes or blinking patterns. These steps are non-invasive and often resolve transient communication faults. If the code reappears, proceed to the diagnostic flow.
Diagnostic Flow Overview
A structured diagnostic flow helps you move from symptoms to root causes to fixes without guessing. Start with observable symptoms, collect fault codes, and perform baseline checks (power, connections, obvious damage). Then categorize potential causes into sensor faults, wiring harness problems, or control-board glitches. Finally, apply fixes in order of likelihood and impact, validating each step with a test run. This approach reduces risk and speeds up resolution, especially when you’re working with limited spare parts.
Step-by-Step Repair: Most Likely Cause (Loose Sensor Harness)
- Safety first: unplug the appliance and disconnect from power. 2) Remove access panels to reach the control board and sensors. 3) Locate the sensor harnesses and main data cables; visually inspect for damage or loose pins. 4) Re-seat all connectors firmly, listening for a click and ensuring tight fit. 5) Reassemble panels and restore power, then run a basic test cycle to verify if the code clears. 6) If the code returns, re-run diagnostics to check alternate sensors or the main controller.
Tip: Use a flashlight and a hand mirror to inspect hard-to-reach connectors; a loose contact is easy to miss but common.
Other Possible Causes and How to Address Them
Aside from a loose harness, the 7107 can arise from a faulty door interlock, a degraded temperature sensor, a failing drive motor sensor, or a glitch on the main control board. Inspect the door interlock switch for proper engagement and worn terminals. If the temperature sensor or motor sensor resistance drifts outside spec during self-test, consider sensor replacement. If multiple subsystems report faults, the control board is a likely culprit and may require professional testing or replacement.
Safety Tips and When to Call a Pro
Always unplug the unit before accessing internal components. If you notice exposed wires, burnt smells, or signs of water ingress, stop and call a professional. Do not bypass safety interlocks or attempt expensive replacements without proper diagnostics. If you’re outside your comfort zone or the appliance is under warranty, contact an authorized service technician.
Prevention Tips to Avoid Recurrence
Keep sensors and wiring connections clean and dry, schedule periodic diagnostic self-tests if your model offers them, and avoid rapid power cycling. Regular software updates and manufacturer-recommended maintenance checks help prevent intermittent faults that trigger codes like 7107. Record fault codes with timestamps to spot recurring patterns and share them with a technician if needed.
Next Steps If It Persists
If the 7107 code remains after completing the diagnostic flow and step-by-step repairs, escalate to professional service. Prepare the appliance model, serial number, running cycle, and any fault timestamps to speed up the diagnostic session. Budget for potential control-board replacement or sensor modules if diagnostics indicate persistent faults not resolved by reseating connectors.
Steps
Estimated time: 30-60 minutes
- 1
Power down and disconnect
Unplug the appliance and wait 60 seconds to ensure capacitors discharge. This reset clears transient faults and can drop erroneous codes.
Tip: Label power cords to avoid re-plugging mistakes. - 2
Access main harness and sensor connectors
Remove panels to reach the control board and sensor harnesses. Gently unplug and re-seat each connector, ensuring a firm fit.
Tip: Check for bent pins or corrosion before re-seating. - 3
Run a diagnostic self-test
If your model supports it, enter diagnostic mode and record any fault codes shown. This narrows down the faulty subsystem.
Tip: Document the exact sequence that triggers the code. - 4
Inspect door interlock and safety switches
Ensure the door latch engages fully and the interlock terminals are clean and intact. A faulty interlock can mimic sensor issues.
Tip: Test with the door closed and locked to confirm stability. - 5
Replace faulty components
If a specific sensor or the control board shows abnormal readings or resistance, replace the part following manufacturer guidelines.
Tip: Only use compatible parts from reputable suppliers.
Diagnosis: Mitsubishi 7107 error code displayed on screen during or after a cycle
Possible Causes
- highLoose or damaged sensor harness connections
- mediumDoor interlock or switch fault
- mediumSensor failure (temperature, water level, etc.)
- lowControl board glitch or communication fault
Fixes
- easyPower-cycle the unit and reseat all critical connectors
- easyInspect door interlock for proper engagement and wear
- mediumTest sensors with self-diagnostic mode and replace any out-of-spec unit
- hardConsult a technician for control-board testing/replacement
Frequently Asked Questions
What does Mitsubishi 7107 error code mean?
The 7107 code indicates a fault in the control network, often a sensor or communication issue. It requires diagnosing sensor integrity, wiring, and the main controller. Start with resets and connector checks before deeper repairs.
The 7107 code means a fault in the control network, usually sensor or wiring related. Begin with a reset and connector checks, then run diagnostics if needed.
Is it safe to DIY the Mitsubishi 7107 error fix?
Basic resets and reseating connectors are generally safe for non-technical users. More advanced fixes, like replacing sensors or the control board, should be done by a professional to avoid electrical hazards and warranty issues.
DIY basics are fine, but for sensors or control boards, call a professional.
What are quick interim steps to try before service?
Unplug the unit for a minute, reseat all external and internal connectors, and run any built-in self-test diagnostics. These steps can clear transient faults and reveal persistent issues.
Try a power cycle and run the self-test if available.
Can the 7107 be caused by a door interlock?
Yes. A faulty or misaligned door interlock can trigger the 7107 code. Check the latch mechanism, ensure the door closes firmly, and inspect interlock terminals for wear.
A door interlock fault can cause 7107; inspect and clean the latch and terminals.
What could a control-board fault cost to fix?
A typical control-board repair or replacement can range from moderate to substantial, depending on model and availability. Expect a broad range that commonly falls into mid-to-high hundreds for parts and labor.
Control-board fixes often cost hundreds, depending on the model and parts.
Watch Video
Top Takeaways
- Identify symptoms and fault codes before replacing parts
- Start with simple resets and reseating connectors
- Differentiate sensor faults from control-board issues
- Call a professional if the issue involves high-voltage components
- Maintain logs of faults to guide future diagnostics