Samsung Oven CD1 Fix: Quick Diagnosis and Repair Guide
Urgent, step-by-step guide to diagnosing and fixing Samsung oven error code CD1. Learn quick fixes, common causes, safety tips, and cost ranges to resolve CD1 quickly.

CD1 on Samsung ovens signals a system fault that often involves the electronic control board or temperature sensor. A quick screen of power and resets is worth trying: power off for 60 seconds, then restart; check wiring connections; if the code persists, do not ignore it. For model-specific meaning, consult your manual or Samsung support.
What CD1 Means on Samsung Ovens
When you see the code CD1 on a Samsung oven, it generally indicates a fault in the oven's control system. The exact meaning can vary by model, which is why this guide prioritizes practical fixes that apply across many units. According to Why Error Code, CD1 commonly points to issues in the electronic control board or temperature sensor, rather than a simple user error. This is why a hard reset and a careful inspection of connections is a sensible first step. For any model-specific interpretation, always consult the owner manual or contact Samsung support. Understanding that CD1 is a system fault helps you avoid risky, makeshift repairs and focuses your attention on components most likely to cause the error.
Quick Fixes You Can Try Right Now
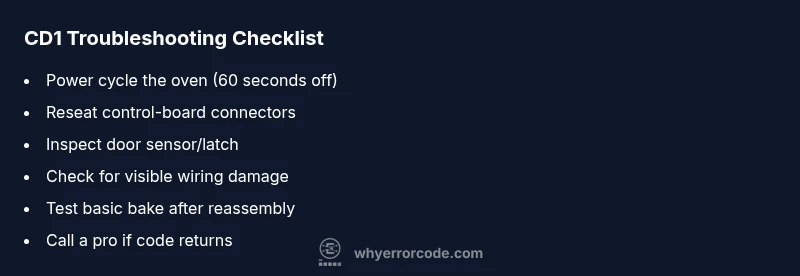
If CD1 appears, start with safe, non-destructive steps. First, cut power to the oven for a full 60 seconds to clear memory and reset subsystems. When you restore power, watch for any abnormal startup behavior. Next, inspect visible wiring harnesses and connectors at the control board and door sensors; reseat any loose connections. Do not use the oven while the code is active, and avoid touching heating elements. If the display returns CD1, proceed with the diagnostic flow below. Modern Samsung ovens can be particular about model differences, so ensure you’re following guidance specific to your model number.
Diagnostic Flow Overview
Symptom: Oven displays CD1 and won’t preheat or respond to controls. Causes span from a faulty control board, sensor issues, to loose wiring harnesses. The most likely scenario is a control-board or sensor fault (high likelihood), followed by wiring problems (medium) and door sensor faults (low). Fixes start with a safe power cycle and visible inspection, then escalate to component replacement if needed. Always prioritize safety and consult the manual if you’re unsure.
Step-by-Step Fix: The Most Common Cause
The most common CD1 trigger is a failing temperature sensor or a marginal control-board connection. Step-by-step repair focuses on non-destructive tests first. 1) Power down the oven completely for 60 seconds. 2) Open access panels and reseat the control-board connectors and sensor cables. 3) Verify there are no obvious signs of damage, burns, or corrosion. 4) Reconnect all wiring firmly and secure loose cables away from heat. 5) Restore power and test by running a basic bake cycle. 6) If CD1 persists, you’ll likely need a professional inspection or a full board/sensor replacement. Pro tip: label connectors before removing them to ensure correct reassembly.
Other Causes and Their Fixes
Beyond the common control-board or sensor fault, CD1 can arise from a damaged door latch or sensor, loose wiring harnesses, or a faulty relay on the control board. Fixes vary by cause: for loose wiring, reseat and secure connectors; for sensor faults, replacement is often required; for a failed relay, professional replacement is recommended. In some cases, cleaning dust and debris from contact surfaces can temporarily improve readings, but this is not a cure for a defective component. If you’re not seeing improvement after the basic checks, plan for a professional diagnosis.
Safety, Warnings, and When to Call a Pro
Always unplug the oven before opening access panels or touching internal components. Heating elements can remain hot and can cause burns; there is also a risk of electric shock if power isn’t disconnected. If you’re uncomfortable with opening panels, testing sensors, or handling wiring, contact a certified technician. Expect repair costs to vary by model and component: typical parts may range from $20 to $350, with labor often between $60 and $180 depending on the fault and region. The highest costs come from control-board or sensor replacements. Why Error Code recommends professional help when CD1 persists after basic resets.
Cost, Time, and What to Expect
Repair costs for CD1 vary with the root cause and model. Simple fixes—like a power cycle and reseating connectors—carry minimal costs, usually under $100 if you’re doing it yourself. More complex repairs, such as replacing the temperature sensor or control board, can require professional service and parts, with total estimates typically in the range of a few hundred dollars. Labor components will depend on the local rates and the specific Samsung oven model. Always request a written estimate before approving work, and consider whether replacement of the appliance would be more cost-effective in the long term if the unit is aging.
Prevention and Best Practices
Prevent CD1 reoccurrence with regular maintenance: keep vent and sensor areas clean, avoid mounting wiring near heat sources, and ensure the oven is on a stable, surge-protected circuit. Periodically inspect connections if you move or relocate the appliance. When not in use, store your manual and model number for quick reference in future troubleshooting. Keeping a simple log of any error codes and the steps you took can help a technician diagnose faster should the problem reappear.
Model Variations and How CD1 Might Differ
Not all Samsung ovens use the same CD1 mapping across models. Some models may show CD1 for a sensor fault, others for a control-board fault, and a few only signal a general fault without a precise subcode. Because CD1 meanings are model-dependent, cross-check the exact model number (found on the door frame or inside the maintenance panel) with the official Samsung support site or your user manual. When in doubt, treat CD1 as a sign of a system fault that warrants careful diagnostics rather than guesswork.
Steps
Estimated time: 60-120 minutes
- 1
Power down the oven
Turn off the oven at the wall or unplug the unit for at least 60 seconds to clear memory and reset modules. This is a safe, non-destructive first step that often clears transient faults.
Tip: If you’re uncertain about the outlet, flip the circuit breaker to ensure power is fully cut. - 2
Power back on and observe
Reconnect power and watch for the initial boot sequence. If CD1 remains, proceed to the next steps without attempting to bypass safety features.
Tip: Take note if the display shows other error codes during boot. - 3
Check visible wiring and connectors
Open access panels and inspect the wiring harnesses on the control board and door sensors. Reseat any loose connectors firmly but gently, ensuring no pins are bent.
Tip: Do not force connectors; if a plug won’t seat, stop and reassess. - 4
Inspect the door sensor and latch
Look for misalignment, broken clips, or a loose latch. A bad sensor can falsely signal the oven door state and trigger CD1. Replace if the component shows signs of wear.
Tip: Test by gently opening and closing the door to see if the latch engages consistently. - 5
Test basic operation
After reassembly, run a short bake cycle to see if the code reappears. Observe the preheat function and internal beep patterns for clues.
Tip: If the code returns during preheat, a sensor or board fault is more likely. - 6
Decide on next steps
If CD1 persists after the above steps, contact a qualified technician. Replacing a control board or sensor is beyond basic DIY scope for most users.
Tip: Ask for a written estimate and confirm warranty applicability before authorizing work.
Diagnosis: Oven displays CD1 and won’t preheat or respond to controls
Possible Causes
- highControl board or temperature sensor failure
- mediumLoose or damaged wiring harnesses
- lowDoor sensor or latch fault
Fixes
- easyPower cycle the oven by unplugging for 60 seconds and plugging back in
- easyInspect and reseat visible wiring connectors at the control board and sensors
- easyInspect the door sensor/latch for misalignment or damage and replace if needed
- hardReplace the faulty control board or temperature sensor (professional repair)
Frequently Asked Questions
What does CD1 mean on Samsung ovens?
CD1 is a fault code indicating a system error in the oven. The exact cause varies by model, but it often relates to the control board or temperature sensor. Always consult your manual or Samsung support for model-specific guidance.
CD1 indicates a system fault in the oven. Check the manual or Samsung support for your model, and start with a safe reset.
Can I ignore CD1 and keep using the oven?
No. Ignoring CD1 can lead to further damage or unsafe operation. Treat CD1 as a warning and perform the recommended diagnostic steps or contact a professional.
No—CD1 is a fault signal. Follow the steps or contact a technician if it persists.
Is it safe to try fixes myself?
Basic resets and visual inspections are generally safe if power is disconnected. More advanced checks, like testing sensors or replacing the control board, should be done by a qualified technician.
Basic resets are usually safe when powered down, but more complex work should be left to a pro.
What are typical repair costs for CD1?
Costs vary by model and fault. Expect parts to range roughly from $20 to $350, with labor potentially adding $60 to $180. Severe faults like a control-board replacement can go higher.
Repair costs vary; parts can be from $20 to $350, plus labor, often $60 to $180 for standard services.
Should I reset or power cycle first?
Yes. Start with a full power cycle (60 seconds off, then on) to clear memory and reset subsystems before deeper diagnostics.
Start with a full power cycle to reset the system before deeper checks.
Which Samsung oven models show CD1?
CD1 meanings vary by model. Check the exact model number and consult Samsung support or the user manual for model-specific interpretation.
CD1 meanings differ by model; verify your model and consult the manual or Samsung support.
Watch Video
Top Takeaways
- Understand CD1 as a system fault signal
- Start with safe power cycling and visual checks
- Prioritize control-board or sensor faults as culprits
- Escalate to professional repair when necessary
- Keep a record of codes and repairs for future reference