Voltas AC E1 Error Code: Quick Troubleshooting Guide
Comprehensive guide to diagnosing and safely fixing the Voltas AC E1 error code, with practical steps for homeowners and technicians in 2026.

voltas ac e1 error code signals a fault related to sensor input or PCB communication in some models. It is not a universal meaning across all Voltas units, so model-specific diagnostics may apply. Quick fixes you can try now include a power reset, ensuring proper airflow, checking sensor connectors, and clearing any obvious wiring or terminal corrosion before calling support if the code reappears.
What the Voltas AC E1 error code means in practice
In the world of Voltas air conditioners, the E1 code appears to flag a fault detected by the unit’s microcontroller. Because Voltas uses multiple control boards across different models, the exact trigger for E1 can vary. In some units, E1 points to a sensor fault or a data path interruption between the indoor module and the outdoor unit. In others, it serves as a general fault indicator once the system has detected readings outside expected ranges. The practical outcome is often a restricted operation mode or a protective shutdown to prevent further damage. For 2026, the correct interpretation is model-specific, so consult your model’s user manual, Voltas support site, or the dealer bulletin for precise meaning. Regardless of which model you own, treat E1 as a sign that something in sensing, wiring, or control logic is out of spec. Start with basic, safe checks before assuming a refrigerant or compressor issue. This approach minimizes unnecessary part changes and reduces downtime.
The Why Error Code team emphasizes model specificity: a universal definition for E1 doesn’t exist across all Voltas products. When in doubt, map the observed symptoms to the model’s official fault tree and use service documentation to confirm the fault path. The goal is to restore normal function without risking safety or warranty coverage. The steps you take next should prioritize sensor integrity, connector security, and a clean airflow path to preserve overall system health.
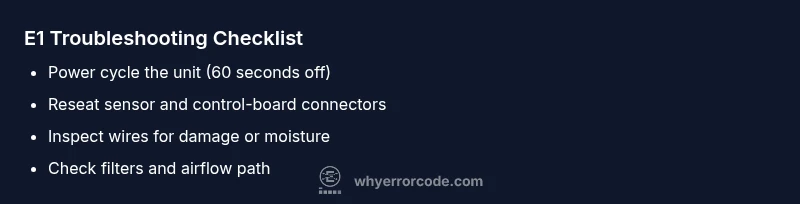
Steps
Estimated time: 60-90 minutes
- 1
Power down and unplug the unit
Turn off the unit at the wall and switch off the circuit breaker if needed. Wait 60–120 seconds to allow capacitors to discharge and the microcontroller to reset. This simple step often clears transient faults that trigger E1.
Tip: Label the breaker so you don’t forget to switch it back on after testing. - 2
Open access safely
Remove the front panel or service door following the user manual. Avoid touching high-voltage components and grounding points. Use insulated tools and keep screws organized for easy reassembly.
Tip: Take a quick photo of the wiring layout before disconnecting anything. - 3
Reseat sensor and harness connectors
Locate indoor/outdoor sensors and the main control board harness. Unplug and firmly reinsert each connector, ensuring a secure and straight mated surface. Check for any signs of corrosion or damaged insulation.
Tip: If a connector is stiff or loose, stop and consult a pro rather than forcing it. - 4
Inspect for obvious damage
Look for frayed wires, scorch marks, moisture intrusion, or damaged grommets around the control cabinet. Any signs of physical damage should halt DIY steps and prompt professional service.
Tip: Do not run the unit with damaged wiring. - 5
Reset and test
Reconnect everything, restore power, and run a standard function test (cooling mode, fan only, etc.). Observe whether E1 reappears and note any abnormal noises or temp deviations.
Tip: Keep a log of test results to share with a technician if needed. - 6
Decide on escalation
If E1 persists after these steps, schedule a service call with model, age, and symptoms on hand. Provide the technician with the steps you’ve already attempted.
Tip: Prepare your warranty information and a brief fault timeline for faster service.
Diagnosis: Voltas AC displays E1 and fails to cool or operate normally
Possible Causes
- highSensor fault or misreading
- highLoose or corroded wiring harness
- mediumPCB/communication fault between indoor/outdoor units
- lowRefrigerant-related fault or compressor issue
Fixes
- easyReset the system and reseat all connector plugs in the control board and sensors
- easyInspect sensor wires for damage, secure connectors, and clean corrosion
- hardPerform a professional diagnostic to test PCB communication and refrigerant pressures
Frequently Asked Questions
What does the E1 error code mean on Voltas AC units?
E1 is a fault code that can indicate a sensor issue or a communication fault between control boards, depending on the model. Check your manual or Voltas support for the exact meaning.
E1 usually means a sensor or communication fault; check connections and reset first.
Can I fix E1 without a technician?
You can try safe resets and reseating connectors; if the code returns or you notice unusual symptoms, stop and contact a professional.
You can try a safe reset, but persistent E1 should be handled by a pro.
Is E1 common across all Voltas models?
No. E1 is model-specific. Refer to your model’s manual or Voltas support for the exact meaning and steps.
Model-specific, so check your manual for details.
Could E1 be related to refrigerant issues?
E1 is typically linked to sensor or wiring problems. Refrigerant leaks or pressures are usually indicated by other fault codes and require a licensed technician.
Mostly sensor or wiring issues; refrigerant work needs a pro.
What safety steps should I take before troubleshooting?
Power off, unplug, and avoid touching high-voltage parts. Use insulated tools and work with dry hands.
Always power down before you start.
When should I call a pro for E1?
If E1 persists after basic checks, or you observe smell, frost, or unusual noises, schedule professional service.
If it won’t reset, get a technician on site.
Watch Video
Top Takeaways
- Identify model-specific E1 meaning and consult the manual
- Start with safe resets and connector checks
- Sensor/connector faults are most common and typically fixable
- Escalate to a professional if E1 persists after checks