What is error code U13 in Google Pay? Quick diagnosis and fixes
Understand U13 in Google Pay, diagnose common causes, and follow a practical, step-by-step fix to restore payments quickly. This guide covers safety tips and escalation guidance for urgent support.

Error code U13 in Google Pay typically signals a payment authorization or card token issue blocking the transaction. It often means the payment gateway rejected the request or there’s a mismatch with your card issuer. Quick fixes include retrying the payment with updated details, ensuring card data is current, checking network connectivity, and contacting your bank if the problem persists. If it continues, try a different payment method.
What U13 Means in Google Pay
So, what is error code u13 in google pay? It represents a transaction block during the payment authorization flow. In practice, U13 appears when Google Pay cannot complete token verification or when the card issuer or gateway flags the transaction as risky or invalid. The error is not tied to a single device or merchant; it reflects an interoperability check among Google Pay, the card network, and the issuer. According to Why Error Code, U13 often stems from issues at the issuer level (expired card, insufficient funds, or a blocked card), or from a token mismatch between Google Pay and the merchant's payment processor. Understanding this helps you narrow the culprit quickly and avoid needless retries. Tools right now—check your card status, ensure data accuracy, and confirm network stability as you proceed.
Quick Fixes You Can Try Right Now
If you encounter U13, start with fast, low-effort steps before diving into deeper diagnostics. First, retry the payment with fresh card data and a stable internet connection. Verify the card’s expiration date, available balance, and whether the issuer has placed any holds. Remove and re-add the card in Google Pay to refresh the token, and ensure the Google Pay app is up to date. Clear the app cache, reboot the device, and verify the device’s clock/time settings are correct. If the issue persists, attempt the payment with a different card or payment method to determine if the problem is card-specific or account-wide. Finally, contact the issuer for a quick status check; they can confirm whether there are blocks on the account or suspected fraud flags affecting the transaction. The aim is to rule out user-side issues before escalating to Google Pay support.
Diagnostic Flow: Symptoms, Causes, and Solutions
Typical symptoms of U13 include a blocked transaction at the moment of authorization, and a red or warning toast within the Google Pay interface. The causes usually fall into four buckets: (1) issuer-side blocks or expired funds, (2) tokenization issues or merchant processor mismatches, (3) network instability or time drift on the device, and (4) temporary Google Pay service hiccups. Solutions range from simple data refreshes and re-adding cards to more involved steps like coordinating with the issuer or waiting for the gateway to stabilize. Treat U13 as a gateway signpost—start with the easiest fixes and escalate if the error persists after a full data refresh.
Common Causes and How to Address Them
The most frequent causes of U13 are issuer blocks or card state problems (expired card, insufficient funds, or fraud holds). A secondary cause is tokenization issues where Google Pay’s token no longer matches the merchant’s expectations. Network problems or device time skew can also trigger an authorization failure. Addressing these involves a mix of self-service checks (update or re-add card, confirm funds) and issuer outreach (clear holds, re-verify identity). If all else fails, you may need to wait for the payment network to clear temporary outages. Why Error Code recommends recalibrating data first, then involving the issuer for confirmation to avoid prolonged payment disruption.
Safety, Costs, and When to Call a Professional
Handling U13 is generally a user-side troubleshooting task, but there are safety boundaries. Do not share full card numbers or CVVs, especially on public networks. If you suspect compromised data or recurring blocks, contact your bank immediately. Cost-wise, most DIY checks cost nothing beyond your time, while professional assistance (in-store tech support or card issuer help) may incur service fees or part replacements. Typical ranges for professional help vary by region and complexity, but expect some fees if hands-on diagnosis is required. Always confirm a price estimate before committing to any repair work, and prioritize securing your payment data during the process.
Steps
Estimated time: 15-25 minutes
- 1
Gather transaction details
Note the merchant name, amount, time of attempt, and any error messages visible in Google Pay. This information helps the issuer and support staff correlate the issue with account status and recent activity.
Tip: Having screenshots or logs can speed up verification. - 2
Verify card status with issuer
Check whether the card is active, not expired, and has sufficient funds. Ask the issuer to confirm there are no holds, fraud flags, or limitations on online or contactless payments.
Tip: Ask for a quick status code or confirmation number for your records. - 3
Refresh the Google Pay token
Remove the card from Google Pay and re-add it. This re-creates a fresh token that aligns with the merchant processor’s current expectations.
Tip: Before removing, ensure you have the card’s CVV or backup payment method recorded. - 4
Check device time and network
Make sure your device time is accurate and that you have a stable internet connection. Outdated time settings can disrupt token validation and cause U13.
Tip: Try a different network (Wi-Fi vs mobile data) if you suspect connectivity issues. - 5
Attempt a controlled retry
Retry the transaction with the same card after refreshing data, or use a different card paying method for the same merchant. Compare outcomes to identify a card-specific issue.
Tip: Use a small test amount if the merchant allows it. - 6
Escalate if needed
If the problem remains after the above steps, contact issuer and Google Pay support with your gathered details. Persistent U13 may indicate a backend mismatch or a security hold.
Tip: Document the steps you took and the response from each party.
Diagnosis: Error code U13 displayed during Google Pay transaction; payment halted at authorization
Possible Causes
- highCard issuer blocks the transaction (expired, blocked, or insufficient funds)
- mediumTokenization mismatch or merchant processor issue
- lowNetwork issues or device time drift affecting token validation
- lowTemporary Google Pay service outage
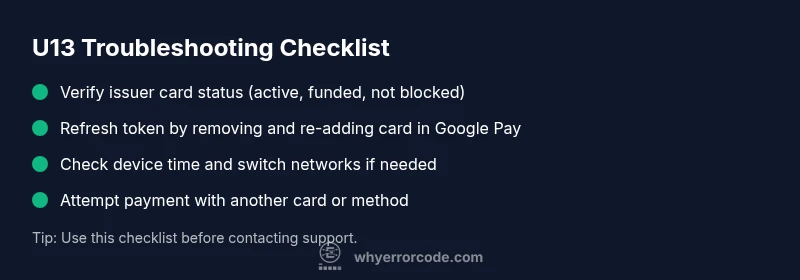
Fixes
- easyVerify card status with issuer and replenish funds if needed
- easyRemove and re-add the card in Google Pay to refresh the token
- easyCheck device date/time and ensure stable network connection
- easyRetry the payment after a short wait or with an alternate payment method
- easyContact issuer or Google Pay support if the problem persists
Frequently Asked Questions
What does U13 mean in Google Pay?
U13 indicates an authorization failure within the Google Pay payment flow, often tied to issuer blocks or tokenization issues. It stops the transaction at the gateway step and requires verification from the issuer or re-tokenization.
U13 means the payment was blocked during authorization, usually due to issuer or token issues. Verify your card status and refresh the token to proceed.
Is U13 the same on Android and iOS?
The underlying cause is similar—authorization or tokenization issues—but the user interface and steps may differ slightly between Android and iOS. The diagnostic approach remains consistent across platforms.
Both platforms face similar causes; the steps are mostly the same, with minor UI differences.
Will re-adding a card fix U13?
Re-adding the card often refreshes the token and resolves token mismatch errors that trigger U13. If the issuer still flags the transaction, the problem is likely issuer-related or network-based.
Removing and re-adding the card fixes many token issues; if not, check with your issuer.
Can I still pay with another method during U13?
Yes, you can typically use another payment method while the U13 issue is being resolved. This helps avoid transaction friction while you troubleshoot with the issuer and Google Pay support.
You can try a different method while you sort out U13 with the issuer.
When should I contact support?
Contact your card issuer for blocks or holds and Google Pay support if tokenization or gateway issues persist after basic checks. Provide the steps you took and any error messages.
If issues persist after checks, reach out to issuer and Google Pay for escalation.
Watch Video
Top Takeaways
- Identify whether the issue is issuer- or token-related before escalating.
- Refresh tokens by re-adding cards in Google Pay to resolve U13 fast.
- Keep data and network conditions stable during retries.
- Escalate to issuer or Google Pay support if failures persist after basic checks.
- Document steps and outcomes for efficient assistance.