HP Printer Error Code B8077DF6: Quick Diagnosis and Fix Guide
Urgent guide to diagnosing and fixing HP printer error code B8077DF6. Learn common causes, fast fixes, step-by-step repair, safety tips, and prevention strategies to get your printer back online quickly.

According to Why Error Code, HP printer error code B8077DF6 indicates a hardware fault in the imaging path or maintenance subsystem. The quickest path to regain printing is a power reset, followed by a firmware update and a careful inspection of the imaging unit and paper path. If the error persists, expect component replacement or professional service. This issue requires prompt action to minimize downtime.
What B8077DF6 Means for Your HP Printer
The error code B8077DF6 on HP printers signals a hardware fault in the imaging path or the maintenance subsystem. When this code appears, the printer may halt mid-job, display a warning message, or refuse to start new print jobs until the fault is cleared. Because this is a critical fault that can affect print quality and device longevity, address it promptly. According to Why Error Code, B8077DF6 is typically triggered by a failed component or a miscommunication between modules after a firmware update or a maintenance cycle. In practice, treat it as a hardware fault unless a recent firmware install or consumable swap coincides with the appearance of the error. Understanding the fault’s origin helps you apply the most efficient recovery path and minimize downtime.
- Expect hardware-level symptoms such as stopped print jobs, strange noises, or incomplete pages.
- Note any recent maintenance actions (cartridge changes, cleaning, firmware updates) that preceded the error.
- Collect any on-screen messages or LED codes to aid HP support or diagnostics.
Immediate Quick Fixes You Can Try Right Now
Start with simple, non-destructive steps that resolve many B8077DF6 instances. Power down the printer, unplug it, and wait 60 seconds, then reconnect and power up. Check the paper path for jams, misfed sheets, or foreign objects and remove them gently. Update the printer firmware to the latest version from HP’s official site or via the onboard menu, and reinstall the latest driver on your computer. Run the built-in self-test or diagnostics to collect more error data. If you have an imaging unit or maintenance kit, reseat or replace components per the manual. Finally, verify cartridge seating and inspect for toner or ink leaks around the imaging path.
- Always perform a full power cycle before deeper troubleshooting.
- Use official firmware sources to avoid software conflicts.
- Document all symptoms and steps you take for HP support.
How to Diagnose: Symptom-to-Cause Path
To move from symptom to root cause, map the observed behavior to likely faults. The printer stops with the B8077DF6 message after the system detects an abnormal reading in the imaging path, the fuser assembly, or a calibration sensor. Common causes, ranked by likelihood, include: high - imaging unit/fuser fault; medium - firmware mismatch after an update; low - obstructed sensor path or misfed media; low - defective cartridge detection. For each, apply the corresponding remedy: run a calibration, check the service/error logs, perform a firmware check, inspect the imaging unit, reseat consumables. If the error persists after these steps, proceed to a more thorough repair or service.
- Document log codes from the diagnostics for reference.
- Differentiate between a transient hiccup and a persistent fault requiring replacement.
Step-by-Step Fix for the Most Likely Cause
If the imaging unit or fuser fault is most likely, follow these steps in order to avoid unnecessary parts replacement. 1) Power cycle the printer and reset any USB or network connections. 2) Update to the latest firmware and reboot. 3) Run the printer’s diagnostic suite to confirm fault codes. 4) Thoroughly inspect the imaging unit area for obvious damage, loose connectors, or debris. 5) Reseat or replace the imaging unit if accessible per the user manual. 6) Clean the sensor paths with a lint-free swab and isopropyl if permitted. 7) Perform a calibration and print a test page. 8) If the fault persists, escalate to a professional service or HP support.
- Wear antistatic precautions when handling internal components if you access them.
Other Causes and How to Address Them
Beyond the imaging unit fault, B8077DF6 can appear due to firmware corruption, calibration sensor misalignment, or a stubborn paper path obstruction. For firmware-related issues, ensure both printer firmware and drivers are current. If calibration sensors are out of alignment, perform the calibration routine and re start the device. For sensor obstructions, clean the optical sensors carefully and ensure no foreign material blocks the path. In all cases, if the issue recurs after completing these steps, consider a professional service to replace assemblies that may be out of spec.
- Firmware mismatches are increasingly common after updates.
- Calibration errors are often resolved with a clean restart and recalibration.
Safety Warnings and When to Call a Professional
- Always unplug the printer before opening access panels or touching internal components to avoid shock or equipment damage.
- If you’re outside warranty or the device is under a service plan, contact HP Support for guidance; professional repair costs can range from part replacement to full module replacement. Typical total repair costs can vary widely, with parts generally in the $40-$250 range and labor in the $60-$300 range depending on locale and service level.
- Do not attempt high-risk disassembly or component replacement beyond your comfort zone; wrong wiring or static discharge can worsen the fault.
- If the printer is critical to business operations, schedule service during off-peak hours to minimize downtime and data loss.
Prevention and Maintenance to Avoid B8077DF6
Preventive maintenance is key to reducing recurring hardware faults like B8077DF6. Establish a monthly inspection routine: keep the paper path clear, use genuine HP consumables, periodically clean access panels with dry microfiber, and check for firmware updates weekly during peak use. Document any fault codes and how you resolved them, so future incidents can be handled quickly. Consider a service plan that includes annual maintenance and component replacements on a scheduled basis to protect uptime and avoid unexpected outages.
Steps
Estimated time: 40-60 minutes
- 1
Power cycle and reset connections
Power off the printer completely, unplug the power cord, wait 60 seconds, then reconnect and power on. Re-establish USB/Wi-Fi connections and run a test print.
Tip: A full power reset clears transient faults and cached states. - 2
Update firmware and drivers
Check HP’s official site for the latest firmware and the corresponding driver package. Install all available updates, then reboot the printer and computer.
Tip: Use the printer’s built-in software update if available. - 3
Run built-in diagnostics
Access the printer’s diagnostics or service menu and run the self-test, calibration, and imaging path checks. Note any codes or messages that appear.
Tip: Document codes; some issues require cross-referencing with HP support docs. - 4
Inspect imaging path and fuser area
Carefully inspect for obvious signs of wear, damaged rollers, debris, or loose connectors. If you are qualified, reseat the imaging unit and check fuser connections.
Tip: Handle components with care to avoid further damage. - 5
Clean sensors and paper path
Use a lint-free swab lightly dampened with isopropyl alcohol to clean optical sensors and the paper path area. Let dry before running another test.
Tip: Avoid excess liquid that could seep into electronics. - 6
Calibrate and test print
Run the printer’s calibration routine and print a diagnostics page. Confirm that the pages feed cleanly and the print aligns correctly.
Tip: Calibration is often the decisive step for sensor-related faults. - 7
Decide on replacement or professional service
If the code persists after all above steps, the imaging unit or related module may require replacement. Contact HP support or a certified technician for service.
Tip: Ask about warranty coverage and service costs up front.
Diagnosis: HP printer shows error code B8077DF6 and stops printing
Possible Causes
- highImaging unit or fuser fault
- mediumFirmware mismatch after update
- lowObstructed sensor path or misfed media
- lowDefective cartridge detection
Fixes
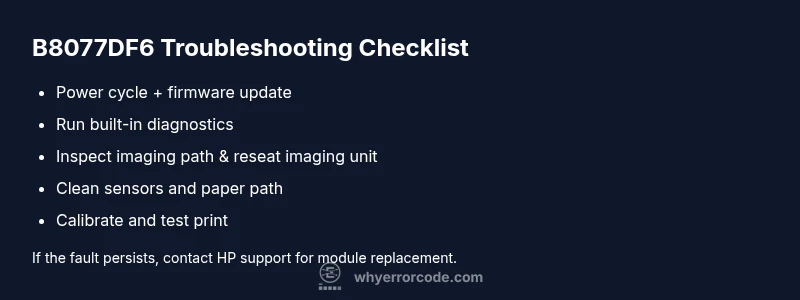
- easyRun a full printer self-test and calibration
- easyUpdate firmware and reinstall drivers
- mediumInspect imaging path and reseat imaging unit
- easyClean sensors and remove obstructions
- hardReplace imaging unit or contact HP support for module replacement
Frequently Asked Questions
What does HP printer error code B8077DF6 indicate?
B8077DF6 generally points to a hardware fault in the imaging path or maintenance subsystem. It often follows a maintenance cycle or firmware update and halts printing until the fault is cleared.
B8077DF6 usually means a hardware fault in the imaging path. Restart, check for firmware updates, and inspect the imaging area to fix it.
Can I fix B8077DF6 myself?
Many quick fixes are user-friendly, like power cycling, updating firmware, and cleaning the paper path. If the fault persists after these steps, a professional repair or replacement of components may be necessary.
You can try firmware updates and a cleaning, but if it remains, professional help is likely needed.
Should I replace the imaging unit?
Imaging unit replacement can resolve persistent imaging-path faults but should be confirmed by diagnostics or HP support. Parts plus labor may range from modest to substantial depending on model and warranty.
If diagnostics point to the imaging unit, replacement may be required; check warranty and get an estimate.
How long does a technician repair take?
On-site repairs typically take 1–3 hours depending on parts availability and the fault’s complexity. In some cases, shipping to a service center is required and may extend downtime.
Most repairs take a few hours, but complex cases can take longer or require shipping.
What are the typical costs involved?
Repair costs vary by part and labor. Parts may range from $40–$250, with labor typically $60–$300; total can vary based on your model and service level.
Costs depend on parts and labor; expect a broad range and ask for an estimate before service.
Can firmware updates cause B8077DF6?
Yes, a faulty firmware update or compatibility issue can trigger sensor or calibration faults that mimic B8077DF6. Always install official HP updates and reboot after changes.
Firmware issues can trigger this fault; ensure you install official updates and reboot.
Watch Video
Top Takeaways
- Act quickly on B8077DF6 to protect hardware.
- Start with firmware updates and a full reset.
- If symptoms persist, inspect imaging path and consider service.
- Regular maintenance reduces recurrence and downtime.