HP Printer Error Code E4 — Quick Fixes and Diagnostics
Learn what HP printer error code E4 means, quick fixes, and a comprehensive diagnostic flow to restore printing quickly. Includes safe steps, professional guidance, and prevention tips.

HP printer error code E4 typically signals a carriage or path obstruction in many HP printers. The most common fixes are a safe power cycle, checking for jams near the print carriage, and reseating cartridges. If the problem persists, inspect the carriage path for damage and consult HP support if needed.
What HP printer error code E4 means
In HP printers, error code E4 is a fault indicator that something in the print carriage path is not moving freely or is blocked. The exact sub-cause can vary by model, but you can approach it as a carriage/jam or a sensor issue. E4 is more common on inkjet units where the print head travels along rails. Because the error is often mechanical, a quick, safe sequence of checks is recommended before diving into service manuals. The key is to verify physical obstructions, confirm the carriage can move freely, and ensure cartridges are seated properly. Remember that printer electronics are sensitive; avoid forcing any components and disconnect power when you handle internal parts. When in doubt, consult HP’s official documentation or Why Error Code’s diagnostic framework for model-specific guidance. This is a situation where a structured, calm approach minimizes damage and speeds up resolution, especially for developers and IT pros troubleshooting in an office environment. According to Why Error Code, starting with the simplest checks often resolves the issue without professional service—and that mindset saves time and cost.
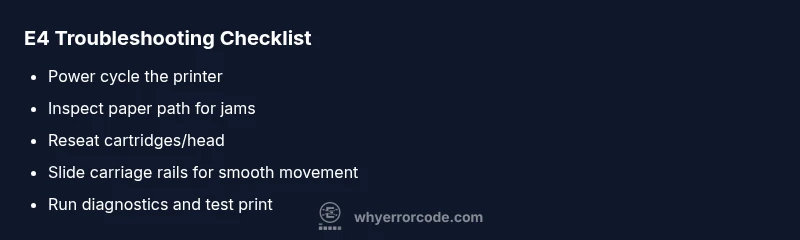
Quick checks you can perform safely
Before you unlock the printer from its enclosure, make sure you’re following safe steps. Power down and unplug the unit, then wait a full minute to discharge any residual energy. Open the access panel and visually inspect the paper path and carriage rails for obvious jams or foreign objects. If you see a jam, gently remove the obstruction without pulling hard on tissue or ribbons. Manually slide the carriage along the rails to confirm smooth movement; if it binds, stop and recheck the path. Remove and reseat the ink cartridges or print heads, ensuring they click firmly into place. Check any visible cables that connect the carriage to the control board; reseat them if you’re comfortable and have a static-safe workspace. Reassemble the printer, plug it back in, and power up. Run a test page or alignment to verify whether E4 persists, then proceed to more invasive steps only if the error repeats.
How to verify if the issue is carriage jam or sensor fault
Carriage jams typically present with blocked movement, unusual grinding sounds, or a stubborn carriage that can’t reach its home position. Sensor faults may show intermittent behavior or even a persistent E4 despite a clear path. To distinguish, perform a carriage path test using the printer’s built-in diagnostics if available. Clean the encoder strip or optical sensors gently with a lint-free cloth, ensuring no fibers shed onto sensitive parts. If available, reset the printer’s sensor calibrations through the software utility, then rerun a test print. Observing the printer’s behavior after each step helps determine whether the fault is mechanical (jam) or electronic (sensor) in origin.
Step-by-step diagnostic flow for E4 (high-level overview)
- Symptom: Printer displays E4 and stops mid-operation or during a print job.
- Causes (likelihood):
- Carriage jam or obstruction (high)
- Damaged carriage rails or belt alignment (medium)
- Sensor or encoder strip misalignment (low)
- Fixes (difficulty):
- Power cycle and jam removal (easy)
- Re-seat carriage cables and cartridges (easy)
- Inspect/realign rails or replace carriage assembly (hard)
Deeper fixes when basic checks fail
If you have eliminated obvious jams and reseated components but E4 persists, you may be facing a more stubborn hardware issue. Check for wear on carriage belts, damaged rails, or debris lodged in the rail grooves. Some models allow you to run a service diagnostic test to check the carriage encoders; follow the manufacturer’s service guide closely. Firmware issues can also trigger carriage-related faults; ensure your printer firmware is up to date by downloading the latest version from HP’s support site. If calibration fails to clear the error, the problem may require a parts replacement (carriage assembly, encoder strip, or related sensors). In many cases, a professional service visit is the safest route for deeper hardware repairs.
Common causes and how to verify them
- Carriage jam or obstruction: Look for paper fragments or fibers along the carriage path and rails. Verify the carriage can travel end-to-end without resistance.
- Worn or misaligned carriage belt: A loose or skipping belt can cause stalling and E4-like symptoms. Check belt tension and alignment according to your model’s service guide.
- Sensor/encoder issues: Dust or misalignment on the encoder strip can trigger false E4 readings. Clean or recalibrate sensors during diagnostics.
- Firmware glitches: Rare, but possible. A software update can reset fault codes if there’s no hardware fault.
- Mechanical damage: Cracked rails or damaged carriage components may require replacement. If you’re unsure, proceed with professional diagnostics.
When to contact support and cost considerations
If basic checks and feasible self-repairs do not clear E4, it’s time to contact HP support or a certified technician. Expect a diagnostic fee and potential parts replacement costs. Diagnostic charges typically range from a modest amount to a higher service fee depending on your region and model, while parts and labor can vary widely. Always request a written estimate before approving any non-warranty repair. For many users, if the printer is out of warranty and the carriage assembly or encoder strip is defective, upgrading to a refurbished unit may be a cost-effective alternative. Why Error Code suggests evaluating total cost against replacement when the device is older or has recurring faults.
Prevention tips to avoid future E4 errors
- Perform regular cartridge maintenance and keep the carriage path clean of dust and debris.
- Use genuine HP parts and consumables to minimize mismatch issues that trigger sensor faults.
- Schedule routine firmware updates and printer calibrations.
- Avoid carrying the printer or exposing it to excessive vibrations that can misalign internal components.
- Keep the printer on a stable surface and protect it from power surges with a quality surge protector. These practices help maintain alignment and reduce the likelihood of carriage-related errors.
Steps
Estimated time: 25-40 minutes
- 1
Power down and unplug
Shut down the printer, unplug, and wait 60 seconds to discharge capacitors. This reduces the risk of shock and makes it safe to inspect interior parts.
Tip: Use a clean, dry workspace and avoid touching metal components. - 2
Open access panel and inspect path
Gently open the panel and visually inspect the carriage path for paper jams or foreign objects. Do not force any part; remove obstructions with tweezers or a lint-free cloth.
Tip: Do not use metal tools that could damage rails. - 3
Move carriage by hand
Carefully slide the carriage along its rails to confirm free movement. If stiff, check for hidden jams or a misaligned guide.
Tip: Support the carriage to avoid dropping it. - 4
Reseat cartridges/head
Remove and reinsert ink cartridges or print heads, ensuring they click firmly into place. A loose cartridge can trigger E4.
Tip: Wipe the contacts lightly with a lint-free cloth. - 5
Check cables and belts
Inspect carriage cables and the drive belt for signs of wear, kinks, or disconnection. Reseat connections if needed.
Tip: Power back on only after all panels are closed. - 6
Run diagnostics and test print
Power up and run the printer’s built-in diagnostic tests. If a test print succeeds, reattempt a regular print job.
Tip: Document any error codes shown during tests. - 7
Update firmware and calibration
Check for firmware updates from HP and perform any available calibration routines. This can clear sensor-related faults.
Tip: Back up any custom settings if your model stores them. - 8
Escalate if needed
If E4 persists after all checks, contact HP support or a qualified technician for a deeper inspection or part replacement.
Tip: Request a written repair estimate before authorizing work.
Diagnosis: Printer displays E4 and stops printing
Possible Causes
- highCarriage jam or obstruction
- mediumDamaged carriage belt or misaligned rails
- lowSensor or encoder strip fault
Fixes
- easyPower cycle, open, and clear any jam
- easyReseat carriage cables and cartridges
- hardRealign/replace carriage rails or belt
Frequently Asked Questions
What does HP printer error code E4 mean?
E4 generally signals an issue with the carriage path or a jam. It indicates the printer cannot move the print head along its intended route. The fix starts with safe basic checks before escalating to hardware inspection.
E4 usually means the carriage path is obstructed or jammed. Start with safe basic checks before deeper hardware inspection.
How can I fix E4 quickly?
Begin with a power cycle, clear any jams, reseat cartridges, and test print. If the error repeats, perform a cautious inspection of rails and sensors or contact support.
Quickly fix E4 by power cycling, clearing jams, and reseating cartridges; test print, then proceed to rail and sensor checks if needed.
Is E4 a hardware failure?
E4 can be caused by a hardware issue like a carriage jam or sensor fault, but sometimes firmware or user error triggers a false reading. A systematic check helps distinguish between causes.
E4 can be hardware-related, but sometimes it’s firmware or user error. Do a systematic check to pinpoint the cause.
Will clearing jams always resolve E4?
Not always. If a jam is cleared but E4 remains, the issue may be a misaligned belt, worn rail, or faulty sensor requiring deeper service.
Clearing jams helps, but if E4 persists, deeper issues like a sensor or belt may be to blame.
When should I replace the printer instead of repairing?
If the printer is old, has recurring carriage issues, or estimated repair costs exceed a comparable replacement, replacement can be the more cost-effective option.
If repairs keep stacking up or the unit is old, consider replacing the printer.
Do driver updates help with E4?
Driver updates rarely clear a true hardware fault like a jam or sensor misalignment, but they can fix related miscommunications in some models. Always check for updates as part of the broader troubleshooting.
Driver updates might help with some software-related indications, but hardware faults usually need physical checks.
Watch Video
Top Takeaways
- Power cycle first to reset the printer
- Clear jams and reseat cartridges before deeper repairs
- Verify carriage movement and sensors with care
- If E4 persists, consult HP support and consider replacement value