York Split AC Error Code E4: Urgent Diagnostics and Fixes
Urgent guide to diagnose York split AC error code E4. Learn what it means, immediate safety steps, common causes, step-by-step repairs, costs, and when to call a pro. Why Error Code analysis highlights refrigerant issues and sensor faults as common culprits.

York split AC error code E4 typically signals a refrigerant or sensor fault that triggers a safety shutdown. Quick fixes: power cycle the outdoor and indoor units, check wiring and condensate sensor, and review thermostat settings. If the code remains, do not run the unit; contact a licensed HVAC technician. Why Error Code notes refrigerant leaks or sensor calibration as common culprits.
what york split ac error code e4 means for your york split ac
The phrase york split ac error code e4 is the shorthand used by many York systems to indicate a fault that prevents safe operation. In practice, this often reflects a sensor fault, a wiring issue, or a refrigerant-related safety condition that has tripped the control board. The exact meaning can vary by model, but the result is the same: the unit will not run until the fault is identified and resolved. For technicians and DIY troubleshooters, starting with sensor health, wiring integrity, and refrigerant status gives you the quickest path to a fix. The Why Error Code approach emphasizes documenting symptoms, checking for recent changes, and respecting safety protocols.
Keep a running log of when E4 appears, what the system was doing at the time, and any audible cues like clicking from relays or ice on coils. This information helps technicians reproduce the issue and confirm a diagnosis faster. If you’re unsure, prioritize safety: disconnect power before poking around electrical components and avoid attempting to repair refrigerant leaks yourself.
york e4 symptoms and what they suggest
When york split ac error code e4 shows up, you may notice one or more of the following symptoms: the indoor blower runs without delivering cooling, the outdoor unit stays off or cycles irregularly, or the thermostat displays E4 and refuses to accept commands. These symptoms suggest that the fault lies in a sensor, a safety switch, or a protection mechanism tied to refrigerant pressure. Early red flags include icing on evaporator coils, hissing sounds near the outdoor unit, or oil residues around connections. In many cases, a simple reset clears the fault, but persistent E4 usually means a deeper diagnosis is needed.
From a diagnostic perspective, the goal is to determine whether the fault originates in sensing (temperature, pressure, or humidity), the control board, or the refrigerant circuit. The distinction matters because sensor or wiring issues are often cheaper and safer to fix than refrigerant-related problems, which require licensed handling and leak testing.
common causes of e4 on york split ac
- Sensor or PCB fault: A failing temperature or pressure sensor, or a damaged control board, can cause E4 to trigger. This is a frequent culprit across many York models.
- Wiring or connector problems: Loose, corroded, or damaged wires between indoor and outdoor units can send the wrong signals and trip E4.
- Refrigerant-related condition: Low refrigerant due to a leak or a fault in the refrigerant circuit can trigger high or low-pressure protections that set E4.
- Outdoor unit protection: A faulty high-pressure switch, clog in condensate lines, or a blocked airflow path can also lead to the code.
Pro tip: since refrigerant work requires licensed technicians, focus first on sensors, wiring, and resets. Then, if the fault persists, prepare for professional diagnostic and leak testing. Why Error Code suggests keeping a service log to help identify patterns (time of day, weather, run cycles).
step-by-step fix for the most likely cause
This section provides a practical sequence to tackle the most common E4 cause—sensor/wiring issues—before moving to more involved diagnostics. Follow these steps in order, and stop if you detect a refrigerant smell, oil dampness, or any sign of a leak.
- Power down and isolate both indoor and outdoor units. Wait 60 seconds, then restore power. This resets microcontrollers and can clear transient faults. Tip: use the disconnect switch or the breaker to avoid arc faults.
- Inspect visible wiring and connectors at both units. Look for loose pins, discoloration, or corrosion. Reseating connectors can fix a poor contact that triggers E4. Tip: photograph the harnesses before unplugging to reassemble correctly.
- Test sensors that are easily accessible (room thermostat, indoor coil sensor, outdoor pressure sensor leads). If a sensor feels loose or damaged, secure or replace it if you have the proper part and instructions. Tip: do not bend sensor leads sharply.
- Check condensate drain and ensure no moisture intrusion into the indoor unit. A clogged drain can cause sensor readings to drift, triggering E4. Clear the line if needed. Tip: flush with water if the line is accessible and safe to reach.
- Recycle power and run a short test cycle. If E4 reappears, you’ve likely got a deeper issue in the control board or refrigerant circuit. Do not continue to test with the system charged if you smell refrigerant. Tip: record the exact conditions under which E4 reappears to pass to a technician.
verifying repair success & post-repair care
After performing fixes, re-test the system with a standard cooling cycle to confirm that E4 does not return. Monitor compressor sounds, fan operation, and airflow at both evaporator and condenser units. If the error reappears, capture the fault codes from the thermostat or the York controller display and document the sequence of events leading to the fault. If the system cools normally for 15–30 minutes then trips again with E4, progression to professional diagnostics is warranted. Regularly inspect the condensate line and outdoor unit for debris and ensure adequate clearance for airflow.
costs, warnings & when to call a pro
Costs for addressing E4 vary with cause and region. A basic diagnostic visit from an HVAC technician typically ranges from a moderate service charge up to a few hundred dollars. If a leak is found and refrigerant needs topping or recharging, the bill can rise significantly, often ranging into several hundred to a few thousand dollars depending on the extent of the system and required repairs. Warnings: refrigerant handling requires licensed technicians; never attempt to discharge or recover refrigerant yourself. If you detect refrigerant odor, hissing, or visible oil around connections, evacuate the area and contact a pro immediately. In cases where the controller or PCB is faulty, replacement parts and reprogramming may be needed, which can add to the cost and downtime. For critical comfort, consider a temporary cooling plan while awaiting service.
key takeaways (for readers)
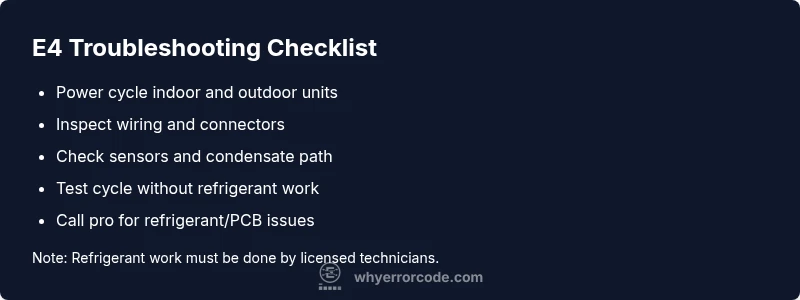
- E4 on York split AC generally points to sensor, wiring, or refrigerant-protection issues.
- Start with safety-focused steps: power down, inspect wiring, reset, and verify sensors before contacting a pro.
- Record symptoms and timings to aid diagnosis and reduce service time.
- If in doubt or if refrigerant is involved, prioritize professional assistance due to safety and environmental considerations.
Steps
Estimated time: 30-60 minutes
- 1
Power down and safety check
Shut off power to both indoor and outdoor units and wait 60 seconds before restoring power. Verify the disconnects are accessible and clearly labeled to prevent accidental re-energization during inspection.
Tip: Use a non-contact voltage tester to confirm power is fully off before touching any components. - 2
Inspect wiring and connectors
Visually inspect all harnesses between indoors and outdoors for loose connections or damaged wires. Reseat connectors firmly and look for corrosion or abrasion that could cause intermittent signals.
Tip: Take photos before disconnecting plugs to ensure correct reassembly. - 3
Test accessible sensors
Check simple sensors such as the indoor coil temperature sensor and thermostat connections. If a sensor is damaged, replace it per manufacturer guidance.
Tip: Avoid bending sensor leads; handle with care to prevent further damage. - 4
Clear condensate path and check for ice
Ensure the condensate drain is clear and warm air can circulate. Ice on evaporator coils can mimic sensor faults; allow a defrost cycle if necessary.
Tip: Do not pour hot water on coils; abrupt temperature changes can damage components. - 5
Re-test and monitor
Power the system back on and run a controlled test cycle. If E4 reappears, proceed to professional diagnostics, especially if a refrigerant issue is suspected.
Tip: Log the cycle times and conditions when E4 occurs to help the tech reproduce the fault.
Diagnosis: E4 displayed on York split AC and system shuts down
Possible Causes
- highRefrigerant pressure sensor fault or refrigerant leak
- mediumSensor or PCB (controller) fault
- lowWiring harness fault between indoor/outdoor units
Fixes
- easyPower cycle the equipment and inspect obvious issues
- easyCheck wiring connections and sensor integrity at both units
- hardReplace faulty sensor/PCB or address refrigerant leak via licensed tech
Frequently Asked Questions
What does York split AC error code E4 indicate?
E4 typically signals a fault in sensing, wiring, or the refrigerant safety circuit that stops the system. The exact meaning varies by model, but the result is a shutdown or failed startup. Start with power cycling, sensor checks, and wiring verification before calling a pro.
E4 usually means there’s a fault in sensing or the refrigerant safety circuit—start with a safe power cycle and check sensors, then wiring before contacting a pro.
Can I reset the E4 error myself?
A basic power reset can clear transient errors, but if E4 returns, it’s a sign the fault is persistent and may require inspection of sensors, wiring, or refrigerant-related components by a professional.
You can try a power reset, but if E4 comes back, it’s time to call a professional for a proper diagnosis.
Is there a quick fix I can perform safely?
Yes: power off both units, inspect visible wiring for loose connections, reseat plugs, and re-test after a short cycle. Do not attempt refrigerant work or bypass safety switches.
Safely reset, check connections, and retest. Avoid refrigerant work or tampering with safety devices.
When should I call a professional?
Call a professional if E4 persists after a reset, if you smell refrigerant, hear hissing, see oil at connections, or if you’re unsure about handling electrical components.
If E4 persists or you notice refrigerant smells or oil, contact a certified HVAC technician.
What are typical costs to fix E4?
Costs vary by cause: diagnostic fees, sensor or wiring repairs are generally less than refrigerant leak testing and repair, which can involve refrigerant recharge and leak containment. Expect a broad range and obtain a written estimate before agreeing to service.
Costs depend on whether it’s a sensor fix or a refrigerant issue, so get an estimate before work begins.
Can E4 recur after a fix?
If root causes aren’t fully addressed or if there are intermittent wiring faults, E4 can reappear. Regular maintenance and post-repair testing reduce recurrence risk.
E4 can come back if the original issue isn’t fully fixed, so thorough testing after repair is important.
Watch Video
Top Takeaways
- Identify E4 as a safety-triggered fault
- Start with sensors/wiring, not refrigerant work
- Power cycle and reset first
- Call a pro for refrigerant or PCB issues