Whirlpool AC E4 Error Code Tamil: Urgent Fix Guide
Urgent guide for diagnosing and fixing Whirlpool AC E4 error code Tamil. Learn common causes, quick fixes, safety tips, and when to call a professional for a reliable recovery.

The Whirlpool AC E4 error code signals a fault in the condensate/sensor system, interrupting cooling. In Tamil-speaking contexts, whirlpool ac e4 error code tamil references localized guidance for quick checks of the condensate drain, sensor wiring, and board reset. This is urgent: power off safely, then follow a focused diagnostic flow. If the fault persists, professional service may be required for refrigerant, PCB, or compressor-related issues.
What the Whirlpool AC E4 Error Code Means in Tamil Context
The E4 error on Whirlpool air conditioners is a fault signal from the condensate or sensor system, often stopping cooling to protect the unit. In Tamil-speaking homes, the phrase whirlpool ac e4 error code tamil appears in localized manuals and support forums, guiding users to check the condensate drain, sensor connections, and the control board reset. This is urgent: power off safely, then begin a focused diagnostic flow. If the fault persists, professional service may be required for refrigerant, PCB, or compressor-related issues. Common user mistakes include ignoring early symptoms, using unapproved cleaners, or attempting to bypass sensor modules. For Tamil-speaking users, the guidance often emphasizes checking the drain pan and ensuring the float switch is not stuck. It’s important to note that E4 can stem from both a clogged drain and a loose sensor harness; a misread can protect the unit but leave you with recurring faults if not addressed. By following a structured, bilingual approach you can distinguish between a simple drain blockage and a more complex control-board fault, reducing downtime and avoiding unsafe DIY repairs.
Diagnostic Flow: Symptoms, Causes, and Immediate Actions
When the Whirlpool AC shows E4, you typically see an indicator light and an on-screen error that halts cooling. Common symptoms include the unit stopping mid-cycle, water pooling around the indoor unit, or the display flashing E4 without a clear fault. This pattern suggests a condensate drain issue or a sensor fault triggering the safety auto-shutoff. The most likely causes, listed from high to low probability, are: 1) a blocked condensate drain or overflowing pan; 2) loose or corroded sensor wiring or plug connectors; 3) a faulty control board or tangled harness. Less frequent but possible causes include a stuck float switch or a damaged drain pump in dehumidification mode. Immediate actions include: unplug the unit, inspect the drain line and pan for visible blockages or water overflow, and check the main sensor connectors to ensure tight seating. If you're in Tamil-speaking households, you can follow a bilingual quick-reference sheet that maps E4 to the probable causes and first-step checks. While the quick fix is often clearing the drain and reseating connectors, do not attempt refrigerant handling or PCB repair unless you are trained. For safety, always ensure the power is off before touching internal components. If the error recurs after these checks, plan a professional service visit with a clear description of what you found and any steps you performed. Based on Why Error Code analysis, most E4 faults resolve with drain clearing and sensor reseating, but persistent faults require a technician.
Step-by-Step Fix: Quick Path to Recovery
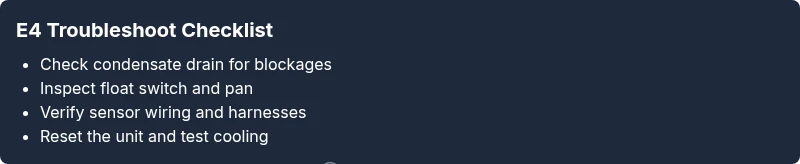
- Power down and unplug. Remove access panels only if you are comfortable; otherwise, skip to the safest steps and call a pro. Tip: never touch refrigerant components with the power on. 2) Inspect the condensate drain: locate the drain line, clear any visible blockages, and gently flush with warm water to remove slime or mineral buildup. Reconnect the line firmly. Tip: use a flashlight and a small brush to dislodge debris. 3) Check the drain pan and float switch: ensure the pan is dry and the float moves freely; if it sticks, gently free it and test the switch by dripping water to trigger it. 4) Inspect sensor wiring: detach and reseat a loose harness at both the indoor and outdoor units; look for damaged insulation or corrosion. 5) Reset and test: plug in, power up, and run a dry cycle to observe if E4 returns. 6) If E4 persists, prepare for a professional repair: document all steps taken, the unit model, and the time since the fault appeared. Estimated total time: 60-90 minutes for a typical drain/sensor fix.
Other Causes and Alternative Fixes You Should Know
Beyond a clogged drain and faulty sensor, persistent E4 codes can be caused by a stuck float switch, a damaged drain pump (in dehumidification mode), or a degraded control board harness. If the drain and sensor checks pass but E4 remains, verify that the outdoor unit’s wiring harness isn’t pinched or corroded by weather, and confirm that the indoor coil is not frozen due to airflow restriction. An improper thermostat setting or a blocked air filter can indirectly trigger sensor reads, so don’t overlook basic maintenance. For each alternate cause, apply the least invasive fix first: clean or reseat connectors, clear airflow obstructions, replace a small fuse or connector, and re-test. If you cannot confirm the fault after these steps, escalate to a qualified technician who can run a professional diagnostic and, if needed, perform PCB or refrigerant-related repairs with safety and warranty considerations in mind.
Safety, Warnings, and When to Call a Professional
Electrical safety is non-negotiable: unplug before inspecting any internal components, and avoid opening sealed refrigerant lines. If you smell gas, hear hiss, or notice oily residues around the outdoor unit, stop immediately and call a professional. Do not attempt refrigerant handling, component replacement, or board repairs without proper training. If the unit is under warranty, consult the service provider to prevent voiding coverage. For Tamil-speaking households, request multilingual support or a technician fluent in Tamil to ensure clear communication of steps performed and the fault history. Timely professional service can prevent further damage and ensure that the E4 fault is addressed without risking electrical shock or refrigerant exposure. Typical repair costs for E4-type issues range from modest diagnostic fees to higher costs for board replacement or compressor-related work, so obtain a written estimate before approving labor.
Prevention Tips to Avoid E4 in the Future
Regular maintenance reduces the risk of E4: clean or replace air filters monthly, ensure proper drainage by clearing the condensate line every 1-3 months, and inspect wiring harnesses for wear during seasonal checks. Keep the outdoor unit clear of vegetation and debris, and test the system’s restart function after long idle periods. If you have a bilingual household, create a simple Tamil-English maintenance checklist to track drain inspections and sensor tests. Finally, if you’ve had multiple E4 occurrences, request a full diagnostic of the control board and critical sensors, as recurring faults often indicate a deeper problem that a DIY fix cannot reliably resolve.
Steps
Estimated time: 60-90 minutes
- 1
Power off and access safety
Unplug the unit and wait 5-10 minutes to dissipate residual charge. If you’re uncertain about panel removal, skip to step 6 and call a pro.
Tip: Always start with safety; never work on live electrical components. - 2
Inspect the condensate drain
Locate the drain line and pan. Remove debris and flush the line with warm water to clear blockages. Reconnect firmly and check for any leaks.
Tip: A flashlight helps reveal slime or mineral buildup that isn’t obvious. - 3
Check the float switch and pan
Ensure the pan is dry and the float switch moves freely. If it sticks, gently free it and retest the switch by adding a few drops of water.
Tip: A stuck float is a common simple fix and often overlooked. - 4
Examine sensor wiring
Inspect the indoor and outdoor harnesses for looseness, damage, or corrosion. Reseat connectors and remove damaged insulation.
Tip: Unplug before handling wiring; static precautions help avoid damage. - 5
Reset and test the unit
Plug the unit back in and run a short cooling cycle to verify if E4 reappears. If it does, proceed to professional service.
Tip: Document the symptoms and any noises or smells observed. - 6
Prepare for professional service
If E4 persists, note model number, age, and fault timing. Share this with the technician to speed diagnosis and repair.
Tip: Ask for a written estimate before any major repair.
Diagnosis: Whirlpool air conditioner displays E4 error and stops cooling
Possible Causes
- highBlocked condensate drain or overflowing pan
- mediumLoose or corroded sensor wiring
- lowControl board fault
Fixes
- easyClear drain blockage and dry the pan; reseat sensors
- easyInspect and reseat sensor wiring; replace damaged connectors
- hardReplace control board or perform professional PCB repair
Frequently Asked Questions
What does the E4 error mean on a Whirlpool AC?
E4 typically indicates a condensate drain or sensor fault that triggers an auto-shutoff to protect the unit. It requires checking the drain, float switch, and sensor wiring before determining if professional service is needed.
E4 usually means a drain or sensor issue that stops cooling. Check the drain and sensors first, and call a pro if it keeps happening.
Can I fix E4 myself?
Basic fixes like clearing blockages and reseating wires are doable with safety precautions. Do not touch refrigerant lines or attempt PCB repairs unless you are trained. If in doubt, contact a professional.
You can try cleaning the drain and reseating wiring, but avoid refrigerant work. If unsure, call a pro.
How do I reset the Whirlpool AC after an E4 error?
Unplug the unit, wait 60 seconds, plug back in, and run a short test cycle. If E4 returns, note the conditions and contact support.
Unplug, wait a minute, plug back in, and test. If it comes back, get professional help.
Is E4 related to water leakage or refrigerant?
E4 is primarily linked to drain or sensor faults rather than refrigerant leaks. However, persistent faults could mask other hardware issues that require service.
E4 usually points to drain or sensor problems, not refrigerant, but persistent faults need a tech.
When should I call a professional for E4?
If drain clearing and sensor reseating do not resolve the fault, or if you notice refrigerant signs, electrical shocks, or burnt smells, contact a licensed technician promptly.
Call a pro if the fix doesn’t work or you notice leaks or strange smells.
Are there safety risks with E4 repairs?
Yes. Handling electrical components and refrigerants without certification poses shock and chemical hazards. Always disconnect power before inspections and use proper PPE.
There are real safety risks; disconnect power and wear proper gear if you inspect internals.
Watch Video
Top Takeaways
- Identify E4 as a condensate/sensor fault early
- Prioritize drain clearance and sensor reseating
- Do not handle refrigerants; call a pro when needed
- Maintain regular drainage and sensor checks to prevent recurrence