What Causes Error Code L1 01: Quick Fix and Diagnostics
Learn what can cause error code L1 01, its meaning, urgent fixes, and step-by-step diagnostics. This Why Error Code guide covers common causes, safety notes, and when to call a professional.

Error code L1 01 generally points to a sensor or communication fault within the device’s control system. The quickest fix is to power cycle the unit, re-seat any loose connectors, and perform a basic self-test. If the code reappears, run the diagnostic flow to confirm the likely causes before proceeding to deeper repairs.
What Can Cause Error Code L1 01 and Why It Matters
The error code L1 01 can feel urgent because it signals a fault within the device's core control loop. Understanding what can cause error code l1 01 helps you triage quickly and limit downtime. In many systems this code appears after a sensor reads out of range, a connector loosens, or there is a simple software hiccup. The presence of L1 01 usually warrants attention, but immediate action is often enough to prevent escalation. Throughout this guide we’ll explain the most common culprits, how to verify them, and practical fixes you can perform safely. The language here follows Why Error Code's approach to diagnosing error codes with practical steps you can apply in real time. If you’re troubleshooting for a critical production system, use the diagnostic flow and keep a log of what you tested. The ultimate goal is to restore reliable operation while avoiding unnecessary part replacements. The pattern you’ll see across industries is that L1 01 points to a controllable fault rather than a complete system failure, making early handling essential.
In particular, what can cause error code l1 01 often boils down to hardware connections, sensor health, and controller communication. By focusing on these areas first, you reduce blind guessing and move toward a precise fix more quickly. This section helps you map symptoms to likely root causes, setting the stage for a safe, effective repair plan.
Common Causes and Symptom Patterns
When L1 01 shows up, a few familiar causes surface repeatedly. The most common is a loose or corroded sensor harness or main wiring connector that interrupts signal integrity. A second frequent culprit is a sensor itself drifting out of calibration or failing, which misleads the control logic and triggers the code. Less common are fault in the communication line between modules, or a failing control board that cannot process sensor data reliably. You may notice symptoms such as intermittent operation, random resets, inaccurate readings, or a device that briefly powers down. Some setups display L1 01 after a power surge or a firmware update that didn’t complete cleanly. Keep in mind that environmental factors like EMI or loose cable ties can masquerade as sensor faults. By recognizing symptom patterns, you can prioritize checks on connections, sensors, and the control interface before diving into component replacements.
These patterns help you form a quick hypothesis about what can cause error code l1 01 and guide you toward targeted verifications rather than broad, costly testing.
Diagnostic Approach: From Symptoms to Solutions
Start with the most likely causes based on observed symptoms. If the device presents L1 01 during startup or first use, focus first on connections and power-related issues. If symptoms occur during operation, sensor or wiring faults become more likely. The diagnostic mindset should be: confirm, then isolate, then verify. Confirm by performing a safe reset and inspecting visible wiring; isolate by disconnecting nonessential modules or segments that interact with the sensor path; verify by re-running basic tests and noting whether the code returns. Document every step; many teams find that a short fault history helps technicians spot recurring patterns that point to a root cause more quickly. In this guide, the diagnostic flow outlines a repeatable approach that reduces guesswork and accelerates repairs while keeping risk in check.
In many environments, keeping a simple fault log improves accuracy over time, so you’re less likely to overlook a subtle intermittent fault that triggers L1 01.
Step-by-Step Fix: Most Likely Cause — Loose Connectors
- Power down the device and unplug from power. Wait 60 seconds to clear residual charge. 2) Visually inspect all sensor and main control connectors for corrosion, bent pins, or debris. 3) Reseat each connector firmly until you hear a click and confirm seating. 4) Gently wiggle the harnesses to ensure there is no intermittent contact. 5) Reconnect power and run a basic self-test; observe whether L1 01 clears. 6) If the code remains, proceed to the next step: test sensors or wiring harness replacement.
If you do not see improvement after reseating, the next likely fix is replacing the sensor or a damaged harness. Expect cost implications for parts and labor; sensor replacements are typically lower in cost than full control-board repairs. Always weigh the risk and your comfort level before replacing major components.
Safety note: Always disconnect power before handling wiring. If you’re unsure about the correct procedure, seek professional help to avoid personal injury or equipment damage.
Other Causes and How to Verify Them
Beyond loose connectors, L1 01 can be caused by sensor drift, a failing sensor, or a compromised control board. Calibration drift is common after firmware updates or temperature swings; a miscalibrated sensor can trigger false readings that illuminate L1 01. A damaged harness or corroded pins can also cause intermittent faults that mimic more serious failures. To verify: run the device’s built-in diagnostics, compare expected vs. actual sensor readings, and inspect wiring insulation for cracks or water intrusion. If the problem persists, consider testing with a known-good sensor or harness, and verify the control board’s communication lines for integrity. If persistent, the fault may be deeper in the controller’s firmware or hardware, which often requires professional service.
Practical note: cost estimates for repairs vary widely by device and part. Typical sensor replacements are in a lower-cost range, while control-board remediation can be significantly more expensive. Budget accordingly and plan for both parts and labor.
Safety, Warnings, and When to Call a Professional
Always de-energize equipment before inspecting wiring or sensors to prevent electric shock, short circuits, or accidental damage. If you lack the proper tools or feel uncertain about diagnosing a control-board fault, contact a professional technician. Warranty coverage may also influence whether you should pursue in-house fixes or authorized service. When you’re unsure, a professional assessment reduces risk and ensures firmware and calibration are handled correctly. In production environments, escalation is recommended promptly if L1 01 recurs after basic fixes.
Cost guidance: basic sensor or connector repairs can fall in the lower hundreds, while modular replacements or board-level work often runs higher. Request a written estimate before work begins and check for warranties that may cover part or all of the repair.
Prevention and Best Practices to Avoid L1 01 Recurrence
Maintain clean, secure connectors and use dielectric grease where appropriate to prevent corrosion. Regularly review firmware updates and verify calibration after updates or service work. Implement EMI controls and proper grounding to minimize signal interference. Create a lightweight diagnostic log to capture fault codes, times, and observed symptoms so patterns can be spotted quickly. A proactive maintenance routine reduces the odds of recurrent L1 01 and speeds future troubleshooting. In fast-moving production environments, a planned maintenance window with a clear rollback plan helps keep systems stable.
Remember: a systematic approach that prioritizes sensor health, connector integrity, and robust communication pathways offers the best defense against L1 01 returning.
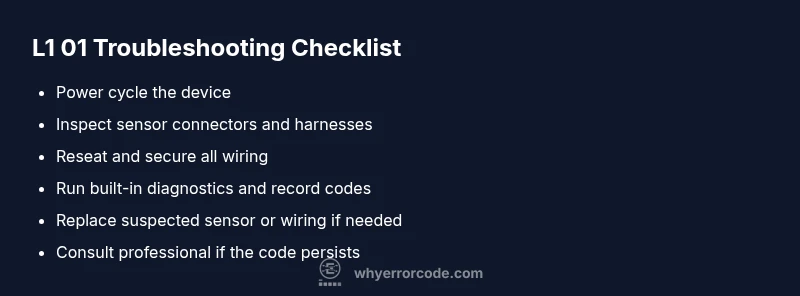
Quick Reference Checklist
- Power cycle the device
- Inspect connectors and harnesses
- Reseat wiring until clicks
- Run built-in diagnostics and note results
- Check sensor calibration and firmware status
- If unresolved, escalate to professional service
Steps
Estimated time: 60-180 minutes
- 1
Power cycle the device
Power down completely, unplug, wait 60 seconds, then plug back in and power up. This clears transient faults and resets internal state.
Tip: Document the time of power cycle for later reference. - 2
Inspect primary connectors
Open access panels and inspect sensor and main control connectors for corrosion, bent pins, or debris. Do not force any connector.
Tip: Use a bright light and magnifier if needed. - 3
Reseat and secure wiring
Disconnect and reconnect each harness firmly until you hear a click; secure with appropriate ties to avoid movement.
Tip: Do not overtighten; snug is enough. - 4
Run built-in diagnostics
Enter the service or diagnostics menu and perform a sensor path test and a communication test.
Tip: Record any new codes that appear. - 5
Replace suspected sensor or harness
If testing shows a faulty sensor or damaged harness, replace with an approved part.
Tip: Check warranty status before purchasing. - 6
Consult professional if code persists
If L1 01 remains after basic fixes, contact a service professional to check the control board and firmware.
Tip: Provide fault history and test results when arranging service.
Diagnosis: Error code L1 01 appears on startup or during operation
Possible Causes
- highLoose or corroded sensor or harness connections
- mediumSensor failure or drift
- lowControl board communication fault
Fixes
- easyPower cycle and reset the control module
- easyReseat all affected connectors and inspect wiring harnesses
- mediumReplace faulty sensor or damaged harness
- hardTest and possibly replace control board if communication fault persists
Frequently Asked Questions
What does L1 01 mean on my device?
L1 01 usually indicates a sensor or communication fault within the control loop. It signals that the device detected data outside expected ranges or a break in signaling between components. A quick, safe reset often clears transient faults, but persistent codes require targeted checks.
L1 01 means a sensor or communication fault inside the control loop. Start with a safe reset and inspect connections, then run diagnostics if it comes back.
Is L1 01 hardware or software?
L1 01 can stem from hardware (sensors, wiring, connectors) or software/firmware issues (corruption, incomplete updates). Diagnosing involves checking physical components first, then validating firmware status.
It can be hardware or software related, so start with hardware checks and then verify firmware.
What quick fixes should I try first?
Begin with a power cycle, reseat all connectors, and run built-in diagnostics. These quick steps resolve many L1 01 incidents without replacing parts.
Try power cycling, reconnecting wires, and running diagnostics first.
When should I call a professional?
If L1 01 persists after basic fixes, or if you’re uncomfortable working with electronics, contact a service professional. They can diagnose control-board issues and firmware problems safely.
Call a professional if it stays after basic fixes or you’re not comfortable with electronics.
Can I fix L1 01 myself with limited tools?
Basic checks and reseating connectors are feasible with common tools. Replacing sensors or boards usually requires specialized parts and equipment; consult the manual or a technician.
Yes for simple connections, but replacing parts may require a pro.
Will L1 01 recur after a fix?
Recurrence depends on the underlying cause. If the fault was intermittent wiring or a drifting sensor, it may recur until the part is replaced or firmware corrected.
It may recur if the root cause isn’t fully resolved.
Watch Video
Top Takeaways
- Power cycle and reseat connections first
- If persists, verify sensors and harnesses
- Professional help recommended if L1 01 reappears
- Budget for parts and service: ranges apply