Midea Heat Pump L1 Error Code: Quick Diagnosis and Fix
Urgent guide to diagnose and fix the midea heat pump l1 error code quickly. Learn symptoms, likely causes, step-by-step repairs, safety tips, cost ranges, and when to call a pro. Includes a diagnostic flow and quick fixes for developers, IT pros, and homeowners troubleshooting error codes.

The midea heat pump l1 error code signals a fault detected by the unit's control board, typically tied to sensor readings, communication between boards, or a failed component. The quickest path to a cure is a power cycle (reset), inspecting obvious wiring, and ensuring proper airflow, followed by a guided diagnostic flow. If the code reappears, arrange professional service.
What the midea heat pump l1 error code Indicates
The midea heat pump l1 error code indicates a fault detected by the unit's fault protection logic. It is a generic alert that can stem from sensors reporting out-of-range values, a communication hiccup between indoor and outdoor boards, or a failing component in the control path. Because L1 is a safety-coded trigger, the unit will often reduce or stop heating or cooling to prevent damage. The exact cause varies by model and installation, so follow the diagnostic flow rather than guessing. In many cases, a simple reset reveals whether the fault was a transient glitch or a persistent issue.
Quick Diagnosis: Symptoms and What They Point To
Typical symptoms that accompany the L1 fault include the display lighting up with the code, the system stopping in heat or fan mode, and occasional outage of remote monitoring. You may notice inconsistent temperatures, longer run times, or reduced efficiency. These symptoms point to sensor readings, communication issues, or a power/safety block. The first step is to observe whether the code appears at startup, during a request for heat, or after a long idle period. If the code appears only when the outdoor unit cycles on, the problem is more likely related to the outdoor circuit or sensor input from that unit.
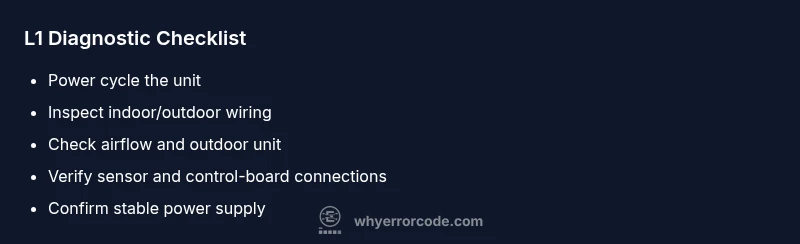
Quick Fixes You Can Try Before Calling a Pro
Before you reach for tools or call for service, try these safe, no-special-tools steps:
- Power cycle the system: turn off at the main breaker for a minute, then restore power and run a test cycle.
- Check air intake and outdoor unit: remove debris, ensure airflow is clear, and avoid placing objects near the outdoor coil.
- Inspect visible wiring and connectors: look for loose plugs or discolored insulation; reseat any connectors you can reach safely.
- Confirm power supply: ensure the circuit breaker hasn’t tripped and that there is stable voltage; if you have a multimeter, verify voltage is steady.
Note: Do not attempt refrigerant work or disassemble sealed components. If the fault persists after these steps, proceed to the diagnostic flow or contact a technician.
Most Likely Causes for L1 (in order)
- High: Sensor fault or misreading; damaged sensor wiring; loose connectors between the indoor and outdoor units.
- Medium: Inter-board communication glitch; faulty harness connections; loose ribbon cables.
- Low: Control board firmware issue or calibration drift; improper installation or age-related wear.
Understanding the order helps you prioritize checks from simple to complex.
In-Depth Sensor and Control Board Troubleshooting
Sensor faults are the most common driver of L1. Start by visually inspecting temperature sensors for damage, then verify that sensor wiring is intact and properly connected. If readings deviate from expected values, record them and compare against service documentation. Inter-board communication problems usually reveal themselves as intermittent codes or misbehaving displays; reseat connectors and inspect the harness for pin damage. If the board itself shows signs of burn marks or abnormal odors, this is a clear reason to escalate to a professional.
Safety and Preparation Before Diagnostics
Always power down and unplug before touching any inside panels. Wear safety glasses if you work near moving parts or water; keep children and pets away. If you must work around the outdoor unit, avoid wet conditions and ensure the area has clear access for service technicians. If you are uncertain at any step, stop and call a qualified technician.
Other Possible Causes and Their Fixes
The L1 fault can occasionally stem from less obvious issues such as refrigerant sensor faults, condensate drain blockages causing pressure readings to shift, or software resets that failed to complete. For each, verify connections, consult the service manual, and perform a controlled reset. In some cases, the fix requires recalibration or component replacement by a trained technician.
Prevention and Maintenance to Avoid L1
Establish a routine maintenance schedule that includes periodic cleaning of air filters, inspection of indoor and outdoor units, and confirming that wiring is secure after any service. Schedule professional cleanings and annual inspections to catch sensor drift early. Keeping the system vented and free of obstructions reduces strain on sensors and control logic, lowering the risk of L1 reoccurrence.
Steps
Estimated time: 60-90 minutes
- 1
Power down and reset
Turn off the unit at the main breaker, wait 60 seconds, then turn it back on and run a test cycle. This simple reset clears transient faults and allows the control board to reinitialize. If the code clears, monitor performance for a full cycle.
Tip: Always cut power at the main switch rather than the thermostat to ensure a full power cycle. - 2
Check indoor/outdoor wiring
Visually inspect visible harnesses and connectors for looseness, corrosion, or damaged insulation. Re-seat any loose plugs and ensure grounds are secure. Do not force connectors. Use a flashlight and, if needed, unplug and reconnect at both ends.
Tip: Take a photo before disconnecting so you can reassemble correctly. - 3
Inspect sensors and readings
Look at accessible temperature sensors for obvious damage. If you have the service manual, compare readings with references. Do not test refrigerant-related sensors; leave that to professionals.
Tip: Document any readings you observe before clearing codes. - 4
Verify airflow and outdoor unit
Check the outdoor unit for debris, ice, or obstructions. Clear the area, ensure the fan spins freely, and confirm the coil is unobstructed. Poor airflow can trigger sensor misreads.
Tip: Never operate with blocked outdoor coil. - 5
Run a controlled self-test
Use the unit’s service interface (if available) to run a self-test or fault-check routine. Note any additional codes that appear and document them.
Tip: Avoid altering firmware or settings beyond the self-test options. - 6
Decision point and next steps
If L1 persists after the above steps, schedule professional diagnostics. Collect the observed symptoms, recent maintenance, and any sensor readings to share with the technician.
Tip: Prepare a concise fault report to speed up service.
Diagnosis: Midea heat pump shows L1 error and will not operate normally
Possible Causes
- highSensor fault or misreading
- highInter-board communication issue
- mediumPower supply or wiring fault
- lowControl board failure
Fixes
- easyPower cycle the unit to reset fault memory and re-test
- easyInspect and reseat connecters between indoor/outdoor units; check harnesses
- easyCheck for blown fuses; verify stable voltage and supply
- hardSchedule professional diagnostics for sensor calibration or control board replacement
Frequently Asked Questions
What does the L1 error code mean on a Midea heat pump?
L1 indicates a general fault detected by the control board, often involving sensors or inter-board communication. Start with a reset and basic checks; if it persists, contact a qualified technician.
L1 on a Midea heat pump means a general fault. Begin with a reset and simple checks, and call a pro if it stays.
Can I fix L1 myself?
You can perform basic resets and inspections, but avoid refrigerant work or disassembly of sealed components. If unsure, stop and contact a technician.
You can try basic resets and checks, but avoid complex repairs and Refrigerant tasks; call a professional if it persists.
How much does repair for L1 cost?
Costs vary by region and the exact fix. A diagnostic service call plus labor often ranges from $50 to $200, with sensor or board replacement pushing total into the hundreds.
Diagnostics usually start modestly, but sensor or board replacement can raise costs; a technician can give a precise quote.
How long does a repair take?
A typical diagnostic and basic reset can take 30-60 minutes; sensor or board replacement may require 2-4 hours on-site.
Most fixes wrap up within a few hours, but some parts replacement can take longer.
Is L1 dangerous to handle myself?
L1 is not inherently dangerous if you follow basic safety precautions, but there is risk when dealing with electrical components. Always power down before inspection and call a pro if uncertain.
L1 isn’t immediately dangerous, but you should power down and call a pro if you’re not sure.
Could L1 involve refrigerant issues?
L1 is not exclusively a refrigerant code. It’s usually sensor or control related, but a tech will verify refrigerant-related sensor inputs if needed.
L1 isn’t always about refrigerant, but a tech may check related sensors if needed.
Watch Video
Top Takeaways
- Act quickly to diagnose L1 faults
- Start with a safe reset and basic checks
- Verify sensors, wiring, and airflow
- Escalate to a pro if unresolved