Aircon H5 Error Code: Urgent Diagnosis & Fix Guide
Urgent guide to aircon h5 error code: meanings, quick fixes, diagnostic steps, safe repair tips, cost ranges, and when to call a professional to restore cooling.

aircon h5 error code usually signals a sensor fault or a communication issue within the control system. The quick fix is a full power cycle, then inspect and reseat key connectors, sensors, and the PCB. If the code remains, schedule professional service to avoid further damage.
What the aircon h5 error code means in plain terms
The aircon h5 error code is a catch-all fault indicator used by many modern split systems. While the exact meaning can vary by brand and model, most manufacturers reserve H5 for faults in sensors, the communication bus between control components, or the main control board. In practical terms, an H5 is telling you that the microcontroller is getting inconsistent data from a sensor or losing contact with the network that coordinates cooling, fan speed, and compressor operation. According to Why Error Code, this type of fault is common when a sensor goes out of calibration, a connector loosens, or a printed circuit board has a minor fault that disrupts data integrity. The key takeaway is that H5 is not always a single failed part; it’s a signal that multiple subsystems aren’t talking reliably, which can cascade into poor cooling or intermittent cycling. In many cases, a careful sequence of resets and reseating connections cures the issue without component replacement.
In terms of risk, H5 is typically non-safety critical but can lead to inefficient operation, increased energy use, or heat buildup in the indoor unit if left unresolved. If you tried basic resets and checks without improvement, you should treat the fault as needing professional diagnosis to avoid longer repair times or voiding warranties.
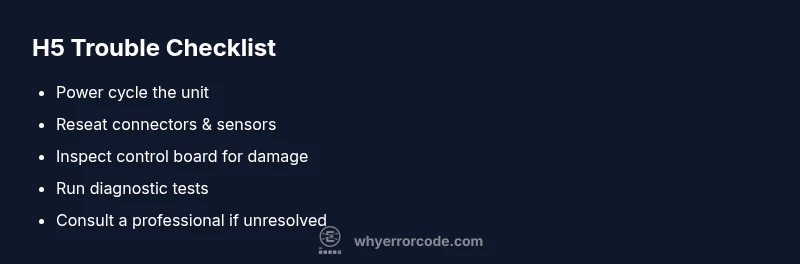
Quick checks you can safely perform today
- Power cycle the system: switch off at the breaker, wait 60 seconds, and restore power. This is the simplest quick fix and can clear transient communication glitches.
- Inspect accessible connectors and harnesses: look for loose plugs at the indoor unit, outdoor unit, and the thermostat/wireless controller. Reseat any suspected connections firmly but gently.
- Check filters and airflow: clogged filters or blocked vents can trigger sensor anomalies by causing the system to run out of expected conditions.
- Inspect the control panel for obvious signs: look for scorched marks, burnt smells, or swollen capacitors on the PCB. Do not touch exposed electronics; move slowly and avoid shorting any components.
- Verify thermostat and remote sensors: ensure the remote sensor isn’t reporting out-of-range temperatures. If you have a smart thermostat, restart the app and re-pair the device.
- Review outdoor unit clearance: ensure there are no plants, debris, or debris buildup around the unit that restricts airflow.
If the code reappears after these steps, proceed to the diagnostic flow and consider scheduling a service with a qualified technician. Early action reduces energy waste and the chance of a larger failure.
Safety note: Always switch off power at the breaker before inspecting electrical components. If you smell burning or see smoke, stop and call a professional immediately.
Diagnostic flow: symptom → causes → solutions
When an H5 code appears, your goal is to map symptoms to plausible causes and then apply targeted fixes. The most common symptom is “the unit runs intermittently or fails to cool adequately.” Primary causes include sensor faults, loose or corroded connections, and communication issues between the indoor controller, outdoor unit, and thermostat. Less common but possible are PCB failures or blown fuses that interrupt data transmission.
Common fixes begin with rapid, low-risk steps: reseat connectors, reset the controller, and clean or replace a dirty sensor. If these do not resolve the fault, you should broaden the diagnosis to check for failed sensors, wiring harness damage, or a malfunctioning control board. The diagnostic flow below mirrors typical field practice: isolate symptoms, confirm likely causes, and apply fixes in order of probability. In most cases, the sensor or connector issues fix before you need to replace major components. If you cannot confidently perform advanced checks, contact a service professional to prevent warranty issues and incorrect repairs.
Step-by-step repair for the most common cause
The most common cause for an H5 error is a degraded sensor or loose connector. The repair process below focuses on safe, non-invasive steps that can restore proper communication without replacing major components. If any step feels beyond your skill, stop and call a professional.
- Power down and verify power cycling: turn off at the breaker for 60 seconds, then restore power and monitor whether the H5 code reappears.
- Reseat primary connectors: remove and reinsert the main harnesses at the indoor unit, outdoor unit, and thermostat receiver. Ensure locks click and contacts are clean.
- Check sensors and wiring: inspect visible temperature sensors for misalignment or damage; gently reseat or replace if the sensor looks suspect.
- Test using the diagnostic interface: if your system supports a diagnostic menu, run the sensor and communication tests, noting any failure codes.
- Observe after reassembly: run a full cooling cycle, check for stable operation, and verify that the H5 code does not recur. If it does, this likely points to a faulty control board or a damaged sensor module that requires replacement.
Estimated total time: 25-45 minutes. Pro tip: document the service code or fault data from the panel so the technician can jump to the most likely failure point.
Other potential causes and how to address them
Beyond the common sensor/connector issue, H5 can arise from a few secondary faults. A loose or corroded control board connector can mimic sensor faults and produce an H5 code. A failing PCB can disrupt the data bus, causing intermittent communication errors that look like sensor faults. Refrigerant pressures below or above spec can sometimes provoke sensor alarms, so a refrigerant check is also prudent if temperature readings are erratic. Finally, software glitches on the controller can trigger H5; updating firmware or performing a factory reset (per the manufacturer’s instructions) can clear such issues. Each potential cause requires a methodical approach: start with non-invasive checks, then verify sensors and communication lines, and reserve PCB replacement as a last resort. Cost-wise, expect service calls to run in the range of tens to low hundreds USD for a simple reset or reseat, with parts (sensors, boards) pulling the total repair into a mid-to-high range depending on the model and warranty status.
When to call a pro: if the problem persists after the safe checks, if you encounter electrical burns, or if you need refrigerant work or PCB replacements, professional service is recommended to protect warranties and ensure compliant, safe operation.
Steps
Estimated time: 25-45 minutes
- 1
Power down and reset
Turn off the system at the breaker, wait 60 seconds, then turn it back on. Observe if the H5 code clears and whether cooling resumes normally.
Tip: A reset often clears transient faults and preserves warranty checks. - 2
Reseat primary connectors
Disconnect and reconnect the main harnesses at the indoor and outdoor units, plus the thermostat receiver. Ensure locks engage and there’s no loose pin or damaged connector.
Tip: Work slowly to avoid bending pins; take a photo before disconnecting to match wiring later. - 3
Inspect sensors and wires
Visually inspect temperature sensors for signs of damage or displacement. Re-seat them gently and check for damaged insulation on wiring harnesses.
Tip: If a sensor is damaged, replacing it is usually more cost-effective than chasing intermittent faults. - 4
Run a diagnostics test
If your unit supports a diagnostics menu, run sensor and communication tests. Record any fault codes observed during testing.
Tip: Document test results for reference during professional service. - 5
Test final operation
Start a full cooling cycle and monitor performance for 10-15 minutes, ensuring stable temperatures and no reappearance of H5.
Tip: If the code returns, avoid continuing operation and escalate to a professional.
Diagnosis: Aircon displays H5 error code and fails to cool consistently
Possible Causes
- highClogged or miscalibrated sensors
- highLoose or corroded connectors between control modules
- mediumControl board or PCB communication fault
Fixes
- easyReseat connectors and cables at indoor/outdoor units and thermostat receiver
- easyPower cycle and reset firmware on controller
- mediumInspect and replace faulty sensors; test sensor readings
- hardReplace or repair the control board if communication faults persist
Frequently Asked Questions
What does the aircon h5 error code mean across brands?
H5 is a generic fault indicating sensor or communication problems. The exact meaning varies by brand, so consult your manual or a professional if the schematic shows a different interpretation for your unit.
H5 usually means a sensor or communication fault, but check your model’s manual because meanings vary by brand.
Can I fix aircon h5 myself?
You can perform safe resets and reseat connectors, but avoid deep electronics work if you’re not trained. For sensor or PCB faults, a professional should diagnose to prevent further damage.
You can try resets and reseats, but for sensor or PCB faults, it’s safer to call a professional.
What is the typical cost to repair an H5 error?
Costs vary by the fault’s complexity. Expect a service call in the lower range, with higher totals if parts like sensors or boards are needed. Always request a written estimate before work.
Repair costs depend on the part and complexity; ask for an estimate before work.
Is H5 caused by a refrigerant leak?
Not typically. H5 is more often sensor or controller related. A refrigerant issue can influence sensors but is usually diagnosed separately.
H5 is usually sensor or controller related, not directly a refrigerant leak.
How long does a fix typically take?
Simple resets and reseats can take 30-60 minutes. More complex diagnostics or PCB replacement may take several hours depending on parts availability and warranty.
Most quick fixes take about an hour; more complex repairs can take longer.
When should I call a professional?
If basic resets don’t clear the code, if you notice burning smells, or if refrigerant handling or PCB work is needed, contact a qualified technician promptly.
Call a professional if resets don’t work or if you need refrigerant or PCB work.
Watch Video
Top Takeaways
- Identify H5 as a sensor/communication fault, not a single worn part
- Start with safe resets and reseating connectors before replacing components
- Document codes and test results to speed professional service
- Call a pro for PCB, refrigerant, or warranty-sensitive repairs