Power Cool AC E5 Error Code: Fast Diagnosis and Fix
Urgent guide for Power Cool AC E5 error code: decode the meaning, identify likely causes, and follow a safe, step-by-step plan to restore cooling quickly and prevent repeat failures.

The Power Cool AC E5 error code signals a safety or sensor fault in the cooling cycle, often tied to a faulty temperature sensor, wiring harness, or control board. The quickest path is a safe power cycle and a check of connectors and airflow; if the error recurs, stop using the unit and seek service. This short guide points you to the most reliable, low-cost fixes first.
What the Power Cool AC E5 Error Code Really Means
The E5 error on a Power Cool AC system generally indicates a safety shutdown or abnormal condition in the cooling loop. In practical terms, this often points to a sensor fault (like a faulty thermistor or temperature sensor), a wiring or connector problem, or a fault in the control electronics. The exact meaning can vary by model, but the common thread is that the unit detects a condition it cannot safely operate under. According to Why Error Code, E5 is best approached as a fault that should be isolated with a structured diagnostic flow rather than a single blown component. Treat this as urgent: continued operation could worsen the fault or waste energy. Begin with simple checks and move toward professional testing if the fault persists.
Common Symptoms You Might See with E5
Typical indicators of an E5 fault include the compressor not starting, the display flashing or returning to standby, unusual or inconsistent room temperatures, and occasional auto-shutoff during operation. Some models may show an E5 code only when the unit is under heavy load or when airflow is restricted. If you notice frost on coils, ice buildup, or a sudden drop in cooling performance alongside E5, these are additional hints that sensor data or protective logic is involved. Quick, non-invasive checks (like airflow, filter condition, and external blockages) can reveal obvious issues before you dive deeper. This section helps you connect symptoms with plausible causes, enabling faster triage.
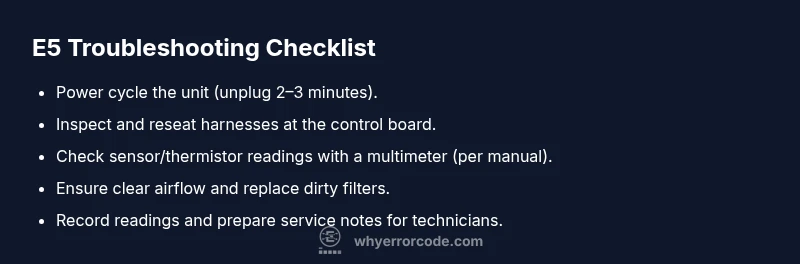
Quick Checks You Can Do Safely (Non-Invasive)
- Ensure all air intakes and exhausts are clear and unobstructed to prevent false temperature readings due to restricted airflow.
- Inspect visible wiring harnesses and connectors for looseness, discoloration, or corrosion; reseat any loose connections carefully.
- Power cycle the unit by unplugging for 2–3 minutes, then plug back in and restart cleanly. If the E5 code returns, do not run the unit continuously; proceed to a deeper diagnostic.
- Check the air filter and interior cabinets for dust buildup; a dirty filter or clogged airflow path can create abnormal temperature readings that trigger E5.
Diagnostic Approach: From Symptoms to Root Cause
A methodical diagnostic path helps separate sensor problems from wiring or control board faults. Start with the most likely, least invasive causes and progress to components that require professional tools. The most common progression is: (1) sensor/thermistor fault, (2) wiring or connector issue, (3) control board or PCB fault. Document each step you take and the observed readings; this reduces guesswork and speeds up service if you must call a technician. Remember, safety first: disconnect power before opening any access panels.
Step-by-Step Fix: Most Common Cause (Sensor/Thermistor) – 1 of 2
If the diagnostic flow points toward a faulty sensor, this fix targets the sensor path first because it’s usually the simplest and least expensive recovery. Begin by powering down the unit and unplugging from the wall. Access the sensor assembly (as per the user manual) and visually inspect for heat damage or disconnections. If the sensor appears loose, reseat it firmly; if you have a multimeter, check for the expected resistance range per the service manual. Do not replace components without confirming the readings. If the fault persists, move to the wiring check.
Step-by-Step Fix: Most Common Cause (Sensor/Thermistor) – 2 of 2
After confirming the sensor, verify the associated wiring harnesses and connectors at the control board and compressor. Look for loose pins, corrosion, or damaged insulation. Reseat all connections and clear any signs of moisture. If you must replace a sensor or thermistor, use OEM-type equivalents and follow the manufacturer’s calibration steps. If the E5 error remains after these steps, the fault may lie with the control board, which typically requires a professional diagnosis and possible PCB replacement.
Other Causes and How to Address Them
Even with sensors and wiring in good shape, E5 can appear due to refrigerant circuit faults, compressor protection logic, or a failing control board. Refrigerant-related issues require professional service and may involve leak testing and recovery; low refrigerant pressures can trigger safety cutoffs. Control board faults often manifest as intermittent codes or inconsistent sensor readings. In all cases, document what you’ve tested, including readings and visual findings, to help the technician diagnose faster and reduce diagnostic time and costs.
Safety, Costs, and When to Call a Professional
Safety is paramount. Do not bypass protections, expose high-voltage components, or attempt refrigerant work unless you’re trained and equipped. If you’re dealing with an E5 error that recurs after power cycling and basic checks, expect professional diagnostics to cost a range depending on model and region. Typical repair cost ranges can span from a basic sensor replacement (lower end) to a board or compressor replacement (higher end). A technician might quote combined parts and labor within a broad band, so ask for a written estimate and a breakdown of parts and labor.
Prevention: How to Minimize Future E5 Faults
Regular maintenance can help prevent recurring E5 codes. Schedule seasonal cleaning of air paths, replace filters on schedule, and keep the indoor environment free of excessive dust and moisture. Document any changes to the environment that coincide with E5 occurrences; small changes may reduce false readings. If your unit is several years old, consider a proactive service check to test sensors, wiring, and the control board before the next cooling season begins. This approach reduces emergency repairs and keeps energy use efficient.
Steps
Estimated time: 30-60 minutes
- 1
Power cycle the system
Unplug the unit, wait 2–3 minutes, then plug back in and restart. This can clear minor sensor or microcontroller glitches that trigger E5. After power-up, monitor for reoccurrence of the code.
Tip: This quick reset is safe and often resolves transient errors. - 2
Check for loose connections
Open access panels and inspect sensor and harness connections at both the control board and compressor. Reseat any loose pins and ensure insulation is intact. Moisture or corrosion should be addressed before reassembly.
Tip: Take photos before disconnecting anything to aid reassembly. - 3
Test sensors/thermistors
If you have a multimeter, measure the sensor resistance according to the service manual. Compare with the expected range. A reading far outside the spec indicates a faulty sensor that should be replaced.
Tip: Only perform measurements if you’re comfortable with electronics. - 4
Verify airflow and filter health
Ensure clean intake and exhaust paths; replace dirty filters and remove any obstructions. Poor airflow can produce abnormal temperature readings, triggering E5.
Tip: A clean filter can recover up to several degrees of cooling efficiency. - 5
Reset or calibrate the control board
Some models allow a service or calibration reset via the control panel or service menu. Follow the manual carefully to avoid incorrect calibration that could cause more faults.
Tip: Document any calibration steps performed for service records. - 6
Call a professional if the error persists
If E5 remains after the above steps, a professional diagnostic is advised to test the PCB, refrigerant circuit, and complex sensor networks. Prepare model and serial numbers, and request a diagnostic estimate.
Tip: Ask for a written estimate with parts and labor before any replacement.
Diagnosis: Power Cool AC shows E5 error code and cooling stops unexpectedly
Possible Causes
- highSensor or thermistor fault
- mediumLoose or damaged wiring harness
- lowControl board or PCB failure
Fixes
- easyReset the unit by unplugging for 2-3 minutes and reseating connectors
- easyInspect and reseat all wiring harness connections at the control board and compressor
- hardReplace control board or PCB if sensor and wiring are intact
Frequently Asked Questions
What does the E5 error code mean on Power Cool AC?
E5 typically signals a safety or sensor fault in the cooling cycle. It often points to a malfunctioning temperature sensor, wiring issue, or control board fault. A systematic diagnosis helps identify the exact cause and prevent unnecessary part replacements.
E5 usually means a safety or sensor fault in the cooling cycle. A step-by-step check of sensors, wiring, and the control board will identify the culprit.
Can I fix E5 myself, or do I need a technician?
Safe, low-risk steps like power cycling and reseating connections can sometimes clear E5. If the error persists after basic checks, or if you need to test sensors with electrical tools, a qualified technician should diagnose and repair it.
You can try safe resets and reseating connectors, but persistent E5 calls for a professional diagnosis.
Is E5 dangerous to operate if it appears?
Operating with an E5 fault can risk electrical shock or refrigerant-related hazards. Do not ignore the code, and avoid disabling safety features. When in doubt, switch off the unit and seek professional help.
It can be unsafe to run with E5, so turn it off and get a professional check if unsure.
What are typical costs to fix an E5 error?
Repairs vary by cause. Sensor or wiring fixes are usually on the lower end, while board or compressor work can be higher. Expect a range that covers parts and labor, typically from a few dozen to several hundred dollars, depending on model and region.
Costs vary; sensor fixes are cheaper, board or compressor work is more expensive.
How long does a professional repair typically take?
A standard diagnostic and fix can take 1–3 hours on-site, depending on access and parts availability. Complex board or refrigerant work may require scheduling parts delivery and a follow-up visit.
Most repairs happen within a few hours, though some board work could need a return visit.
Should I replace the entire unit due to E5?
Replacement is rarely the first option. A professional can determine if the fault is economical to repair. If the unit is old and in frequent need of service, replacement may be more cost-effective in the long run.
Only replace if repairs are not cost-effective or the unit is very old.
Watch Video
Top Takeaways
- Identify whether E5 is sensor-related first.
- Start with safe, non-invasive fixes before component replacement.
- Document tests and readings for quicker professional diagnosis.
- Budget for parts and labor with ranges before scheduling service.