Bosch E02 Error Code Dishwasher: Complete Troubleshooting Guide
Urgent guide to diagnose and fix the Bosch E02 error code on dishwashers. Learn symptoms, diagnostic flow, step-by-step repairs, safety tips, and prevention strategies for 2026.

Bosch E02 on a dishwasher signals a water-fill fault. The machine isn’t getting or detecting water properly during the fill, which stops the cycle for safety. Quick fixes include opening the shutoff, cleaning the inlet screen, and reseating the door latch. If the error persists, follow the diagnostic flow and perform the step-by-step repair outlined below. Consider replacing the inlet valve if tests show it’s not energizing correctly, or consult a pro for high‑level checks.
What the Bosch E02 Error Code Means
The Bosch e02 error code on a dishwasher signals a problem with water filling. In many Bosch dishwashers, E02 indicates the appliance detected an issue with water entering or a stall in the fill process. This is a safety-sensitive fault; the machine halts to prevent damage or overflow. If you’re troubleshooting the Bosch e02 error code dishwasher, start with the simplest checks: water supply, inlet screen, and a basic reset. While some causes are purely mechanical, others involve the control board misreading sensor data. Accurate diagnosis reduces downtime and prevents unnecessary parts replacement.
Quick Fixes You Can Try Right Now
Before opening the case, unplug the unit and turn off the water supply to avoid leaks. Then perform these quick checks:
- Confirm the shutoff valve is fully open and the supply hose is not kinked or crushed.
- Inspect the inlet filter/screen for debris; clean with a soft brush and rinse thoroughly.
- Re-seat the door latch and ensure the latch acknowledges closed; a loose latch can fool the level sensor.
- Reset the dishwasher by power cycling: unplug for 60 seconds, then plug back in and start a short test cycle. If the fault persists, proceed to the diagnostic flow and the step-by-step repair below.
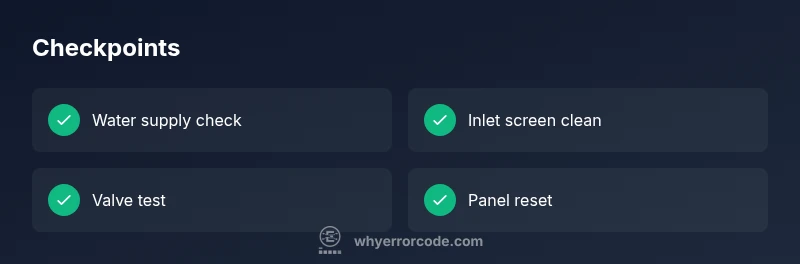
Diagnostic Flow: Symptoms, Causes, and Fixes
This section guides you through a practical flow to pinpoint E02.
- Symptom: Dishwasher displays E02 during fill and stops mid-cycle.
- Likely causes (ordered by probability): Water inlet valve or screen blockage (high), inadequate water supply or kinked hose (high), door latch or level-sensor fault (low).
- Fixes (aligned to causes): Clean or replace inlet screen and inspect valve (easy); Ensure water supply is unobstructed and hose is straight (easy); Replace faulty latch or sensor if needed (hard).
Step-by-Step Fix: Replacing or Resetting Faults
- Power down and secure water supply. Unplug the dishwasher, turn off the water valve, and disconnect power to prevent shorts while you inspect the inlet assembly. Tip: Have a towel ready and photograph connections for reassembly.
- Access the inlet area and inspect the screen. Remove the toe-kick or access panel per model guidance. Clean the inlet screen and check for debris or mineral buildup; reinstall carefully. Tip: Use a soft brush to avoid scratching the valve.
- Check the water supply and hose integrity. Open the faucet fully and verify steady flow. Inspect the inlet hose for kinks, bulges, or crushed sections; replace if damaged. Tip: Detach and run water through the hose to confirm adequate flow.
- Test or replace the inlet valve. With the unit powered off, test the valve coil resistance using a service manual as reference; if out of spec, replace the valve. Tip: Only perform electrical tests if you’re trained; consider a pro for safety.
- Reset and run a test cycle. Reassemble panels, plug in, restore water supply, and run a brief cycle to observe fill behavior. Tip: Listen for the valve energizing and watch the water level gauge.
- Evaluate the door latch and level sensor. If the unit still reports E02, the level switch or door latch circuit may be faulty. Test with a multimeter or compare against the service manual; replace if necessary. Tip: After any sensor replacement, run multiple test cycles to confirm stability.
- When to call a professional. If you’re uncomfortable with electrical testing or the fault persists after these steps, a certified technician can diagnose control-board issues or sensor faults with specialist tools. Estimated time: 60–90 minutes.
Other Possible Causes and Their Fixes
While water-fill faults are most common, several other issues can trigger E02 or similar symptoms. Address these with caution and best-practice safety:
- Blocked inlet screen or filter: Clean or replace to restore proper flow. Fix is easy and cost-effective.
- Kinked or blocked supply hose: Straighten or replace the hose; ensure fittings are tight to prevent leaks.
- Faulty float switch or level sensor: Test using the service manual; replace if readings are out of spec. This is typically a moderate-difficulty repair.
- Control board communication error: Resetting or updating firmware isn’t always possible; professional diagnosis is often required. This is a hard fix and may involve replacement of complex modules.
Safety, Warnings, and When to Call a Pro
E02 faults can involve electrical components and water supply, so safety must come first. Always unplug the unit before any inspection and shut off the home water supply. Wear eye protection if you disassemble parts that could release pressurized water. If the appliance is under warranty, consult the manufacturer’s service page to avoid voiding coverage. If you encounter wiring, high-voltage components, or uncertain readings, contact a professional. Cost-wise, expect a broad range depending on parts and labor, from low hundreds to mid-hundreds.
Prevention Tips to Avoid E02 in the Future
Consistent maintenance reduces the likelihood of E02 recurrences. Implement these routines:
- Clean the inlet screen monthly or after mineral buildup; a clogged screen is a common cause.
- Inspect hoses for kinks or crushing, especially after relocation or installation.
- Verify the water supply valve stays fully open; install a shutoff valve with a secure handle and label it clearly.
- Run a short cleaning cycle every few weeks to keep the fill system and sensors calibrated. Regular maintenance reduces unexpected downtimes.
Steps
Estimated time: 60-90 minutes
- 1
Power down and secure water supply
Unplug the dishwasher, shut off the water valve, and disconnect power to prevent shorts while you inspect the inlet assembly. This minimizes risk and protects components during inspection.
Tip: Keep a towel handy; take photos of your connections for reassembly. - 2
Access the inlet area and inspect the screen
Remove the toe-kick or access panel per model guidance. Locate the water inlet valve and screen; remove, clear debris, and inspect for signs of wear. Reassemble with firm, even connections.
Tip: Avoid forcing parts; use the service manual if available. - 3
Check water supply and hose integrity
Turn on the faucet to verify a steady flow. Inspect the inlet hose for kinks, crushing, or leaks; replace if any damage is found. Reconnect hose securely to valve and sump.
Tip: Run water through the hose before reconnecting to ensure clean flow. - 4
Test or replace the inlet valve
If you have electrical testing skills, measure coil resistance with a multimeter according to the service manual. If readings are out of spec, replace the valve; otherwise consider professional service.
Tip: Power off and discharge capacitors before testing; safety first. - 5
Reset and run a test cycle
Reconnect all components, restore power, and run a short cycle to observe fill behavior and confirm the valve is energizing.
Tip: Listen for the valve and watch the fill level during the cycle. - 6
Evaluate door latch and level sensor
If the error persists, test the door latch circuit and level sensor. Replace any faulty components following the service manual.
Tip: A misreading sensor can simulate an E02 error even with proper water supply. - 7
When to call a professional
If you’re uncomfortable with live electrical work or the fault persists after these steps, a certified technician can diagnose complex issues like control-board faults.
Tip: Ask for a fixed-price diagnostic to control costs.
Diagnosis: Dishwasher displays E02 error code during the fill stage and stops mid-cycle
Possible Causes
- highWater inlet valve or screen blockage
- highInadequate water supply or kinked hose
- lowDoor latch or level sensor fault
Fixes
- easyClean the inlet screen and inspect the valve for debris; reassemble
- easyVerify water supply is open and hose is straight; replace if damaged
- hardReplace faulty inlet valve or repair/replace door latch level sensor
Frequently Asked Questions
What does the Bosch E02 error code mean on a dishwasher?
E02 typically indicates a water-fill fault, meaning the dishwasher either isn’t receiving water or isn’t detecting a proper fill. It halts the cycle to prevent overflow or miswashing. Always start with the water supply, inlet screen, and a reset before progressing to more advanced checks.
E02 means a water-fill fault. Check the water supply, inlet screen, and reset the unit before moving on to more complex repairs.
Can I fix E02 myself at home?
Yes for basic checks like water supply and inlet screen cleaning. Some fixes, such as replacing the inlet valve or sensor, require electrical work and may necessitate a professional. Always disconnect power and water before starting.
You can attempt basic checks at home, but more complex parts may need a pro. Always unplug and shut off water first.
How much does it cost to fix E02 on a Bosch dishwasher?
Costs vary widely based on the part and labor. Typical repairs range from a low hundreds up to several hundred dollars, with more complex valve or control-board replacements potentially higher. Get a written diagnostic to estimate costs before proceeding.
Costs vary, usually from the hundreds; a professional diagnostic helps pin down parts and labor.
How do I reset the E02 error on a Bosch dishwasher?
Start with a simple reset: unplug the machine for about a minute, then plug it back in and run a test cycle. If the code reappears after a reset, you likely have a hardware issue requiring inspection of water inlet, sensor, or control board.
Unplug it for a minute, plug back in, and run a test cycle to reset. If it comes back, you may need a hardware check.
Is E02 always a water issue?
Not always. While E02 most often points to a water-fill fault, sensor or door latch issues can trigger similar symptoms. A proper diagnostic flow helps confirm the exact cause.
Usually water, but sensors or the door latch can cause the same error code.
When should I replace the dishwasher instead of repairing it?
If faults recur after multiple repairs, especially with the control board or sensors, replacement may be more cost-effective. Compare the repair estimate to the price of a new unit and consider age, energy efficiency, and warranty.
If repairs keep failing and the unit is old or inefficient, replacement might be smarter.
Does Bosch recall affect E02 issues?
Recall status varies; check Bosch support or your country’s appliance recall database. A recall could cover related components like the inlet valve or sensors, potentially simplifying repair options.
recalls vary; check Bosch support for specifics on E02-related recalls.
Watch Video
Top Takeaways
- Identify whether the E02 is water-related or sensor-related
- Start with simple checks: water supply, filter, and reset
- Follow the diagnostic flow to isolate the fault
- Use step-by-step repairs for common fixes
- Consult a professional for complex or repeated issues