Carrier Infinity Error Code 41 Troubleshooting Guide
Urgent guide for diagnosing and fixing Carrier Infinity error code 41, with quick fixes, a diagnostic flow, step-by-step repairs, safety tips, and prevention strategies for professionals and homeowners.

Carrier Infinity error code 41 signals a communications fault between the thermostat and the outdoor unit. It’s most often caused by loose or damaged wiring, a degraded connector, or a failing control board. The quickest response is to power down, reseat or replace connectors, and verify the harness is intact; if the problem persists, call a licensed HVAC tech for a high‑voltage check.
What the carrier infinity error code 41 Means
According to Why Error Code, carrier infinity error code 41 indicates a communication fault between the thermostat and the outdoor unit. This is not merely a sensor glitch; it blocks the control system from coordinating temperature setpoints, compressor cycling, and safety interlocks. The fault typically originates in the data link that ties the indoor air handler, outdoor condenser, and thermostat together. In most cases, a simple wiring or connector issue is enough to restore operation, but deeper failures in the control board can also trigger this code. For developers and technicians, recognizing this as a communication fault helps focus troubleshooting on harness integrity, connector continuity, and the health of the communication bus rather than chasing random sensor errors.
The Why Error Code team emphasizes that this code often emerges after maintenance work, a repaint or relocation of components, or a minor power fluctuation. Because the system’s safety features rely on reliable signaling, even a small intermittent contact can cause the unit to refuse to start or to shut down unexpectedly. Early, careful inspection is key to avoiding unnecessary part replacements. In short, treat Code 41 as a sign of a compromised data link rather than a single failed component.
Common Symptoms You Might Notice
When carrier infinity error code 41 is active, you’ll typically see a combination of symptoms indicating communication breakdown rather than a straightforward mechanical fault. The thermostat display may show the 41 code or a general fault indicator, and the outdoor unit may not respond to setpoint changes. You might hear the outdoor fan attempt to start but quickly stop, or experience frequent short cycles where the system tries to run but immediately falls into a fault state. Some users report a temporary recovery after a power reset, only for the code to reappear later. Clues such as a stubborn control panel, unresponsive commands, or inconsistent temperatures often point to a signaling problem rather than a pure utility or refrigerant issue.
If you have access to the control wiring diagram for your Carrier Infinity system, you can visually inspect the thermostat-to-outdoor harness. Look for loose wires, discoloration at terminals, or hardened insulation that could cause poor contact. Don’t ignore the most obvious problem: a disconnected or loose wire is the easiest fix and often the quickest path to restoring system operation.
Quick Fixes You Can Try Right Now
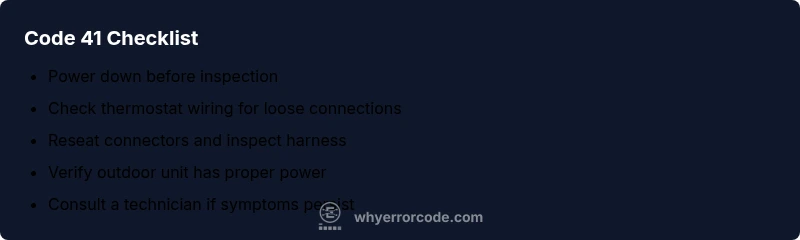
- Power down the system at the service disconnect and the main breaker to ensure all stored energy is released. Wait at least 60 seconds before re-energizing.
- Check the thermostat wiring at both ends for loose or damaged conductors. If a wire is loose, reseat it firmly and secure with the proper terminal screw.
- Inspect the conductor harness and connector blocks for corrosion, bent pins, or melted insulation. If you encounter damaged pins or degraded connectors, replace the affected component or harness.
- Verify the outdoor unit disconnect is on and that the outdoor unit is receiving 24 VAC from the thermostat circuit when the system is commanded to run. A voltage irregularity can trigger signal faults.
- After reseating connectors and securing terminals, restore power and monitor the system. If the code returns, note any recurring patterns (time of day, weather, or thermostat commands) to guide the next steps. If you’re unsure about high‑voltage checks, contact a pro immediately.
These quick fixes address the most common causes and are designed to be performed by homeowners with basic safety training. Always prioritize safety and err on the side of professional inspection if anything seems uncertain.
Diagnostic Flow: From Symptoms to Solutions
Understanding the logical flow helps you narrow the root cause efficiently. Start with the symptom: a thermostat-communication fault (Code 41) typically indicates a link problem rather than a pure component failure.
-
Potential causes (high likelihood to low):
- Loose or damaged thermostat-to-outdoor wiring (high)
- Faulty connector blocks or corrosion at terminals (medium)
- Control board malfunction in the outdoor or indoor unit (low-to-medium)
- Power supply instability or voltage fluctuations (low)
-
Initial fixes: reseat connectors, replace damaged wires, and verify the 24 VAC supply is stable when commanded to run. If the problem persists, progress to targeted component testing or professional diagnostics. The diagnostic path emphasizes validating connections first because this is the most common, least invasive fix that can rapidly resolve Code 41.
Step-By-Step Fix for the Most Common Cause: Loose or Damaged Wiring
- Power off at the breaker and the thermostat to ensure no live circuits. Wait 60 seconds for residual energy to dissipate.
- Open the thermostat enclosure and the outdoor unit access panels. Inspect the thermostat cable and field wiring for damaged insulation, frayed conductors, or pinched wires.
- Reseat all thermostat-to-outdoor connectors. Ensure each pin is fully inserted and seats with a decisive click; if a terminal is loose, tighten the screw clamp.
- Clean any corrosion from terminals with a dry brush or contact cleaner recommended by the manufacturer. Do not use metal tools that could abrade the contact surface.
- Replace any visibly damaged wires or connectors. Use exact replacement parts that match the wire gauge and color code. Re-secure the harness with strain reliefs to prevent future movement.
- Reassemble panels, restore power, and test the system. If the code persists, perform a controlled restart sequence (thermostat off, then back on) and monitor for reoccurrence. If unresolved, proceed to diagnosing the control board or contact a professional for a deeper fault analysis.
Tip: Document the exact wiring routing and terminal locations before disassembly; this makes reassembly reliable and reduces the risk of miswiring on reassembly.
Other Causes and How to Address Them
Beyond wiring, the code can be triggered by issues within the control architecture or the power supply. A failing outdoor control board can disrupt the signaling path, and a faulty indoor board can also generate misalignment between sensing and actuation. Sensor calibration or timing issues may mimic a communication fault, especially after a component replacement or firmware update. If the control boards show signs of scorch marks, bulging capacitors, or abnormal heat, treat them as potential failure points that require professional diagnosis. Power supply irregularities, such as unstable line voltage or short-term outages, can also trigger intermittent communication faults and should be ruled out with a multimeter and proper safety procedures by a qualified technician.
Safety, Warnings, and When to Call a Pro
Working with electrical components and high-voltage controls carries risk. Always shut off power at the breaker before inspecting any wiring, and confirm there is no residual voltage in the circuit. If you notice burning smells, melted insulation, or exposed conductors, stop immediately and call a licensed HVAC technician. When in doubt about your own ability to safely perform diagnostic steps, it’s prudent to seek professional help. A pro will have the proper tools to test the 24 VAC control circuit, verify the integrity of the control boards, and perform a safe, code-compliant repair.
Prevention Tips to Avoid Code 41 in the Future
- Schedule regular inspection of thermostat wiring and terminal blocks during maintenance visits.
- Keep the indoor and outdoor wiring harnesses routed away from areas with high heat, moisture, or vibration.
- Use the manufacturer’s recommended connectors and replacement parts to ensure compatibility.
- Perform annual checks of power supply stability and voltage with appropriate electrical safety practices.
- Update thermostat firmware if applicable, and document any system changes that could affect communication protocols.
- Train users to avoid moving components or loosening panels during routine cleaning or seasonal maintenance.
Steps
Estimated time: 60-120 minutes
- 1
Power Down Safely
Turn off the breaker feeding the thermostat and outdoor unit. Wait for at least 60 seconds to discharge residual energy, then proceed with inspection. Safety is the priority when handling electrical components.
Tip: Always use a non-contact voltage tester first to verify the circuit is de-energized. - 2
Inspect Wiring and Harness
Open the thermostat and outdoor unit access panels. Look for visibly damaged insulation, frayed wires, or kinked cables. Document any issues before making changes.
Tip: Do not pull on wires; gently tug to test for looseness at the connectors. - 3
Reseat Connectors
Disconnect and reconnect each terminal, ensuring a firm seat and no gaps. For multi-pin connectors, confirm pin alignment before reattachment.
Tip: If a connector pin is bent, replace the connector rather than forcing it into place. - 4
Clean and Replace**, if Needed
Clean any corrosion with appropriate cleaner and replace any damaged terminals or wires with OEM parts. Re-inspect after reassembly for secure finishes.
Tip: Use insulated tools and wear safety glasses when working near metal terminals. - 5
Power Up and Test
Restore power and command a test cycle from the thermostat. Observe whether the system engages normally or if the 41 code returns.
Tip: If the code persists, note the exact sequence of events to aid professional diagnostics. - 6
Escalate if Necessary
If you still see Code 41 after wiring fixes, proceed to a professional inspection for potential board-level faults or power-supply issues.
Tip: Professional diagnostics can quickly determine if the board or harness requires replacement.
Diagnosis: Carrier Infinity thermostat displays error code 41 and system fails to operate
Possible Causes
- highLoose or damaged thermostat-to-outdoor wiring
- mediumFaulty connector blocks or corrosion at terminals
- lowControl board malfunction in the outdoor or indoor unit
Fixes
- easyReconnect wiring and reseat connectors; replace damaged cables
- easyClean or replace corroded terminal blocks and secure harnesses
- hardTest and possibly replace control boards if no wiring issue is found
Frequently Asked Questions
What does Carrier Infinity error code 41 mean?
Error 41 signals a communication fault between the thermostat and outdoor unit. It usually stems from wiring, connectors, or a control board issue rather than a simple sensor fault.
Error 41 means the thermostat and outdoor unit aren’t communicating properly. It’s often caused by wiring or connector problems, or a faulty control board.
Is error code 41 dangerous to ignore?
Ignoring Code 41 can lead to repeated system faults and potential overheating or compressor issues. It’s wise to diagnose promptly and address wiring or board faults before continuing operation.
Code 41 isn’t dangerous by itself, but ignoring it can cause further equipment stress. Diagnose and fix wiring or board faults quickly.
Can I fix Code 41 myself?
You can perform basic checks like reseating connectors and inspecting visible wiring if you’re comfortable with electrical work. For any signs of damaged harnesses or control boards, or if high voltages are involved, hire a licensed technician.
You can try reseating connectors and checking wires if you’re comfortable with electrical work. For damaged parts or high voltages, call a pro.
What tools do I need for basic diagnostics?
Basic hand tools, a non-contact voltage tester, and manufacturer wiring diagrams are helpful for safely inspecting connections. Avoid using metal probes on live terminals.
A screwdriver, non-contact voltage tester, and the system diagram are handy for safe repairs.
How long does a typical repair take?
A simple wiring reseat and connector replacement can take about 60–120 minutes. If boards or power supply require testing or replacement, time can extend and may require a service visit.
Simple fixes usually take about one to two hours, while board work may take longer.
Watch Video
Top Takeaways
- Identify Code 41 as a communication fault, not just a sensor error
- Start with wiring and connectors before assuming board failure
- Power down completely before any inspection or repair
- Call a pro if you encounter uncertainty or high-voltage concerns