Electrolux Refrigerator H1 Error Code: Quick Fixes and Diagnostics
Diagnose and fix the Electrolux refrigerator H1 error code quickly with a practical, user-friendly guide from Why Error Code. Learn quick fixes, common causes, safety tips, and typical repair costs to get your fridge back to optimal cooling.

An H1 error code on Electrolux refrigerators signals a general fault detected by the control system. It’s commonly caused by a door switch, sensor, wiring harness, or control board issue. Start with a power reset and reseat connectors, then inspect the door switch. If the code persists, power down and contact a professional. Expect diagnostic time and parts to cost roughly $100–$350.
What the electrolux refrigerator h1 error code means
The electrolux refrigerator h1 error code is a general fault indicator displayed by modern Electrolux control systems. It typically means something is malfunctioning in the sensing or control loop that keeps the unit cold and safe. Because the display can be tied to multiple subsystems, the exact cause varies by model and production year, so a systematic approach is essential. The urgency comes from food safety and energy efficiency: ignoring the code can lead to warmer temperatures inside the compartment, higher energy use, and potential frost or ice buildup. In most cases, the H1 fault points to a door switch or sensor, a wiring harness, or the main control board. A careful sequence of tests can reveal the culprit without unnecessary part swaps. Throughout this guide, we use the phrase electrolux refrigerator h1 error code to keep the focus on diagnosis that applies across common models.
According to Why Error Code, starting with a safe reset is a smart first step. Power cycling clears transient faults and retrains the system. If the error reappears, move to hardware checks that do not require specialized tools. The goal is to isolate whether the issue is mechanical (door, seal, hinges), electrical (connections, sensors), or digital (control logic). This approach keeps you in control and minimizes downtime while you fix the problem.
Top Causes Behind the H1 Fault on Electrolux Appliances
When you see the H1 fault, prioritize the most likely culprits first: door switch or door ajar sensor failure, a loose or damaged wiring harness to the control board, a faulty temperature sensor or thermistor, and finally a control board fault. Environmental factors such as a dirty or misaligned door seal can trigger the door switch or sensor readings, creating persistent error codes. Each cause has telltale symptoms you can check without opening up the entire system. For example, a door switch problem may manifest as the display flashing when the door is closed, or a door that feels looser than normal. A bad thermistor often results in inconsistent temperatures between compartments. In any case, document the observed symptoms before making changes so you can communicate clearly with a technician if needed.
Diagnostic Steps You Should Follow
A structured diagnostic flow keeps you from guessing. Start with basic safety first: unplug the unit or switch off the circuit breaker before probing any internal parts. Observe the display for any accompanying fault codes or temperature warnings. If H1 remains, check the door switch operation by manually pressing the door latch and listening for a click; a non-responsive switch is a common source. Inspect visible wiring harnesses at the rear panel, looking for loose connectors, frayed insulation, or detached plugs. If you have a multimeter, test the door sensor resistance and the thermistor values against the manufacturer’s specs. Finally, power cycle the fridge again and monitor behavior for 24 hours to confirm stability. This flow aligns with Why Error Code's recommended diagnostics for electrolux refrigerator h1 error code scenarios.
Quick Fixes You Can Try Now (Safe, Non-Invasive)
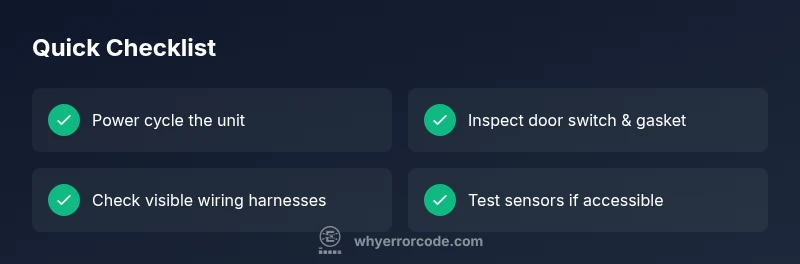
- Power cycle the refrigerator: unplug for 5–10 minutes, then plug back in to reset the control board. This is a quick fix that clears transient faults.
- Inspect the door switch and gasket: ensure the door latches fully and that the switch is not stuck or damaged. A misaligned door can trigger false H1 codes.
- Check visible wiring: look for loose connectors or damaged insulation around the rear panel. Reseat any loose plugs carefully and avoid forcing connectors.
- Verify sensor connections: if you notice loose sensor leads or corrosion on connectors, reconnect or replace as appropriate. Re-test after a full power cycle.
- Document symptoms: note temperature variances, frost patterns, or water leaks. This helps if you need professional support later.
If the H1 error reappears after these steps, it’s time to move to deeper diagnostics or professional service. These quick fixes reduce downtime and protect your food from spoilage while you plan the next steps.
Deeper Troubleshooting and When to Seek Help
If the quick fixes fail to clear the H1 error, the issue is more likely related to a sensor, control board, or wiring harness problem. A malfunctioning control board can cause broad temperature regulation issues, while sensor or thermistor faults produce inconsistent readings and fluctuating temperatures. In many cases, replacement of a damaged component is required. Because these parts are critical to food safety and energy efficiency, consider scheduling service if you cannot confidently isolate the root cause. If you are comfortable, you can attempt a controlled component swap, such as replacing a faulty door switch or a damaged wiring harness, but avoid high-voltage work unless you are trained. Expect a service call to cost in the general range for kitchen appliance repair, with variation by model and locale. This section expands on the diagnosticFlow to help you reason through every plausible scenario for the electrolux refrigerator h1 error code.
Safety First: Tips and Warnings
- Never operate the fridge with exposed wiring or a damaged power cord. Unplug before inspection.
- Use insulated tools if you must touch energized components and avoid metal jewelry around electrical panels.
- If you smell burning plastic, hear buzzing, or notice overheating, stop and call a pro immediately.
- Document all symptoms with dates and temperatures to support the service technician.
- Understand that some repairs may require parts replacement or panel access that should be performed by qualified technicians.
These cautions help prevent personal injury and further appliance damage while handling an electrolux refrigerator h1 error code.
Prevention and Maintenance: Keeping H1 Errors Away
- Regularly clean the door seals and gaskets to prevent misalignment that triggers door switches.
- Periodically inspect wiring harness connections for corrosion or looseness.
- Schedule preventive maintenance checks to test sensors and the control board before failures occur.
- Keep the condenser coils free of dust; poor cooling can amplify fault signals and lead to cascading errors.
- Maintain a stable power supply and use a surge protector to shield sensitive electronics from spikes.
With proactive maintenance, you reduce the likelihood of H1 errors and extend the life of your Electrolux refrigerator.
Wrap-Up: Quick Reference for electrolux refrigerator h1 error code
- H1 is a general fault indicator; diagnose from the easiest to the most complex causes.
- Start with a safe reset and door switch checks; move to wiring and sensors if needed.
- If the problem persists, plan for professional diagnosis and potential part replacement.
- Keep detailed notes and consider proactive maintenance to prevent future faults.
- Costs vary by model and region, but plan for diagnostic and repair costs within the typical appliance service range.
Steps
Estimated time: 30-45 minutes (for quick checks) plus potential service time
- 1
Power cycle the unit
Unplug the refrigerator for 5–10 minutes to reset the control board. Plug back in, allow 5 minutes for initialization, and monitor for the H1 code return.
Tip: Label the unplug time to verify the reset interval. - 2
Inspect the door switch
Locate the door switch behind the gasket; press it manually to ensure it clicks and returns. If the switch is sticky or unmoving, replace or adjust the mechanism.
Tip: A misaligned door can mimic a switch failure. - 3
Check wiring harnesses
Power down again and peek behind the back panel for loose or damaged connectors. Reseat any that are loose, and look for frayed insulation.
Tip: Only handle plugs with dry hands and unplug before touching metal parts. - 4
Test sensors where accessible
If you can access the thermistor or temperature sensor, compare resistance readings to the manufacturer spec or service manual. Replace if readings are out of range.
Tip: Keep track of readings in a notebook for the technician. - 5
Decide on professional service
If H1 persists after the above steps, schedule a service visit for control board inspection or replacement as needed.
Tip: Request a written estimate and confirm warranty applicability.
Diagnosis: Display shows H1 fault, fridge not cooling evenly
Possible Causes
- highDoor switch or door ajar sensor failure
- mediumLoose or damaged wiring harness to the main control board
- lowFaulty temperature sensor or thermistor
- lowControl board malfunction
Fixes
- easyPerform a full power cycle by unplugging for 5-10 minutes, then plug back in
- easyInspect and reseat door switch and door gasket for proper alignment
- easyCheck visible wiring harnesses; reconnect loose connectors and inspect for damage
- mediumTest or replace the door temperature sensor/thermistor if accessible
- hardIf no improvement, consult a technician for control board assessment or replacement
Frequently Asked Questions
What does the H1 error code indicate on an Electrolux refrigerator?
H1 is a general fault indicator from the control system. It often relates to the door switch, sensors, wiring, or the main control board. A systematic check can identify the exact cause without unnecessary repairs.
H1 is a general fault indicator. Start with a safe reset, check the door switch, then inspect wiring and sensors. If it persists, contact a professional.
Can I fix H1 myself safely?
Some quick fixes, like power cycling and door switch inspection, are safe for a DIY approach. Deeper issues involving the control board or wiring should be handled by a technician to avoid injury or further damage.
You can try simple resets and door checks, but serious fixes should be done by a pro.
What are typical costs for diagnosing and repairing H1?
Diagnostics and common repairs for H1 usually fall in a broad range depending on the part and labor. Plan for a service visit and potential part replacement to stay within a general cost band.
Expect a service call plus parts; prices vary by model and region.
How long does Electrolux service typically take for H1 issues?
A diagnostic visit often takes 30–60 minutes, with additional time for any required part replacement or repairs. Scheduling may depend on technician availability.
Diagnostics usually take about an hour; repairs can take longer if parts are needed.
Is H1 a sign of a dangerous electrical problem?
H1 can indicate an electrical fault, but not necessarily dangerous. Do not ignore it, and avoid using the unit if you notice burning smells, overheating, or a buzzing sound.
It can be electrical; avoid risky operation and call a pro if worried.
Watch Video
Top Takeaways
- Identify H1 as a general fault code with multiple potential causes.
- Start with a safe power reset and door switch checks.
- Inspect wiring and sensors before replacing major components.
- Call a professional if the code persists after quick fixes.
- Maintain regular maintenance to reduce risk of future H1 errors.