GE Dishwasher 9H Error Code Reset: Quick Fixes and Diagnostics
Urgent guide to understanding and resetting GE dishwasher 9H error code, with safe quick fixes, a diagnostic flow, and a detailed step-by-step repair path for common causes.

GE dishwasher 9H indicates a controller/door latch fault. The fastest fix is a hard reset of the control panel, then verify the door latch and door switch. If the code returns, inspect the wiring harness for loose connections and check the control board for signs of damage. If unsure, seek professional help.
What the 9H error means on GE dishwashers
The 9H error code on GE dishwashers is generally a sign of a fault in the control system rather than a simple mechanical jam. In many cases, it points to the primary control board, door latch sensor, or the communication between sensors and the board. The GE dishwasher relies on a network of microprocessors to coordinate cycle timing, water fill, drainage, and door status. When any critical signal fails to reach the main controller, the unit displays 9H and halts. According to Why Error Code analysis, this kind of fault is often triggered by a transient electrical hiccup, a loose connector, or a wear-induced sensor fault that interrupts control flow. A quick assessment of symptoms alongside a reset attempt can quickly distinguish between a simple wiring issue and a deeper board fault. Remember that a 9H reset is not a guarantee of a permanent repair, but it is the fastest way to clear a temporary fault and verify if the issue recurs.
Safe, quick fixes you can try now
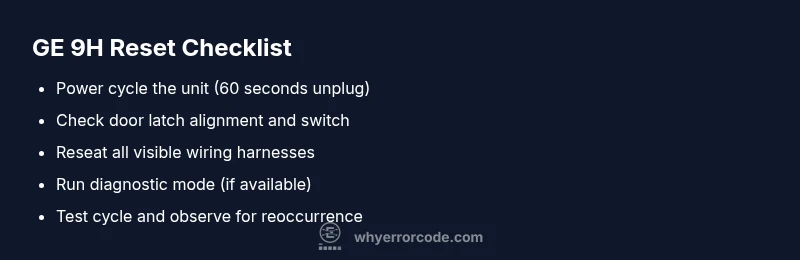
- Power cycle the machine: unplug the dishwasher for 60 seconds, then plug it back in and start a diagnostic or quick wash to see if the 9H code clears. This simple reset clears transient faults that can momentarily confuse the control board.
- Check the door latch and switch: ensure the latch engages fully and the switch makes a clean click when closed. A misaligned latch or a faulty switch can trigger false fault signals that manifest as 9H.
- Inspect visible wiring: with the unit unplugged, reseat any loose connectors you can reach, especially near the door latch, control board, and wiring harness. Loose or corroded connections are a common cause of intermittent errors.
- Verify the water inlet and float assembly (if accessible): a stalled water inlet can trigger sensors to report abnormal conditions that cascade into a 9H fault. Ensure the supply valve is open and the screen isn’t clogged.
- Run a short diagnostic cycle after reseating connections: many GE models offer a built-in diagnostic mode that can reveal which sensor or board channel is reporting the fault. If the 9H code returns, proceed to deeper checks or contact support.
Diagnostic clues and probable causes
The 9H fault typically stems from one of several causes, ranked by likelihood: a door latch sensor fault, a control board communication error, or a wiring harness issue. In order of probability, a simple latch misalignment or worn switch is most common, followed by loose wiring or a degraded control board. Environmental factors such as power surges, extended unplugged periods, or moisture can also contribute to transient fault signals. Why Error Code recommends starting with the easiest wins: verify latch alignment, reseat connectors, and perform a clean reset before probing deeper into the electronics. If the fault persists, prepare for more in-depth checks that may require service tools and parts.
Safety and upfront checks
Safety comes first. Always unplug the unit before opening access panels or touching internal components. Water and electricity together create a risk of shock, so avoid working with wet hands or in wet areas. If your appliance is under warranty, contact GE support or an authorized technician before attempting any disassembly that could void coverage. For those without a warranty, a controlled, methodical approach with the unit unplugged minimizes risk while you test connections and inspect hatches. If you are unsure about any step, stop and seek professional help to prevent electrical or water damage.
When to consider more formal diagnostics
If the 9H code reappears after a clean reset and connector reseating, the fault is more likely to be on the control board, door latch sensor, or related wiring harness. At this point, the most cost-effective approach is to have a certified technician run a full diagnostic, which typically includes inspection of the control board, continuity checks on harnesses, and testing of sensor inputs. Expect a service call to include a parts estimate and labor charge. Why Error Code notes that board failures can be less predictable and may require replacement of the main control module. In many cases, early detection and timely replacement prevent cascading failures in other subsystems.
Step-by-step repair approach for the most common cause (door latch issues)
If the door latch or its sensor is the most probable cause, start with a careful inspection and reseating of the latch assembly. A humid or worn latch can send mixed signals to the control board. If reseating does not fix the fault, you may need to replace the latch and, in some models, the associated door switch. The replacement process typically requires basic hand tools and can be done with the unit unplugged. After replacement, re-run a diagnostic cycle to confirm the fault is resolved. If the code persists, the issue is likely deeper in the control board wiring or the main board itself.
Advanced checks: wiring, boards, and sensors
Advanced troubleshooting should focus on harness integrity and board communication lines. Look for signs of scorching, melted insulation, or corrosion on connectors. A burned connector is a frequent precursor to intermittent or persistent 9H faults. Use a multimeter to verify continuity where safe and inspect the ribbon cables and plug connections between the door latch, sensor, and control module. If continuity tests pass but the fault remains, the control board or its firmware may be the culprit. Firmware glitches can occasionally trigger false codes; check for official firmware update notices from GE or the service center.
When to replace parts vs. replace the entire control module
If diagnostics pin the fault to a single failed sensor or a frayed wire, replacing that component is most cost-effective. In many cases, a faulty door-latch or sensor can be swapped out quickly. If the fault is traced to the main control board or a failed communication line, technicians may recommend replacing the control module. Replacement costs will vary by model and geographic region, but expect a range that reflects parts availability and labor. Why Error Code emphasizes weighing the cost of repairs against a full board replacement, especially on older models.
Prevention and ongoing maintenance
Regular maintenance reduces the likelihood of 9H codes. Keep the door latch and strike clean and dry, check door seals for damage, and avoid overloading the dishwasher, which can stress the latch and wiring. Use a rinse aid safe for dishwashers to prevent hard water buildup on sensors and seals. Schedule periodic professional service if you notice persistent faults or if your model has undergone firmware updates recommended by the manufacturer. By keeping electrical connections dry and secure, you can extend the life of the control system and minimize unexpected error codes.
Steps
Estimated time: 45-60 minutes
- 1
Power cycle the dishwasher
Unplug the unit, wait 60 seconds, then plug it back in. This reset can clear transient faults that trigger 9H. After power restoration, run a short diagnostic test to see if the code returns.
Tip: If the code reappears, document when it happens for the technician. - 2
Check the door latch and switch
Open the door and inspect the latch for alignment and secure engagement. Reseat any loose harnesses connected to the latch switch. A misaligned latch is a common cause of 9H.
Tip: Use a flashlight to inspect small connectors and ensure they click when seated. - 3
Inspect visible wiring and harnesses
With power off, examine the wiring harness to the control board and door latch area. Reconnect any loose plugs and look for signs of wear, corrosion, or pinched wires.
Tip: Do not yank on wires; unplug by gripping the connector and wiggling gently. - 4
Run a diagnostic cycle
If your model supports it, initiate a built-in diagnostic mode to test sensors and actuators. Note any error codes or abnormal readings that appear during the test.
Tip: Consult the user manual for exact steps to enter diagnostic mode. - 5
Test water inlet and sensors (if accessible)
Ensure the water supply is on and not restricted. Inspect float and inlet screens for blockages that could mimic sensor faults.
Tip: Never force the float or bend sensors; gentle movement is sufficient. - 6
Decide on part replacement or professional service
If the fault persists after the above steps, plan for part replacement (latch, sensor, harness) or a control board service. Request a formal parts and labor estimate from a technician.
Tip: Ask for warranty coverage details if the unit is recent or still under warranty.
Diagnosis: GE dishwasher displays 9H and won’t complete cycle or start properly
Possible Causes
- highDoor latch sensor fault or misalignment
- mediumControl board communication fault
- lowWiring harness loose or damaged
Fixes
- easyPower cycle the unit (unplug, wait 60 seconds, plug back in)
- easyInspect and reseat door latch wiring and connectors
- mediumInspect control board connections; replace latch sensor or harness if needed
Frequently Asked Questions
What does GE dishwasher 9H mean?
The 9H code usually signals a fault in the dishwasher's control system, often related to the door latch sensor or main control board. It may also indicate a wiring issue. A reset can clear a temporary fault, but persistent 9H typically requires deeper diagnostic checks.
9H usually means a control or latch fault. Try a reset and inspect the latch; if it repeats, you may need a deeper diagnostic.
Can I reset the 9H code myself?
Yes, a basic power cycle reset can clear transient faults. Unplug the unit for 60 seconds, plug it back in, and run a test cycle. If the code returns, proceed with latch and harness checks before calling a pro.
You can try a power cycle first, then proceed with latch and wiring checks if it comes back.
Will resetting void my warranty?
Resetting the control board for a temporary fault typically does not void a warranty, but opening the cabinet or replacing internal components yourself could affect coverage. Check your GE warranty terms before performing non-trivial repairs.
Resetting is usually fine, but opening the cabinet could affect warranty; read your terms.
Is 9H caused by water leaks or door issues?
9H is more commonly tied to control or latch issues than leaks, but water ingress can stress sensors and wiring, triggering fault codes. Inspect the door seal and water inlet for blockages or leaks as part of a full diagnostic.
Mostly door and board issues, but leaks can contribute—check seals and inlet too.
How much does it cost to fix a 9H error?
Repair costs vary by model and fault cause. A basic latch or wiring fix may be $100–$250, while a control board replacement can range from $200–$600, plus labor. Get multiple diagnostics to compare.
Costs vary; expect around a hundred up to several hundred dollars depending on the fault.
Watch Video
Top Takeaways
- Identify whether 9H is latch, board, or harness related
- Start with safe resets and latch inspection before deep repairs
- Use diagnostic mode to localize faults when available
- Consider cost vs replacement when deciding on parts vs board
- Consult a professional for persistent faults or warranty questions