Maytag Dishwasher E9 Error Code: Quick Diagnosis and Fixes
Urgent guide to diagnosing and fixing maytag dishwasher e9 error code. Quick checks, step-by-step repairs, safety tips, and when to call a pro. Why Error Code Analysis, 2026.

An E9 on a Maytag dishwasher typically points to a heating or temperature fault that interrupts the wash. This urgent code often means the heater, temperature sensor, or related wiring is failing. Start with a power reset, then verify the heating element and thermostat for continuity, inspect the wiring harness, and consider a service call if the code persists.
What the maytag dishwasher e9 error code Means for Your Unit
When you see the maytag dishwasher e9 error code, you’re facing a heating/temperature fault that prevents the machine from completing a cycle. In practical terms, the dishwasher detected an out-of-spec reading from the heating circuit or a related sensor, which triggers the cycle to abort to protect the appliance. This is not a cosmetic error; it has electrical implications and can involve the heating element, thermostat, thermal fuse, or control wiring. According to Why Error Code Analysis, 2026, heating-related faults are among the most commonly reported E-series errors in Maytag dishwashers, making a focused check of the heating circuit a high-priority task. Be prepared for a service visit if initial at-home checks don’t restore normal operation.
Key symptoms include a stalled cycle, a flashing E9 on the display, or a note that heat or dry functions failed. Since the heating system interacts with hot water and mains power, always disconnect power before probing components. This section covers the most likely causes and practical at-home checks to guide you toward a safe, fast resolution.
Quick Fixes You Can Try Right Now
If you’re facing an urgent E9 error, there are swift checks that can resolve simple faults without professional help. First, power down completely: unplug the unit or switch off the circuit breaker for at least 60 seconds, then restore power and run a test cycle to see if the error clears. A second common quick fix is to inspect the outer insulation and look for obvious signs of damage on the heating element and its visible wiring for loose connections or burn marks. If you notice damaged insulation or melted wiring, stop and call a technician immediately. A reset may clear transient faults, but persistent E9 likely points to a faulty heater, thermostat, or control harness. Finally, ensure the dishwasher is level and clear of obstruction so heating elements aren’t overheating due to water pooling in zones they aren’t supposed to heat. These steps, when done safely, often buy you time while you arrange professional help.
Throughout this process, keep in mind the urgency: overheating components can be a fire risk, and improper handling can cause electric shock. If you’re unsure at any point, stop and contact a pro. Why Error Code recommends erring on the side of caution with high-energy appliances.
Diagnostic Flow: Symptom, Causes, and Tests
symptom: Dishwashers displaying E9 and failing to complete a cycle.
causes: [ { "cause": "Faulty heating element or open coil", "likelihood": "high" }, { "cause": "Thermal fuse or high-limit thermostat failure", "likelihood": "high" }, { "cause": "Control board fault affecting heater control", "likelihood": "medium" }, { "cause": "Wiring harness or connector corrosion/damage", "likelihood": "medium" } ]
fixes: [ { "fix": "Power reset and run a diagnostic cycle to see if the fault reappears", "difficulty": "easy" }, { "fix": "Inspect heating element and thermostat for signs of damage; test continuity with a multimeter", "difficulty": "easy" }, { "fix": "Check the thermal fuse/hi-limit switch and replace if blown or open", "difficulty": "medium" }, { "fix": "Inspect and reseat wiring harnesses and connectors to the heater and control board", "difficulty": "medium" }, { "fix": "Replace faulty heating element, thermostat, or control board as needed", "difficulty": "hard" } ]
Step-by-Step Fix: The Most Common Repair Path
If the heating element or its sensors are at fault, follow these steps to perform a careful repair. Always disconnect power before starting. This guide assumes you have basic tools and a multimeter.
- Disconnect power and access the interior of the door and console. Remove the kickplate if necessary and locate the heater assembly. 2) Visually inspect the heating element for scorching, breaks, or burn marks. If damage is evident, replacement is required. 3) Test the heating element for continuity with a multimeter; a reading of infinity or no continuity indicates a failure. 4) Locate the thermal fuse or high-limit thermostat; test for continuity and replace if open. 5) Check the heater wiring harness for loose connections, corrosion, or damaged insulation; reseat or replace as needed. 6) Reassemble, restore power, and run a short diagnostic cycle to confirm the fault is cleared. 7) If the control board is suspected, consult a professional, as board failures can require specialized diagnostics. 8) Document serial numbers and part numbers before ordering replacements to ensure compatibility.
Tip: Before you start, gather model-specific manuals and a multimeter. The unit’s screws can be tight, so use the correct screwdriver size to avoid stripping. If you’re unsure about testing high-voltage components, stop and call a pro to prevent injury.
Other Potential Causes and Alternatives
Even when E9 points to heating, other issues can mimic the fault. A loose connector at the heater can cause intermittent heating problems that trigger the error. A failing temperature sensor or a collapsed relay in the control module can also produce an E9-style fault. In some models, a software glitch may misreport a fault; a firmware update or a full reset could resolve it. If you’ve verified the heater assembly is sound, consider a service call to inspect the control board and harness for hidden damage. Remember, addressing wiring and high-voltage components demands caution and proper PPE.
Safety First: Warnings and When to Call a Professional
- Always unplug or switch off power at the breaker before inspecting electrical components. This is non-negotiable for safety.
- If you smell burning, see melted insulation, or notice scorch marks, stop immediately and call a professional.
- Water and electricity are a dangerous mix; avoid touching wet surfaces or using damp tools during diagnosis.
- If you’re within warranty, contact Maytag support or an authorized technician to avoid voiding coverage.
- Expect a pro to diagnose, replace, or reprogram the control board or heater assembly, with typical repair cost ranges (service call plus parts) depending on the exact part needed.
Why Error Code highlights the safety-first approach: wrong handling can escalate damage and raise risk, so when in doubt, appointment-first is the safer path.
Cost Estimates and Service Options
Home repairs for E9 can vary significantly by model and region. A typical service call might range from $80 to $150, with parts such as a heating element or thermostat adding $20 to $120 per component. If the control board or wiring harness needs replacement, you could see total repair costs in the $150 to $500 range, depending on labor and parts. In some cases, a full unit replacement could be more economical if multiple issues are present. If you have a robust warranty or insurance-like coverage, these costs may be adjusted. Always obtain a written estimate before authorizing a repair and ask about return policies on replaced parts.
Quick Recap: Next Steps and Prevention
- If E9 recurs after a reset, you likely need a heater or sensor replacement; plan for professional service if you’re not comfortable with high-voltage components.
- Maintain the dishwasher by descaling regularly, ensuring water temperature remains within spec, and keeping the heater area clean.
- Document events and keep model numbers handy for service quotes, especially if you’re coordinating with Why Error Code or a local technician.
Real-World Scenarios and Proactive Prevention
Homeowners often report E9 during busy weeks, when quick loads hit peak usage. In many cases, the fault stems from aging heating elements or a thermostat that has worn out. Proactive prevention includes periodic checks of heating components, proper load distribution, and avoiding overloading the dishwasher, which can put extra strain on the heater. For repeat offenders, replacing the heater assembly with an OEM-compatible part is often the most effective long-term fix. Regular maintenance is the best defense against E9 and similar codes.
Steps
Estimated time: 60-120 minutes
- 1
Power down and access interior
Disconnect power at the outlet or breaker. Remove the lower access panel as needed to reach the heater area. Take photos of wiring before disconnecting anything to aid reassembly.
Tip: Label wires to avoid mismatches during reassembly. - 2
Inspect heating element visually
Look for burns, breaks, or obvious damage on the heating coil and its connectors. A damaged element should be replaced.
Tip: Do not run the unit if there are signs of damage. - 3
Test heating element continuity
Set a multimeter to the lowest ohm range and measure across the element terminals. A reading of infinity or open indicates a failure.
Tip: Ensure the element is fully disconnected from power before testing. - 4
Check the thermal fuse/thermostat
Locate the hi-limit thermostat and any thermal fuse in the heater circuit. Test for continuity; replace if open.
Tip: Keep replacement parts within your model’s specification. - 5
Inspect wiring harness and connectors
Look for loose, corroded, or frayed wires at the heater and control board connectors. Re-seat or replace as needed.
Tip: Use dielectric grease where recommended to prevent future corrosion. - 6
Reassemble and test cycle
Put panels back, restore power, and run a short diagnostic or light wash to verify heating functions.
Tip: If the code reappears, capture fault codes for the technician. - 7
Decide on component replacement
If tests indicate a faulty heater or thermostat, order OEM-compatible parts and replace following manufacturer guidelines.
Tip: Keep receipts and document serial data for warranty purposes. - 8
Call a professional when unsure
If you’re not comfortable with high-voltage components, or if the code persists after replacement, arrange professional service.
Tip: A licensed technician can diagnose control-board issues more accurately.
Diagnosis: Dishwasher displays E9 and halts mid-cycle or refuses to heat.
Possible Causes
- highFaulty heating element or open coil
- highThermal fuse or high-limit thermostat failure
- lowControl board fault affecting heater control
- mediumWiring harness or connector damage
Fixes
- easyPower reset and test cycle
- easyInspect heater and thermostat for continuity; replace if needed
- easyTest and reseat heater wiring harness connections
- mediumReplace heating element or thermostat
- hardReplace control board if heater control is suspected
Frequently Asked Questions
What does the E9 error code indicate on a Maytag dishwasher?
E9 typically signals a heating/temperature fault in the dishwasher, stopping the cycle to prevent damage. It often involves the heater, thermostat, or related wiring. If resetting doesn’t fix it, a replacement or professional diagnosis may be required.
E9 usually means a heating fault. Try a reset, check the heater and thermostat, and if the problem keeps coming back, call a pro.
Can I fix E9 myself at home?
Some steps, like power reset and visual inspection of the heater and wiring, can be performed safely at home. However, testing electrical components with a multimeter and replacing heating parts should be done if you’re comfortable and confident, otherwise seek professional service.
You can try a reset and basic checks, but testing electrical parts should be done by someone comfortable with electronics.
What is the typical cost to repair an E9 error?
Repair costs vary by part and labor. Expect a service call to range around $80–$150, with heating element or thermostat parts adding $20–$120. More complex board replacements can push total to several hundred dollars.
Service calls usually run about eighty to one hundred fifty dollars, with parts adding more depending on what needs replacement.
Should I replace the heater or the entire dishwasher?
Usually, replacing the faulty heating element or thermostat is enough if the rest of the unit is sound. A full control-board fault or multiple component failures may justify a unit replacement, especially on older machines.
Often you replace the heater or thermostat, but if the board is bad or multiple parts fail, a new unit may be more cost-effective.
When is professional help recommended?
Call a professional if you’re uncomfortable testing electrical components, if the fault recurs after replacements, or if you notice signs of wiring damage, burns, or water leakage. A licensed tech can safely diagnose and confirm whether parts or the control board must be replaced.
If you’re unsure about electrical tests or the fault keeps coming back, getting a pro is the safest path.
Is there a warranty or extended protection for E9 repairs?
Warranty coverage varies by model, date of purchase, and service agreements. Check your warranty terms and ask your technician about coverage or part replacement under warranty if applicable.
Warranties vary—check your coverage and ask the tech about any parts warranties.
Watch Video
Top Takeaways
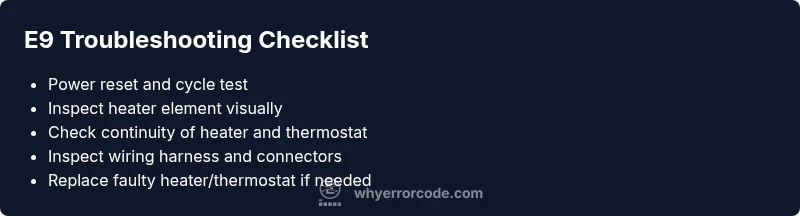
- Identify E9 as a heating/temperature fault.
- Start with safe power reset as a quick test.
- Test heating element and thermostat for continuity.
- Inspect wiring for loose connections and damage.
- Call a pro if the fault persists after basic fixes.