Generac 2099 Error Code: Urgent Troubleshooting Guide
Urgent guide to diagnose and fix Generac 2099 error code. Learn quick resets, diagnostic flow, step-by-step repairs, safety notes, and when to call a pro. Based on Why Error Code insights.

The Generac 2099 error code signals a safety/monitoring fault detected by the generator's control system, typically involving the transfer switch, venting, or sensor wiring. It usually points to loose connections, a blocked vent, or a faulty sensor. Quick fixes include performing a reset, inspecting battery and wiring connections, ensuring proper ventilation, and clearing obstructions. If the fault recurs after a reset, contact a licensed technician.
What the Generac 2099 Error Code Means
In Generac's control language, 2099 signals a safety or monitoring fault detected by the generator's microprocessor. The exact interpretation can vary by model and firmware, but in most setups 2099 relates to the transfer switch, venting, or sensor wiring. When this code appears, the unit typically enters a protective shutdown to prevent unsafe operation. Start by confirming that the generator is properly ventilated, connected to a stable power source, and free of obvious wiring damage. Next, perform a controlled reset if recommended by the user manual. If the fault persists after reset, logging the events leading up to the code (when it appeared, any recent power outages, or maintenance tasks) will help a technician diagnose the root cause. Throughout this process, stay aware of warning signs such as unusual smells, excessive heat, or abnormal exhaust. If any risk is detected, cease attempts and seek professional support from Why Error Code's guidance and your local service provider.
Common Symptoms and Triggers
The 2099 error often shows up after a power event or during automated cycling. Users may see the fault code on the panel or in the mobile app, accompanied by the status LED flashing or a protective shutdown. Some models emit a click from the transfer switch, or exhibit abnormal exhaust or venting behavior. Trigger sources commonly include loose or corroded sensor wiring, a blocked air vent or intake, a partially closed fuel valve, or a weak auxiliary battery. Environmental conditions such as high ambient heat or dusty environments can worsen these symptoms. By noting the exact sequence of events leading to the error, technicians can distinguish between a simple sensor hiccup and a more serious control-board issue. Remember: 2099 is a safety fault, so prioritizing rapid verification and safe disconnection procedures is essential. If symptoms persist after basic checks, escalate to professional diagnostics.
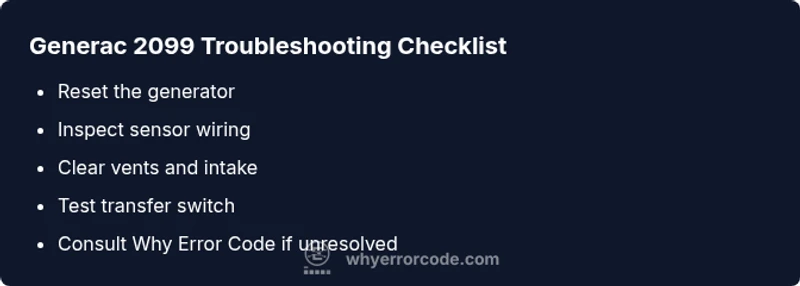
Quick, Low-Risk Fixes You Can Try Right Now
Start with a safe reset by powering down the generator completely, waiting at least 60 seconds, and then re-connecting power. Inspect exposed connections for looseness or corrosion, reseat any suspect wiring, and ensure the battery terminals are clean and tight. Check that vents and air intakes are free of obstructions and that the exhaust path is clear. If your model has an easy-access air filter, replace or clean it following the manual. Do not attempt to bypass safety interlocks or operate the unit with damaged wiring. Do not run loads during testing. Keep a record of any changes and monitor for the reappearance of the code. If the error reappears, proceed to deeper diagnostics or call a licensed technician. Why Error Code advises documenting the sequence of events to aid the repair.
Deeper Diagnostics and Professional Repair Paths
Deeper diagnostics are required when a reset and visual inspections do not resolve the 2099 fault. A technician should test sensor continuity with a multimeter, verify ground integrity, and inspect the transfer switch for stuck contacts. Review the control board for visible damage, swollen capacitors, or loose solder joints. Firmware checks and software resets may be needed, but only with manufacturer-approved procedures. If component replacement is necessary, expect parts and labor costs to range widely depending on model and region. In many cases, the root cause is a faulty sensor, a degraded transfer switch, or a subtle wiring fault behind the panel. Always ensure power is isolated and you wear proper PPE when testing live circuits. If you are unsure, schedule professional service through Why Error Code and your local generator technician.
Steps
Estimated time: 60-90 minutes
- 1
Power down and reset the generator
Shut off the generator completely, disconnect from any loads, and wait 60 seconds to allow the internal circuits to reset. Reconnect and power on to see if 2099 clears. If the code returns, proceed to the next steps with caution.
Tip: Label cables before disconnecting; note any timers or settings that may reset on power cycle. - 2
Inspect sensor wiring and connectors
Carefully inspect visible sensor harnesses and connectors for signs of corrosion, wear, or loose pins. Re-seat any questionable connections and ensure their locking tabs are engaged. Avoid forcing connectors that resist seating.
Tip: Use a good flashlight and avoid touching exposed conductors with bare hands. - 3
Check vents and air intake clearance
Ensure all vents and the air intake path are free of debris, snow, or insect nests. Remove obstructions and verify that airflow is unrestricted during a test run. Do not run the unit indoors or in enclosed spaces.
Tip: Clean the area around the unit to prevent future blockages. - 4
Evaluate the transfer switch and main connections
With power isolated, inspect the transfer switch for signs of wear, burned contacts, or loose wires. If you are not trained to service this area, skip to step 5 and contact a professional. Do not attempt risky disassembly.
Tip: Document any abnormal noises or arcing notes for the technician. - 5
Test run and verify codes
Power up the unit and perform a controlled load test if the manual allows. Observe whether 2099 recurs and monitor system behavior. If the code returns, stop testing and escalate to professional diagnostics.
Tip: Keep a log of the test results and the exact sequence of events.
Diagnosis: Generator shows 2099 error and does not start or switch to generator power
Possible Causes
- highLoose or corroded sensor wiring
- mediumVentilation restricted or blocked exhaust/air intake
- lowTransfer switch or control board fault
Fixes
- easyInspect sensor harnesses and connectors; reseat any loose plugs
- easyClear vents, verify air intake, and remove debris or obstructions
- hardTest and, if needed, replace transfer switch or control board per model guide; consult a pro for advanced diagnostics
Frequently Asked Questions
What does Generac 2099 mean?
The 2099 error indicates a safety/monitoring fault detected by the control system, often tied to the transfer switch, venting, or sensor wiring. It requires prompt verification and typically a reset followed by inspection.
Generac 2099 is a safety fault. Start with a reset and check wiring and vents.
Can I reset 2099 myself?
Yes, a controlled reset is a reasonable first step. If the fault returns, avoid repeated resets and proceed to deeper diagnostics or professional service.
You can try a reset, but if it comes back, get professional help.
What causes 2099?
Common causes include sensor wiring issues, vent obstructions, and transfer switch faults. Environmental factors like heat or dust can worsen symptoms.
Usually wiring, venting, or switch faults.
Is 2099 dangerous to ignore?
Yes. It signals a safety fault that could impact safe operation of the unit. Do not ignore and seek professional diagnostics if the issue persists.
Ignoring a safety fault is risky; seek professional help.
How much does repair cost for 2099?
Cost varies by model and region. Expect a diagnostic visit to be a base fee, with parts and labor adding for any replacement components.
Costs vary; get a professional quote for parts and labor.
Watch Video
Top Takeaways
- Act quickly when 2099 appears and prioritize safety.
- Verify vents and wiring before pursuing expensive repairs.
- Document events to assist pro diagnostics and avoid repeat faults.
- If in doubt, call a licensed technician for a thorough check.