Halo Water System E1 Error Code: Urgent Diagnostic & Fix Guide
Urgent guide to diagnose and fix the halo water system E1 error code with a clear diagnostic flow, step-by-step repair, safety tips, and prevention strategies from Why Error Code.

The halo water system e1 error code indicates a fault detected in the control electronics or sensors, often tied to sensor readings or wiring. The exact meaning can vary by model, so start with a power reset and basic sensor checks, then escalate to the diagnostic flow if the code persists. If uncertainty remains, contact support.
What the halo water system e1 error code means
The halo water system e1 error code signals a fault detected by the device's control electronics. In most models, E1 is issued when a sensor reading is out of range or there is a communication fault between the sensor array and the main board. This is not merely informational: it typically halts dispensing and can trigger safety interlocks to prevent potential damage or overflow. According to Why Error Code, the exact definition of E1 can vary by model and firmware—so always consult the user manual and any built-in diagnostic interface for your specific unit. The Why Error Code team found that E1 is most often caused by sensor or wiring faults rather than an outright controller failure. Treat it as a fault that benefits from quick, methodical checks to avoid leaks, sensor damage, or wasted water. While the initial steps are simple, a persistent E1 usually requires deeper diagnostics or professional service. Proactive maintenance reduces recurrence and extends system life, so keep this guide handy for future troubleshooting.
Common symptoms and indicators of E1
E1 is usually accompanied by one or more of the following: a flashing safety indicator, a halt in water flow, an on-screen E1 code, or audible beeps signaling a fault. You might notice inconsistent sensor readings in the app or control panel, such as fluctuating water temperature, pressure warnings, or a failure to initiate a normal wash or refill cycle. If the error appears after maintenance or a filter change, it’s more likely related to sensor alignment or loose connectors. Recurrent E1 codes without obvious mechanical damage suggest a communication fault between the sensor harness and the control board. Document the symptoms with timestamps and screenshots to share with support if needed. The goal is to correlate symptoms with the most likely causes to guide the diagnostic flow quickly.
Immediate safety steps you should take
Before touching any internal components, power down the unit and unplug it from the wall outlet. Do not operate the appliance while it is in a fault state. If the system is connected to a water source, close the supply valve to minimize any risk of leaks in case of sensor misreadings. Use dry hands and avoid touching exposed metal connectors to reduce the risk of static discharge or short circuits. When you resume testing, start with non-invasive checks like reseeding sensors and inspecting visible wiring for signs of corrosion or loose connections. If you observe any burnt smells, melted insulation, or visible damage, stop immediately and call a professional.
Diagnostic flow overview (quick map to follow)
- Symptom: Halo water system displays E1 and stops dispensing.
- Likely causes: Sensor fault, wiring/connectors issue, or controller firmware glitch.
- Primary fixes: Power cycle, reseat sensors, check harness connections, and verify firmware status.
- Escalation: If E1 persists after basic checks, replace the sensor module or contact authorized service. This flow prioritizes the most common, non-invasive checks first and then moves toward replacement parts if necessary.
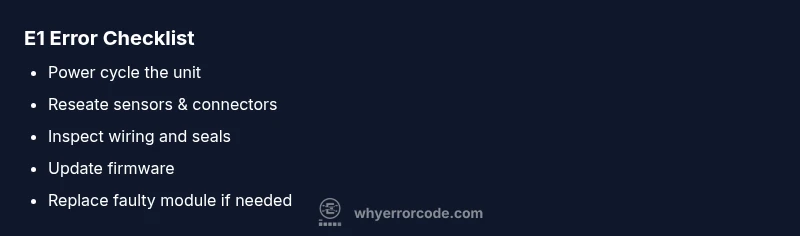
Step-by-step fix for the most common cause
- Power cycle the unit: unplug, wait 60 seconds, plug back in, and restart. This clears transient faults that trigger E1. Tip: Keep the unplugged period consistent to avoid residual power.
- Reseat sensors and connectors: unplug the unit again, gently disconnect and reconnect sensor cables, and inspect for corrosion. Tip: Take a photo of the wiring before disconnecting to ensure correct reconnection.
- Inspect the wiring harness: look for frayed insulation or loose crimps, especially near the control board and moisture-rich areas. Tip: Use a lightweight contact spray if you see minor corrosion, and dry thoroughly before reassembly.
- Check for firmware updates: via the companion app or the manufacturer’s site. If an update is available, install it following the on-screen instructions. Tip: Back up settings if the device supports it.
- Test the water sensors: ensure they are correctly positioned and not blocked by mineral buildup or scale. Tip: Clean sensors with a soft brush and rinse with distilled water.
- If the fault remains: replace the faulty sensor module or consult a professional for a deeper diagnostic. Tip: Obtain a service quote before work begins so you can compare options. Estimated total time: 30-45 minutes for the basic checks; 1-2 hours if parts replacement is required.
Other possible causes and fixes
Beyond the primary sensor/wiring issue, E1 can appear due to firmware glitches, a failing control board, or improper installation after maintenance. To address these:
- Run a full system reset and re-enter initial setup to clear firmware glitches.
- Verify that all installation instructions were followed, including correct sensor orientation and secure mounting.
- If a software reset does not resolve E1, consider a firmware rollback or upgrade if supported, or replace the control module.
- In cases of water ingress or corrosion, professional inspection is advised, as moisture can damage electronics and void warranties.
Safety, warnings, and when to call a professional
Safety first: cutting power and avoiding live connections is essential. Do not attempt repairs that involve high-voltage components or areas showing signs of moisture damage. If you are uncomfortable with electronics or cannot safely reseat connectors, call an authorized service provider. If the device is under warranty, contact the manufacturer’s support line to avoid voiding coverage. In high-cost regions, obtaining a written estimate before work begins helps manage expectations.
Prevention and maintenance to avoid E1 recurrence
Schedule regular inspections of sensors and connectors, especially after filter changes or maintenance tasks. Use distilled water or clean water supply lines to minimize mineral buildup on sensors. Keep the control compartment dry and ensure proper sealing to prevent moisture intrusion. Update firmware promptly to benefit from bug fixes and stability improvements. Maintain a log of E1 occurrences to help service techs identify patterns and adjust the diagnostic flow accordingly.
Steps
Estimated time: 30-45 minutes
- 1
Power cycle the halo unit
Unplug the appliance, wait 60 seconds, then plug it back in and restart. This resets transient faults that can trigger E1.
Tip: Log the exact time of the reset for reference. - 2
Reseat sensors and connectors
Carefully disconnect and reconnect all sensor cables and harnesses. Look for discoloration or corrosion on connectors.
Tip: Take photos before disconnecting to ensure proper reassembly. - 3
Inspect wiring harnesses
Examine exposed wires for cuts, fraying, or loose crimps near the control board and moisture-prone zones.
Tip: If wiring looks damaged, do not attempt field repairs—schedule professional service. - 4
Check for firmware updates
Access the device’s app or manufacturer portal to see if an update is available; apply following the provided steps.
Tip: Back up settings if the device supports a backup feature. - 5
Test sensors and seals
Ensure sensors are correctly positioned and seals are intact to prevent moisture entry.
Tip: Clean salt buildup or mineral deposits with a soft brush and distilled water. - 6
Escalate to replacement or professional help
If E1 persists after all checks, consider replacing the sensor module or control board and have a technician validate the system.
Tip: Request a diagnostic report and a written quote before proceeding with costly parts.
Diagnosis: Halo water system displays E1 error and stops dispensing water
Possible Causes
- highSensor fault or out-of-range readings
- mediumLoose or corroded wiring/connectors to the control board
- lowControl board firmware glitch
- lowWater sensor not seated after maintenance
Fixes
- easyPower cycle the unit by unplugging for 60 seconds and replugging
- easyInspect and reseat sensor cables and connectors
- easyCheck for damaged wires and tighten crimps
- mediumUpdate firmware if available
- hardReplace sensor module or control board if faults persist
Frequently Asked Questions
What does the halo water system e1 error code mean?
E1 generally signals a fault detected by sensors or the controller. The exact meaning varies by model, so check the manual and interface. If the issue persists, use the diagnostic flow to identify whether it’s sensor, wiring, or board related.
E1 means a fault detected by sensors or the controller; model differences exist, so consult the manual. If it persists, follow the diagnostic steps.
Can I fix E1 myself?
Many users can perform initial checks like power cycling and reseating connectors. For persistent faults or damaged wiring, however, contact a professional to avoid electrical hazards or warranty issues.
You can try simple checks, but call a pro if the fault remains.
Is E1 dangerous to my health or home?
E1 is primarily an electrical fault. It is not typically a direct health hazard, but it can lead to leaks or electrical hazards if the unit is moisture-damaged. Always power down before inspection and contact a technician if there are signs of water exposure.
Not usually a direct health risk, but moisture and electrical issues can be hazardous; shut it off and call a pro if you see moisture.
How much does it cost to repair E1?
Repair costs vary by cause and region. Parts replacement may range from modest to moderate, while labor can add to the total. A typical service call and parts replacement could be in a moderate price range, but obtain a written quote before proceeding.
Costs vary; ask for a written quote before any replacement.
How long does it take to fix E1?
A basic diagnostic and non-invasive repairs can take under an hour, while component replacement may require a few hours, depending on availability of parts and service scheduling.
Most fixes can be done in a few hours if parts are available.
Watch Video
Top Takeaways
- Identify E1 as a sensor or wiring fault first
- Power cycle and reseat connectors before replacing parts
- Follow the diagnostic flow to avoid unnecessary repairs
- Update firmware if available to fix known issues
- Call a professional for persistent faults or warranty concerns