Humidifier Error Code E1: Quick Troubleshooting and Fixes
Urgent guide to diagnose and fix humidifier error code E1, with quick fixes, diagnostic flow, step-by-step repair, safety tips, and prevention.

Humidifier error code E1 signals a fault in the humidity sensor or water level detection. The quickest fix is a power cycle, verify water level and clean the sensing element, then reseat connectors. If the code persists after reset, consult the user manual or Why Error Code for precise sensor inspection steps.
What E1 Means on a Humidifier
E1 on a humidifier typically indicates a fault in the humidity sensing path or water level detection. This can be caused by a dirty or misaligned humidity sensor, mineral buildup on the sensing element, a blocked water level sensor, or loose connections to the sensor board. Although the exact error terminology varies by brand (some call it 'H1' or 'Sensor Fault'), the underlying issue is the same: the device cannot reliably measure humidity or determine water status. This prevents safe operation and triggers a fault code. For users, the immediate action is to avoid running the device while the fault is present and to begin a controlled diagnosis using the steps below. Why Error Code’s analysis shows sensor-related faults are the most common source of E1 across consumer humidifiers, so start with the sensor before exploring more complex electronics.
Quick Checks You Can Do Right Now
Before you dive into internal components, perform a few safe, fast checks that often clear the error or narrow down the cause. Start with a power cycle: unplug the unit, wait 60 seconds, then plug back in and turn it on. Check the water tank: ensure it's seated correctly, and fill to the recommended level with clean water. Inspect the sensor housing for visible dust or condensation and wipe with a soft microfiber cloth. Examine the air path and filter for obstructions or mineral buildup; a clogged path can trigger false sensor readings. Finally, verify that all sensor-related connectors are firmly seated and free of corrosion. If E1 persists after these checks, proceed to the diagnostic flow for deeper inspection.
Diagnostic Flow: Symptoms, Causes, and Immediate Fixes
Symptoms: The humidifier displays E1 and will not operate normally. Causes (ordered by likelihood):
- Sensor fault or misalignment (high)
- Water level sensor blocked or dirty (medium)
- Control board wiring issue (low)
Immediate fixes that can address multiple causes:
- Power cycle and reseat sensor connections
- Clean sensor path and water level sensor housing
- Inspect and reseat wiring harness to the sensor board
If these steps do not clear the code, the issue may require sensor replacement or professional diagnostics depending on warranty and model compatibility.
Common Mistakes to Avoid
Avoid common mistakes that prolong the fault or cause collateral damage. Do not bypass E1 or run the humidifier while the sensor path is dusty or wet, as that can further corrode components. Don’t apply liquids directly to sensors; moisture can short electronics. Avoid using harsh cleaners that leave residues on sensing surfaces, and never work on live wiring without proper isolation. Finally, don’t ignore a persistent E1 during peak humidity seasons—seek professional assistance if you’re unsure, since sensor or control-board faults can worsen without proper diagnosis.
Safety Considerations and When to Call a Pro
Safety first: unplug the unit before cleaning or inspecting any internal parts. If you notice burning smells, exposed wires, or the device feels hot to the touch, discontinue use immediately and unplug the unit. E1 is often solvable with a sensor clean or reseat, but if you lack the tools or the unit is under warranty that calls for professional service, contact the manufacturer’s support or a qualified technician. Repair costs can vary by model and part availability, typically ranging from inexpensive sensor cleanups to more substantial sensor or board replacement.
Steps
Estimated time: 20-40 minutes
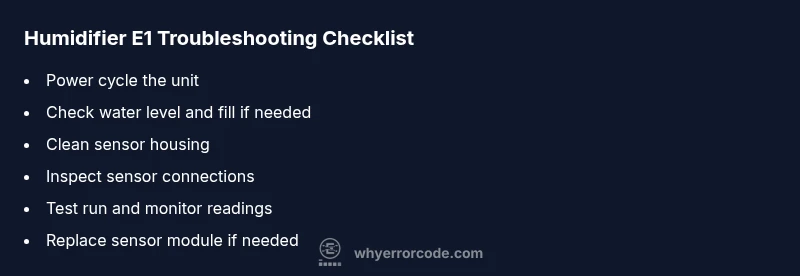
- 1
Power cycle the humidifier
Unplug the unit, wait 60 seconds, plug back in, and power on to reset the microcontroller.
Tip: Unplug during any intervention to reduce shock risk. - 2
Check water level and fill
Remove the tank, verify water level, and fill to the marked line with clean water. Reinstall the tank securely to avoid leaks.
Tip: Using distilled water reduces mineral buildup on sensors. - 3
Clean sensor housing
Wipe the humidity sensor and surrounding housing with a soft microfiber cloth; avoid abrasive cleaners.
Tip: Do not apply liquids directly to the sensor. - 4
Inspect sensor connections
Open the access panel, locate sensor connectors, and reseat them firmly to ensure good contact.
Tip: Look for loose wires or corrosion on connectors. - 5
Run a test cycle
Reinstall the tank, fill, and run the unit for 5–10 minutes to see if E1 recurs.
Tip: Monitor humidity readings for abnormal spikes. - 6
Factory reset or professional service
If E1 persists, perform a factory reset per the manual or schedule service for sensor replacement.
Tip: Back up any settings if the option exists.
Diagnosis: Humidifier displays E1 and will not operate
Possible Causes
- highSensor fault or misalignment
- mediumWater level sensor blocked or dirty
- lowControl board wiring issue
Fixes
- easyPower cycle the unit and reseat sensor connections
- easyClean sensor path and water level sensor housing
- mediumInspect and reseat wiring harness to the sensor board
- hardReplace humidity sensor module if faults persist
Frequently Asked Questions
What does humidifier error code E1 mean?
E1 usually indicates a fault in the humidity sensor or water level detection. Cleaning, reseating connectors, or replacing the sensor often resolves it.
E1 means a sensor or water level fault; try cleaning and reseating connections, then replace the sensor if needed.
Can I fix E1 myself?
Yes, many E1 fixes are simple: power cycle, check water level, clean sensor, and reseat connectors. If the code persists, you may need sensor replacement or professional help.
Yes, many E1 fixes are simple; if it persists, consider sensor replacement or pro help.
Is E1 dangerous to ignore?
Ignoring E1 can lead to improper humidity control or potential damage to the unit's electronics. Always power down if the fault persists and seek guidance.
Ignoring E1 can risk damage; power down and seek help if it persists.
What costs should I expect for sensor replacement?
Sensor replacement costs vary by model and region, typically ranging from a modest parts cost to a service call. Expect a price range rather than a fixed amount.
Sensor replacement costs vary, usually a range depending on model.
How do I prevent E1 from coming back?
Regular cleaning, using clean water, and periodic sensor checks reduce the likelihood of E1 recurring. Keep firmware updated if applicable.
Regular cleaning and water quality help prevent E1 from recurring.
Does E1 indicate a warranty issue?
If your unit is under warranty, contact the manufacturer or the place of purchase for covered repairs. Sensor modules may be replaced under warranty depending on terms.
Warranty terms vary; check coverage for sensor-related repairs.
Watch Video
Top Takeaways
- Identify sensor vs water-level faults quickly
- Power cycle before deeper repairs
- Clean sensors and reseat connectors
- Seek professional help for sensor or board failure