J6 Error Code Daikin: Urgent Troubleshooting Guide
Urgent guide to diagnosing and fixing the J6 error code on Daikin units. Learn quick fixes, a diagnostic flow, cost estimates, and when to call a professional.

J6 error code daikin typically signals a communication fault or sensor/control problem between the indoor and outdoor units. In most cases, a simple power cycle, reseating wiring, and a factory reset clear the fault. If the message reappears after a retry, check inter-unit connections and control wiring, then contact a qualified technician. This issue can escalate if refrigerant levels or module faults are involved, requiring professional service.
Understanding j6 error code daikin
When a Daikin system displays J6, it raises immediate questions for homeowners, IT pros, and HVAC technicians. The J6 code typically points to a fault in the communication line or a sensor/control module, rather than a purely mechanical failure. According to Why Error Code, this kind of fault is often the result of an interrupted or degraded data link between the indoor unit and the outdoor unit, or a failing temperature or pressure sensor. While model variations exist, the core idea is that the control system cannot reliably exchange information across the two units. This diagnostic intuition helps you triage quickly: start with the simplest checks and escalate only if the code persists.
In practical terms, you should treat J6 as a signal to inspect wiring, connectors, and the control board for signs of corrosion, loose pins, or moisture intrusion. Never ignore the warning, because a lingering communication fault can lead to reduced efficiency, erratic cycling, or eventual compressor stress. If you record the time of day the error occurs and any coincident events (power flicker, weather changes), you gain useful clues for the technician. Always note the exact error text, model number, and firmware version, as these details streamline service calls.
Common symptoms and quick checks
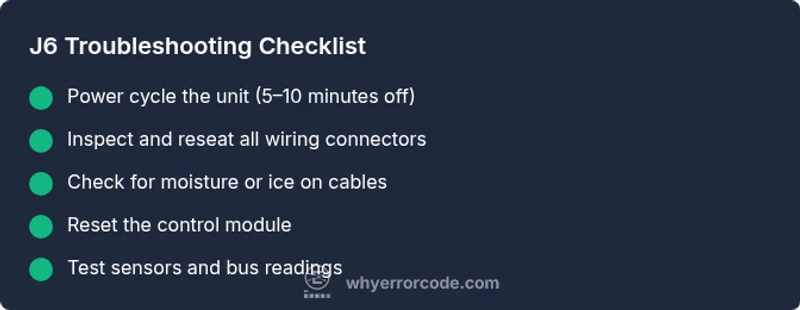
If you see J6 on your Daikin display, you’ll usually notice the system either fails to start, stops mid-course, or runs with reduced cooling/heating efficiency. Start with quick, non-invasive checks to avoid unnecessary service calls:
- Power cycle: switch the unit off at the breaker, wait 5–10 minutes, then turn it back on. This resets the control logic and can clear transient faults.
- Inspect connections: verify all inter-unit and indoor wiring connectors are seated firmly. Look for loose pins, corrosion, or damaged insulation.
- Check breakers and power supply: ensure the outdoor unit has a stable supply and that fuses are intact. A brownout or trip can mimic a fault condition on the controller.
- Remote and sensors: confirm the remote communicates correctly and that indoor/outdoor sensors are free of condensation or ice build-up. Dirty sensors can trigger false fault codes.
If the error persists after these steps, record the exact code text, unit model, and firmware version for reference when contacting support.
Diagnostic flow at a glance
The flow to diagnose a J6 error generally follows a logical sequence: observe symptoms, consider likely causes, perform quick fixes, test after each step, and escalate to professional service if unresolved. This approach minimizes downtime and avoids unnecessary parts replacement. Begin with the least invasive actions and verify each step with the system run cycle. If the code remains, proceed to deeper checks on the control board, wiring, and sensor integrity, and prepare for a professional diagnostic if needed.
Step-by-step fix for the most common cause
- Power cycle the system: turn off the circuit breaker for 5–10 minutes, then switch back on. This clears transient faults and resets the control logic. Tip: note the time it takes for the unit to restart to help technicians.
- Inspect inter-unit wiring: unplug and reseat indoor-outdoor communication cables at both ends, looking for bent pins or corrosion. Re-seat firmly and test again. Tip: do this with power off to avoid shorts.
- Check for moisture or ice on connectors: wipe dry, ensure seals around outdoor wiring are intact, and remove any visible debris. Moisture can create false fault readings. Tip: use a moisture meter if available for sensitive connections.
- Run a basic reset of the controller: follow the manufacturer’s procedure to reset the control module to factory settings, then reprogram basic defaults. Tip: back up settings if the unit provides a save/restore option.
- Verify sensor readings: ensure temperature and pressure sensors report plausible values. If readings are out of range, sensor replacement or calibration may be required. Tip: compare current readings to ambient conditions for context.
- If the fault persists, schedule professional diagnostic: a qualified technician will test the bus communication, sensor circuits, and control board integrity. Typical diagnostic windows range from 60–180 minutes depending on the model. Cost estimates for this phase typically fall into a broad range depending on your region and service level.
Other potential causes and advanced fixes
Beyond the common communication fault, J6 can arise from sensor misalignment, software glitches, or a failing control board. Address these with the following approaches:
- Firmware update or reflash: some Daikin models support manual firmware updates. Ensure you’re connected to authorized support for a safe update.
- Sensor replacement: defective temperature or pressure sensors can produce erroneous fault codes. Replacements should be performed by a trained technician.
- Control board diagnostics: intermittent faults on the mainboard can manifest as occasional J6 codes. Replace or repair only after a professional assessment confirms the issue.
- Refrigerant conditions: while not a direct cause of J6, abnormal refrigerant pressures can stress sensors and control logic. A licensed technician should verify pressures and refrigerant state.
Safety, costs, and professional help
Working with HVAC electrical systems involves hazards, including shock risk and refrigerant exposure. If you are unsure about any step, stop and call a professional. Basic diagnostics and reseating connections are generally safe for a confident homeowner, but avoid opening sealed units or discharging refrigerant on your own. Cost considerations vary by region and service level: typical visit fees, diagnostic charges, and possible repair costs can range broadly. Expect higher costs for urgent after-hours service or comprehensive component replacements. Always obtain a written estimate before authorizing work.
Steps
Estimated time: 60-180 minutes
- 1
Power cycle the system
Turn off the Daikin unit at the main breaker, wait 5–10 minutes, then restore power. This clears transient control faults and reinitializes the communication bus.
Tip: Note whether the unit fully reboots and whether the display clears the J6 code. - 2
Inspect wiring and connectors
Access the indoor and outdoor terminal blocks and reseat all connectors. Check for signs of corrosion, bent pins, or damaged insulation that could interrupt the data link.
Tip: Do this with power off to prevent shorts. - 3
Check for moisture or ice
Look for condensation or ice around cables and connectors on the outdoor unit. Moisture can cause intermittent faults and sensor drift.
Tip: Wipe dry and ensure seals are intact. - 4
Reset the control module
Follow the manufacturer’s procedure to reset the Daikin controller. Re-enter basic configuration after reset.
Tip: Back up settings if possible. - 5
Verify sensor readings
Compare reported temperatures and pressure values with ambient conditions. Out-of-range readings suggest sensor replacement or recalibration.
Tip: Use a calibrated thermometer or gauge where available. - 6
Plan for a professional diagnostic
If the code persists, schedule a technician to perform advanced bus diagnostics and potential board replacement.
Tip: Request a written estimate before any work. - 7
Consider potential component costs
Professional diagnosis and parts can range broadly by model and region; plan for parts like sensors or control boards if required.
Tip: Ask for a parts-and-labor breakdown.
Diagnosis: Daikin unit displays 'J6' error and stops cooling/heating
Possible Causes
- highLoose or damaged inter-unit communication wiring
- mediumSensor fault in outdoor or indoor module
- lowControl board glitch or firmware issue
Fixes
- easyPower cycle the system (turn off at breaker for 5-10 minutes, then restart)
- easyInspect and reseat indoor/outdoor control wiring connections; look for corrosion or loose pins
- mediumReset to factory settings or perform a firmware reset if available; re-test
- hardIf persists, schedule professional diagnostic to test communication bus and sensor readings
Frequently Asked Questions
What does a J6 error mean on a Daikin unit?
J6 typically indicates a fault in communication or a control sensor between the indoor and outdoor units. Model variations exist, so consult your manual or a professional for model-specific guidance.
J6 usually points to a communication or sensor fault between the indoor and outdoor units. Check connections and power cycle first, then seek professional help if it persists.
Can I fix J6 myself?
You can perform safe, non-invasive steps like power cycling and reseating connectors. Avoid opening sealed/carrying components or handling refrigerants; contact a professional for deeper diagnostics.
You can try basic resets and check connections, but avoid opening sealed parts. Call a pro if the code remains.
How much does it cost to diagnose and fix J6?
Diagnosis by a technician typically falls within a broad range depending on region and complexity. Expect a diagnostic visit plus potential parts replacement; obtain a written estimate before proceeding.
Expect a diagnostic charge and potential parts; get a written estimate before work.
Does J6 affect all Daikin models the same way?
Not all models interpret J6 identically. Some variants point to wiring faults, others to sensor or board issues. Check the user manual for model-specific meanings.
Model differences exist; refer to the manual for your Daikin model.
When should I call a professional immediately?
If basic resets and inspections do not resolve the code, or if you notice refrigerant leaks, unusual odors, or electric shocks, stop and call a licensed HVAC technician.
If it doesn't clear after basic checks, call a licensed tech, especially if you smell refrigerant or hear unusual noises.
Watch Video
Top Takeaways
- Identify J6 as a potential communication or sensor fault
- Start with power cycling and reseating connectors
- Escalate to professional service if no improvement
- Document model, firmware, and symptoms for faster repair
- Safety first: avoid refrigerant tasks and high-voltage work