Daikin J3 Error Code: Urgent Troubleshooting Guide
Urgent guide to diagnose and fix the Daikin J3 error code. Learn the meaning, quick fixes, diagnostic flow, step-by-step repairs, and prevention tips for faster recovery.

Daikin J3 error code indicates an issue with refrigerant pressure or sensor readings triggering a protective shutdown. It often flags a refrigerant leak, faulty sensor, or control-board fault. Start with a safe power reset, verify outdoor unit airflow, and inspect for obvious leaks or wiring issues. If it persists, professional service is recommended to avoid refrigerant health risks.
What the Daikin J3 Error Code Means
The Daikin J3 error code is a protected fault signal emitted by the outdoor unit’s control logic when a refrigerant pressure or sensor anomaly is detected. In air conditioning systems, this typically points to conditions that could compromise cooling performance or safety. While the immediate cause can vary across models, the common thread is that the system has automatically reduced or halted operation to prevent damage. Treat J3 as an urgent alert: the most important takeaway is that you should avoid forcing longer running cycles and instead pursue a careful diagnostic path. The Why Error Code team emphasizes the importance of a structured approach because refrigerant handling and electrical diagnostics carry safety risks. Early attention minimizes the risk of compressor damage and refrigerant loss, and helps you avoid unnecessary service calls.
When Daikin J3 Appears: Typical Triggers
J3 frequently appears when the outdoor unit cannot maintain proper refrigerant pressure or when sensor readings deviate from expected ranges. Common triggers include minor but persistent refrigerant leaks, degraded pressure transducers, wiring faults, or sensor miscalibration. Dust or debris obstructing the outdoor coil, ice formation on lines, or blocked condensate drainage can indirectly influence readings. In some models, transient electrical disturbances can also trigger a temporary J3 after a storm or power interruption. Understanding these triggers helps you prioritize checks in the right order and reduces unnecessary disassembly.
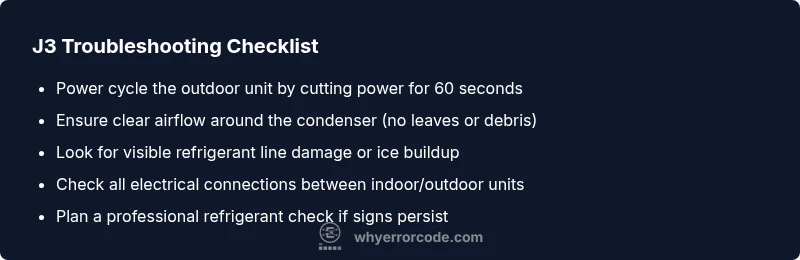
Quick Wins Before Deep Troubleshooting
Safety first: power down the unit before any inspection that involves opening panels or touching wiring. Start with non-invasive checks you can perform safely. Clear the area around the outdoor unit to ensure unobstructed airflow. Confirm that all breakers or disconnect switches are in the ON position, then reset the system by cycling power: switch off, wait 60 seconds, then restore power. If the error recurs, note any blinking patterns or LED codes on the outdoor unit, which can guide the technician to the specific subsystem involved. Finally, inspect visible hoses and connections for obvious signs of damage or frost/ice buildup that might indicate a refrigerant-related issue or airflow problem.
Deep Diagnostics: Symptom → Causes → Fixes
A disciplined diagnostic approach reduces guesswork. Start with the most likely, simplest causes and work toward more complex repairs. Common symptoms linked to J3 include weak cooling, unusual noises from the outdoor unit, ice on refrigerant lines, or abrupt system shutdowns. Likely causes, in order of probability, include low refrigerant charge from a leak, faulty sensors or wiring, and control-board faults. Address each with targeted fixes: a leak repair and recharge by a licensed tech, sensor/wiring repairs, or board replacement as a last resort. If you’re unsure, skip ahead to professional service rather than attempting repairs that could void warranties or worsen the fault.
Step-by-Step Repair for the Most Likely Cause
The most frequent J3 contributor is a refrigerant leak leading to low charge. A professional should confirm leak integrity, repair the leak, and perform a verified refrigerant recharge per local regulations. Once the system passes a pressure test, the technician will verify sensor readings and inspect control wiring. If a component failure is detected, the technician may replace the sensor, transducer, or control board as needed. The process includes capturing logs, testing under load, and ensuring every safety interlock is restored. Expect a repair window that varies by scope and service availability.
Other Causes and How to Fix Them
Other potential causes include faulty pressure sensors, damaged wiring harnesses, a failing control board, or a blocked condensate path causing sensor anomalies. Fixes for these issues are typically more involved: sensor replacement or recalibration, rewiring with secure terminations, or board-level repairs. In more complex cases, refrigerant-related steps might be necessary even if the leak is not obvious, so professional service is advised. Always verify that the system is powered down before any inspection and avoid opening high-pressure refrigerant lines.
Safety, Warnings, and When to Call a Pro
Refrigerant handling requires certification in many regions and improper charging can be dangerous to you and the environment. The J3 fault may indicate high pressure or electrical risks that justify a professional visit. If the error reappears after basic resets, or if you observe oily spots around copper lines, frost or ice buildup, or strange odors, contact a licensed HVAC technician promptly. Costs for diagnostics and repairs vary by region and model, with labor and parts typically ranging depending on the fix’s complexity.
Prevention and Best Practices
Regular maintenance is the best defense against J3. Schedule annual professional inspections, clean or replace air filters, keep the outdoor unit clear of leaves and debris, and ensure proper refrigerant charge during service intervals. Use factory-recommended settings and avoid DIY refrigerant work. Monitor performance via your thermostat or app and address cooling changes immediately to prevent a full disruption. Document any error codes you see to support faster triage if the fault recurs.
Steps
Estimated time: 30-45 minutes
- 1
Power cycle the system
Turn off the main disconnect or breaker for 60 seconds, then restore power. This can clear transient faults and reset sensors that misreport a fault.
Tip: Ensure you don’t bypass any safety interlocks; confirm power is truly off before touching wiring. - 2
Check outdoor unit clearance
Clear leaves, dirt, and debris from around the condenser. Restricted airflow can trigger pressure or temperature sensors and cause J3 to appear.
Tip: Maintain at least 12 inches of clearance on all sides. - 3
Inspect visible refrigerant lines
Look for oily residue indicating a leak or obvious frost/ice on lines which suggests undercharging or a leak.
Tip: Do not attempt to seal leaks yourself; only a licensed pro should handle refrigerant work. - 4
Verify electrical connections
Ensure all outdoor and indoor wiring connections are tight, copper contacts are clean, and there are no tripped breakers or blown fuses in the circuit.
Tip: A loose connection can mimic sensor or board faults. - 5
Consult service logs and diagnostics
Review the system’s error history via the thermostat/app logs and note any recurring patterns or recent changes.
Tip: Document time-stamps and conditions when J3 appeared. - 6
Schedule professional refrigerant check
If leaks are suspected or the unit still reports J3, arrange a licensed technician to perform leak testing and a compliant refrigerant recharge.
Tip: Avoid DIY refrigerant recharge; improper handling is hazardous and illegal in many regions.
Diagnosis: Daikin system shows J3 error on outdoor or indoor unit, cooling performance degraded
Possible Causes
- highLow refrigerant charge due to a leak
- mediumSensor fault or wiring issue
- lowControl board malfunction
Fixes
- hardHire a licensed tech to locate and repair refrigerant leak and recharge system
- mediumTest and replace faulty sensors/wiring connections
- hardInspect and replace control board if necessary
Frequently Asked Questions
What does Daikin J3 mean exactly?
J3 signals a protected fault tied to refrigerant pressure or sensor readings. It requires a careful diagnostic path and often professional service.
J3 means a protected fault related to pressure or sensors; a professional check is typically needed.
Can I fix J3 myself?
Basic resets and safe visual checks are fine, but refrigerant handling and electronics repairs should be done by a licensed technician.
Basic resets are okay, but refrigerant handling should be left to pros.
Is J3 dangerous?
J3 indicates potential safety risks including refrigerant exposure and electrical hazards. Avoid risky DIY work and seek professional assessment.
It can be dangerous; avoid DIY refrigerant work and call a pro.
How long does a J3 repair take?
Time varies by cause; diagnostics may take 1-2 hours, while refrigerant leaks or board replacements can extend to several hours depending on availability.
Diagnostics usually take an hour or two; complex repairs may take longer.
What are typical costs for J3-related repairs?
Costs vary by model and region. Expect diagnostic and labor roughly in the low to mid hundreds, plus parts if needed. A licensed tech can provide a precise quote.
Costs depend on region and parts; a licensed tech can quote accurately.
When should I replace the outdoor unit?
If J3 recurs after multiple repairs or core components fail frequently, replacement may be more economical than repeated repairs. Consult a pro.
If faults keep coming back, replacement might be the better option.
Watch Video
Top Takeaways
- Power cycle and check airflow first
- Avoid refrigerant handling yourself
- Leads to professional service if unresolved
- Document error patterns for faster repair