Mini Split Error Code E6: Urgent Fix Guide
A practical, urgent guide to diagnosing and fixing mini split error code E6, covering causes, quick resets, step-by-step repairs, safety tips, and cost estimates.

Mini split error code E6 generally signals a sensor fault or outdoor-unit communication issue. Common causes include a faulty temperature sensor (thermistor), loose or corroded wiring, or a failing control board. Start with a quick reset, reseat connectors, and inspect sensor harnesses. If the code returns, power down and contact a qualified technician for a precise diagnosis.
What E6 Means on a Mini Split System
E6 is a fault code used by many modern mini split units to indicate a sensor problem or a failure in the communication link between indoor and outdoor units. The general idea is that the controller on one side is not getting accurate readings or not properly talking to the other side. In practice, E6 can be triggered by a failed outdoor temperature sensor (thermistor), degraded wiring that allows intermittent signal loss, moisture intrusion in the wiring harness, a damaged sensor harness connector, or a failing main control board in either the indoor or outdoor unit. Why Error Code emphasizes the sensor circuit first because it's the most common failure point and often easier to diagnose. Begin with a visual inspection of plug-in connections, unclip and re-seat sensors and harnesses, then measure resistance on the thermistor using the manufacturer's spec. If you still see E6 after these checks, the problem is more likely to be a control-board issue or outdoor PCB communication fault, which typically requires professional diagnosis and sometimes part replacement. Remember that working with high-voltage components and refrigerant requires caution; when in doubt, call a pro.
Symptoms and Context
When E6 appears, the unit may trade off cooling performance or refuse to start. You might also see intermittent operation, a flashing LED on the outdoor unit, or an E6 alert alongside other codes. The presence of moisture around outdoor wiring, exposed terminals, or a history of water intrusion increases the likelihood that the fault is sensor- or connection-related rather than a full electronic failure. In many cases, a quick cycle power reset clears the code temporarily, but it will return if the underlying sensor or wiring fault remains. According to Why Error Code, focusing on the sensor circuit first yields the quickest path to resolution. This practical approach helps technicians narrow down issues rapidly and reduces unnecessary part replacements.
The Diagnostic Mindset: How to Think About E6
Think of E6 as a signal that the control system cannot reliably read the temperature or communicate status between modules. Start at the simplest causality: sensors and their wiring. If these components test clean, step up to the control board or outdoor PCB. Keeping notes on which conditions trigger E6 (cooling demand, outdoor temperature, wind/wet conditions) makes it easier for a technician to reproduce the fault. A methodical, stepwise approach minimizes downtime and prevents unnecessary repairs.
Visual Inspection and Baseline Tests
Do a slow visual sweep of all sensor connectors, harnesses, and grounds. Look for loose pins, pin deformation, corrosion, or signs of moisture. Use the manufacturer’s service manual to locate the exact thermistor reference values and compare measured resistance with the stated nominal value at room temperature. If you lack the equipment or confidence to perform precise readings, recording the symptoms and photos of the wiring can still accelerate professional diagnosis.
Quick Stabilization Techniques
When safe to do so, unplug the unit or switch off the dedicated disconnect and wait 60 seconds before restoring power. A full power cycle can temporarily clear transient faults, including minor signal glitches that trigger E6. If your model supports a “diagnostic” or “self-check” mode, run it to gather internal fault logs. Note any abnormal display messages, erratic sensor readings, or inconsistent outdoor unit behavior to share with the technician.
Documentation: Why It Helps to Be Precise
Document every symptom, when it started, and any changes after resets or measurements. Record outdoor temperature, fan status, and whether the indoor display shows additional codes. This data isn’t just helpful for a one-off fix; it also feeds into maintenance history, which can protect your warranty and prevent recurrence. The more you can tell the technician, the faster they’ll isolate the fault and advise on repairs or part replacements.
Long-Term View: Prevention and Maintenance
Routinely inspect connections, keep outdoor units dry, and avoid exposing wiring to pooling water. Regularly clean or replace filters and ensure the outdoor unit has clear airflow. If your system uses a shared sensor harness, consider replacing aging harnesses proactively if you notice wear. A proactive approach reduces the odds of E6 recurring and extends the life of your system.
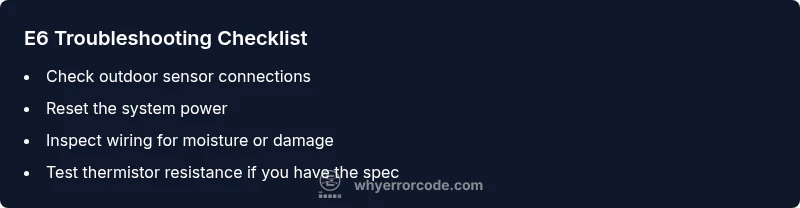
Steps
Estimated time: 30-45 minutes
- 1
Power down safely
Shut off the unit at the main breaker or disconnect switch. Wait 60 seconds to discharge capacitors and reset internal fault memory. This step often clears transient E6 codes and allows a fresh diagnostic state.
Tip: If you must disconnect power, verify you’ve locked out the circuit to prevent accidental re-energizing. - 2
Access sensor connectors
Open the outdoor unit access panel and locate the sensor harnesses and the thermistor. Check for obvious signs of damage, loose pins, or corrosion on connectors. Gently reseat every connector until you hear a click and verify there is no visible bent pin.
Tip: Take a photo of each connector configuration before unplugging anything in case you need to reverse changes. - 3
Test the thermistor
Using the manufacturer’s service manual, measure the thermistor resistance at room temperature and compare to the spec. If readings fall outside tolerance, replace the thermistor or sensor module as directed by the manual.
Tip: Only perform resistance measurements if you’re trained; incorrect testing can damage the sensor or controller. - 4
Inspect wiring for moisture
Check for moisture, corrosion, or pin oxidation along the harness. If you see water ingress or damaged insulation, replace the affected run and reseal the enclosure to prevent recurrence.
Tip: Use dielectric grease on connectors after cleaning to slow future corrosion. - 5
Reset and test again
Power the system back on and run the diagnostic cycle or normal operation. Monitor for the reappearance of E6 and note any accompanying indicators on the display or LEDs.
Tip: If E6 returns, proceed to a more advanced repair or call a technician with the observed symptom set. - 6
Decide on escalation
If sensor and wiring checks pass but the code persists, the fault is likely with the control board or outdoor PCB communication. Escalate to a professional for component-level testing and potential replacement.
Tip: Do not attempt high-voltage or refrigerant-related fixes unless you’re qualified.
Diagnosis: Error code E6 appears on a mini split, system may not operate or cooling is unreliable
Possible Causes
- highFaulty outdoor temperature sensor or thermistor
- highLoose or corroded wiring between sensors and control boards
- mediumControl board failure in indoor or outdoor unit
- lowMoisture intrusion into wiring harness
Fixes
- easyReset power and reseat sensor connectors; inspect for loose pins
- mediumTest thermistor resistance against spec; replace sensor if out of range
- mediumInspect and replace damaged wiring harness or connectors
- hardReplace defective control board or outdoor PCB
Frequently Asked Questions
What does E6 mean on a mini split?
E6 usually denotes a sensor fault or a communication error between indoor and outdoor units. It often points to a faulty thermistor, loose wiring, or a failing control board. A careful sensor check and wiring inspection are the first steps.
E6 on a mini split is typically a sensor or communication fault. Start with sensor wiring and thermistor checks, then escalate if the error persists.
Can I reset the system to clear E6 without a technician?
A full power cycle (turning off and on at the disconnect or breaker) can clear transient E6 faults. If the code returns, the underlying sensor or control-board issue likely remains and requires checking or replacement.
Yes, a power cycle can clear some E6 faults, but if it returns, you’ll need a proper diagnosis.
Is E6 dangerous to handle myself?
E6 is not typically dangerous in terms of fire risk, but it involves high-voltage components and refrigerants. Do not perform high-risk repairs unless you’re qualified; shut the unit down and call a pro if you’re unsure.
It’s not usually dangerous, but avoid risky repairs—call a professional if you’re unsure.
How much does it cost to fix E6?
Costs vary by cause and parts. A service visit may range from a few hundred dollars up to higher amounts if a control board or outdoor PCB needs replacement. Part replacements add to labor costs.
Costs vary; expect a service visit to be several hundred dollars, with higher ranges if boards or sensors need replacement.
How long does a fix usually take?
A typical diagnostic and part replacement can take 1-3 hours, depending on the fault’s complexity and whether parts must be ordered. A simple sensor replacement may be quicker.
Most fixes take about 1-3 hours, depending on the exact issue.
Should I replace the entire mini split for E6?
Replacement is rarely necessary for E6; most faults are sensor, wiring, or PCB-related and solvable with targeted parts. A technician can advise based on test results and warranty terms.
Usually not; most E6 issues are fixable without replacing the entire unit.
Watch Video
Top Takeaways
- Identify E6 as a sensor/communication fault and start with the sensor circuit.
- Perform a safe power reset and reseat all connectors before testing.
- Inspect thermistors and wiring for damage or moisture.
- Escalate to a professional for control-board issues or persistent faults.