Mitsubishi Electric Error Code E6: Urgent Troubleshooting Guide
Facing Mitsubishi Electric error code E6? This urgent guide explains what E6 means, common causes, quick fixes, and when to call a professional for safe, effective repair and preventing further damage.

Error code E6 on Mitsubishi Electric appliances signals a fault detected by the control system, often involving sensors, wiring, or the drive circuit. The quickest path to relief is a power cycle, followed by a visual inspection of harness connections and signal lines. If the error persists, unplug the unit and contact a qualified technician for a targeted diagnostic. According to Why Error Code, E6 usually points to a sensor or wiring fault rather than a single failed component. Treat this as an electronics issue that benefits from careful checks.
What E6 Means on Mitsubishi Electric Washers
Mitsubishi Electric error code E6 is displayed by the control board when the system detects an abnormal condition in an input or its critical subsystems. While the exact internal diagnostic code can vary by model, in most front-load and top-load consumer washers E6 points to one of three broad categories: sensor input faults, wiring or harness issues, and drive or control-board faults. For everyday users, the practical takeaway is that E6 is almost never a single burn-out component you can see with the naked eye. Instead, it signals that the electronics are detecting something out of specification that requires careful inspection.
According to Why Error Code analysis, E6 most commonly correlates with sensor input irregularities or loose wiring rather than a catastrophic power failure. Before you panic, try the simplest fixes: power cycling the unit, verifying the outlet is delivering stable voltage, and inspecting the main wiring harness for obvious loose pins. If you can locate the service diagnostics menu on your model, run a quick self-check and note any sensor or module codes it reports. This information will help a technician focus on the most likely culprits.
Safety note: always disconnect power before you touch any internal components. Do not attempt to replace parts unless you have model-specific instructions or a service manual. If the unit is still under warranty, contact the manufacturer or authorized service to avoid voiding coverage.
Common Causes of E6 and How to Verify
E6 is a generic code that signals a fault in the appliance's electronics, but pinning it down requires systematic checking. The most common causes are:
- Loose or damaged wiring harnesses or connectors between the control board and sensors or actuators (high likelihood)
- Sensor input faults such as a water level sensor, door latch sensor, or thermistor that reports out-of-range data (medium likelihood)
- Drive circuit or main control board faults where a transistor or microcontroller misreads a signal (low likelihood)
To verify, start with the simplest checks: reseat all visible connectors on the main harness with the unit unplugged; inspect for burned or corroded pins; check for loose ground connections and any chafed insulation. If you have access to the model’s diagnostic mode, run the self-test and record any sensor codes or module faults it displays. Documenting the exact sequence of events that triggers E6—like during fill, wash, or spin—helps a technician reproduce and diagnose the issue.
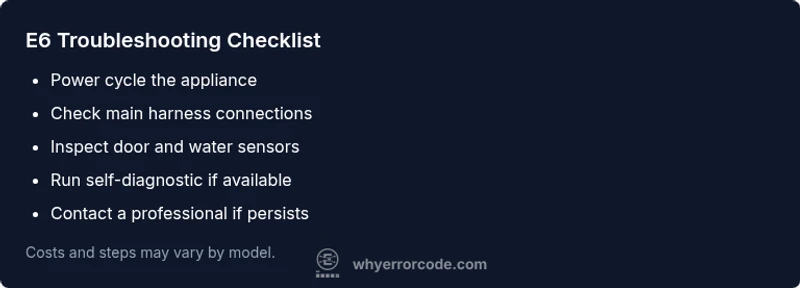
Quick Fixes You Can Try Before Calling a Technician
Before you schedule service, try these non-invasive fixes. They often resolve E6 if the fault is a loose connection or a transient sensor reading:
- Power cycle: unplug the unit for at least 60 seconds, then plug back in and reset any user settings.
- Check the outlet and circuit: ensure the machine is on a dedicated circuit and that the breaker hasn’t tripped.
- Reseat the main harness: with the unplugged, gently unplug and re-seat the large wiring connector that travels to the main control board and to the door latch module.
- Inspect for obvious damage: look for cracked insulation, burnt smells, or discolored connectors around the control area.
- Run self-check if available: enter diagnostic mode and let the machine report any stored sensor faults; write down the codes.
- Clear the mode memory: if your model stores a temporary error, a full reset (power cycle) can clear it and let you verify if E6 returns.
If these steps do not clear E6 or if you notice signs of water intrusion, damage, or substantial wear on wiring, stop and contact a professional. Do not attempt to swap sensors or boards without official service guidance.
Safety, Warranty, and When to Call a Pro
E6-related repairs involve electronics that can retain a dangerous charge and can be affected by moisture exposure. If you detect a burning smell, melted insulation, buzzing noises, or if the unit is still under warranty, contact the manufacturer or an authorized service provider. DIY repairs beyond reseating connectors can void warranty or worsen damage. Expect potential costs: diagnostic fees typically range from 60–120 USD, with labor in the 70–150 USD per hour range, and component replacements (sensors, harnesses, or control boards) that may total several hundred dollars depending on the model and availability. The Why Error Code Team recommends documenting symptoms, performing non-invasive checks, and only moving to parts replacement after confirming via a proper diagnostic or service manual. If you are past the warranty window or the fault persists after basic fixes, a professional repair is the prudent choice to prevent further damage and ensure your safety.
Steps
Estimated time: 60-90 minutes
- 1
Power down and unplug
Turn off the unit and unplug from the wall. Wait 60 seconds to discharge any residuals. This reset helps clear transient faults that might trigger E6. Do not touch live components during this step.
Tip: Keep a note of any immediate changes in behavior after plugging back in. - 2
Access the control area
Carefully remove the back or top cover to access the main control board and wiring harness. Use a non-conductive tool if removing panels. Do not touch circuit traces directly.
Tip: Take a quick photo of the wiring layout before disconnecting anything. - 3
Inspect and reseat connectors
Gently disconnect and reconnect the primary harness and any sensor plugs. Check for bent pins or signs of heat damage. Reseat until snug and secure.
Tip: If a connector feels loose after reseating, secure with a small zip tie away from moving parts. - 4
Check visible sensors
Visually inspect the water level sensor, door latch sensor, and thermistor area for obvious wear or moisture intrusion. Dry any moisture and ensure connectors are dry before retrying.
Tip: Use a flashlight and take notes of any discoloration or residue near sensors. - 5
Run a diagnostic check
If the model has a diagnostic or service mode, run the self-check and record any codes that appear. Compare to the model manual for mapping to a fault.
Tip: Document codes clearly; write them down before powering down again. - 6
Decide on next steps
If E6 persists after the above steps, prepare for professional inspection. Gather purchase date, model, and any observed symptoms to speed troubleshooting.
Tip: Always consider warranty and regional service options before replacing major components.
Diagnosis: Washer displays E6 and won’t start
Possible Causes
- highLoose or damaged wiring harnesses or connectors between the control board and sensors/actuators
- mediumSensor input fault (e.g., water level, door sensor, thermistor)
- lowDrive circuit or control board fault
Fixes
- easyReseat main harness connectors and inspect pins for damage
- mediumInspect sensors and connectors for corrosion or wear; replace damaged wires
- hardReplace faulty sensor, drive circuit, or control board
Frequently Asked Questions
What does Mitsubishi Electric error code E6 mean?
E6 is a general electronics fault indicating sensor or wiring issues that require diagnosis. It’s not typically a single failed component you can replace at home. A methodical check of connections and sensors is advised.
E6 means there’s an electronics fault, usually involving sensors or wiring. Start with safe checks and wiring connections, then run any built-in diagnostics.
Can I reset E6 by unplugging the machine?
A power cycle can clear transient faults and temporarily reset readings, but E6 often reappears if the underlying sensor or wiring issue isn’t fixed.
Power cycling may clear it temporarily, but the fault will likely come back until the root cause is addressed.
Is E6 covered under warranty?
Warranty coverage depends on model and purchase date; verify with the manufacturer or an authorized service provider. Some exclusions may apply for user-caused damage.
Warranty varies by model and date of purchase; check with the maker to confirm coverage.
How much does it cost to fix E6?
Costs vary by region and model. Typical diagnostics range from $60–$120, with labor usually $70–$150 per hour. Replacement parts can add hundreds if needed.
Diagnostics are typically $60 to $120, plus labor and parts if replacements are needed.
When should I call a professional for E6?
If basic checks don’t resolve E6, or you notice moisture, burning smells, or obvious component damage, stop and contact a qualified technician or the manufacturer’s service line.
Call a professional if basic fixes fail or you see damage or moisture in the unit.
Watch Video
Top Takeaways
- E6 signals a control-electronics fault, not a single burnt part
- Start with safe power-cycle and reseating connectors
- If the error persists, escalate to professional service
- Document symptoms and codes for faster diagnosis