Self-Protection Failed Error Code 4: Diagnosis and Fixes
Understand self protection failed error code 4, its common causes, and practical step-by-step fixes. This Why Error Code guide helps developers diagnose quickly, minimize downtime, and safely restore protected operations.

Self protection failed error code 4 means a protective guard detected an unsafe condition and halted the process. It signals a security or safety fault needing attention. Quick fixes include a controlled reboot, updating firmware or software, and verifying security modules or sensors. If the fault remains, review logs and contact support.
What the error means in practice
Self protection failed error code 4 denotes that a protective check, guard, or security policy has tripped and halted a process, device, or service. It is urgent because continuing could expose data, hardware, or users to risk. The message is not just a nuisance; it signals a need to verify the integrity of your security posture, review recent changes, and ensure that any protective mechanism is functioning as intended. In many systems, this code appears after a configuration change, a failed sensor reading, or a firmware update that left protection rules in an unreachable or inconsistent state. Treat it as one of the top-priority issues when triaging a fault, since ignoring it can lead to broader outages or data exposure.
Symptoms and scenarios you might see
Users and operators typically encounter error code 4 after a system protection trigger, a failed safety check, or a security policy violation. Look for accompanying indicators such as a halted service, a protective lockout, a red alert banner, or a log entry marked with the code 4 identifier. In network devices, this may align with a failed certificate validation or a tamper-detection event. In embedded systems, expect sensor readouts to be flagged as invalid or out-of-range. The urgency remains the same: isolate the cause, prevent further risk, and begin a measured remediation.
Most likely causes and quick fixes
The top suspects for self protection failed error code 4 usually include: a security module fault, a corrupted configuration, or a firmware bug impacting protection checks. Quick fixes are designed to restore a safe baseline before deeper work. If you’re able, perform a controlled reboot to reinitialize protection logic, then apply a firmware or software update to ensure the latest protection rules are in place. Verify sensor health and reseat any removable security modules if applicable. If the issue recurs, revert to a known-good configuration and re-run tests in a controlled environment.
In-depth repair steps for the primary cause
When the root cause appears to be a security module fault or hardware sensor failure, a structured repair is needed. Start with a controlled shutdown, then reseat or replace the suspect module following the manufacturer’s guidelines. After reseating, power up and run a full health check, including any integrity or signature validation processes. Next, install the latest firmware or software patch that addresses protection logic regressions. Finally, reconfigure protection rules to match current security requirements and conduct a simulated test to confirm normal operation under safe conditions.
Other possible causes and how to address them
If primary causes are ruled out, consider corrupted configuration, certificate or key mismatches, and software bugs that alter protection decision logic. Check for recent changes in access control policies, cryptographic material, or security APIs. Restore from a clean backup, re-apply secure settings, and monitor logs for repeating patterns that could indicate a latent issue. In some cases, a teardown of non-critical subsystems may help identify cross-component interactions that trigger the fault.
Safety, escalation, and cost expectations
Safety should always come first. Do not bypass protection checks or disable guards to force operation; this increases risk to people and equipment. If the fault persists after basic fixes, escalate to the responsible security or hardware team or contact the vendor for a formal triage. Cost estimates for repair typically include a firmware update window, potential hardware replacement, and labor—often ranging from low to mid hundreds of dollars for complex systems, depending on parts and service rates. In mission-critical environments, factor in downtime costs and potential data recovery expenses.
Steps
Estimated time: 60-120 minutes
- 1
Prepare and back up
Power down the system safely and back up current configurations, logs, and critical data. Prepare a maintenance window if this is a production environment.
Tip: Document the exact time of the fault and snapshot current protection rules before changes. - 2
Power cycle and reset
Perform a controlled reboot to reinitialize the protection logic. Monitor boot logs for any errors related to the security module or protection checks.
Tip: Use a safe boot mode if available to avoid triggering more protective actions during restart. - 3
Apply updates
Install the latest firmware or software patch that addresses protection logic regressions. Verify the update completed and the system reboots cleanly.
Tip: Check vendor release notes for any known issues or post-update steps. - 4
Inspect hardware modules
Open the enclosure and inspect security modules and sensors. Reseat connectors and verify there are no obvious signs of damage.
Tip: Handle components with ESD precautions and use approved tools. - 5
Validate configuration and test
Restore a known-good configuration, then run a controlled test to verify that protection checks function as intended without false positives.
Tip: Perform a staged test: non-critical workload first, then full operation.
Diagnosis: Error code 4: Self protection failed, system halted or protective feature engaged
Possible Causes
- highSecurity module or safety guard fault
- mediumCorrupted configuration or stale certificates
- lowFirmware or software bug affecting protection checks
Fixes
- easyRun a controlled reset or safe reboot to reinitialize protection logic
- mediumUpdate to the latest firmware/software and reapply configurations
- hardRe-seat or replace the security module/hardware sensor if available
Frequently Asked Questions
What does self protection failed error code 4 mean?
It indicates a protective guard detected an unsafe condition and halted operation. It requires validating security posture, reviewing recent changes, and restoring proper protection behavior.
Error 4 means a safety check tripped and stopped the system; you need to review safeguards and fix the root cause.
Can I fix error code 4 myself?
Yes, many cases can be addressed with a controlled reset, updates, and configuration checks. However, if you are unsure about safety implications or the fault persists, seek professional assistance.
You can often fix it yourself with resets and updates, but don’t hesitate to contact a pro if uncertainty remains.
What are common causes of this error?
Typical causes include a failed security module, corrupted settings, or a firmware bug affecting protection checks. Less common are sensor faults or power instability.
Common causes are a faulty security module, bad settings, or a bug in the protection logic.
Is there a cost estimate to fix this error?
Costs vary by device and scope, often ranging from modest software updates to hardware replacement, plus labor. Request a service estimate before major repairs.
Costs depend on what needs repair, from updates to possible hardware changes.
What if the fault comes back after fixes?
If the fault recurs, escalate to security or hardware support, collect logs, and consider a deeper diagnostic or replacement of failing components.
If it returns, escalate to support and gather logs for a deeper check.
How can I prevent this error in the future?
Keep firmware updated, monitor protection policy changes, and implement regular health checks and backups to catch issues before they trigger a fault.
Prevent failures by staying updated and running regular protection health checks.
Watch Video
Top Takeaways
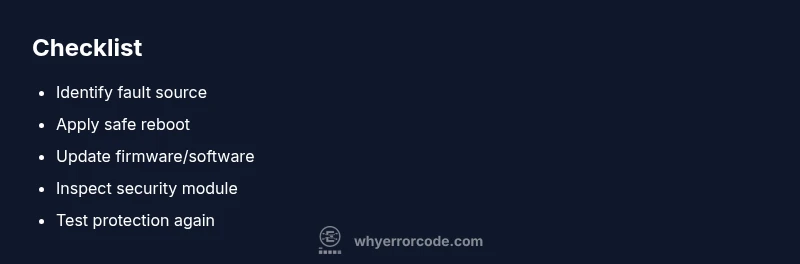
- Identify the fault fast using the diagnostic flow
- Prioritize firmware updates and configuration integrity
- Verify hardware modules and sensors if safe to do so
- Document changes and test thoroughly after fixes