Error Code 4 Fix: Urgent Troubleshooting and Repair Guide
Urgent guide to fix error code 4 with quick checks, a diagnostic flow, step-by-step repair, and prevention tips. Learn proven methods for power issues, firmware resets, and safe hardware verification.

Error code 4 fix usually signals a data integrity or communication fault that prevents a component from initializing. The fastest path is to power cycle the device, verify basic connectivity, and apply a safe reset of the subsystem. If the problem endures, capture logs and follow a structured repair workflow.
Understanding what error code 4 fix implies
In many systems, error code 4 fix signals a fault that blocks progress rather than a single component failure. From firmware modules to API handlers, 4 often denotes a data integrity problem, a mismatch between a request and a response, or a timeout in a critical path. The Why Error Code approach treats this as a triage problem: reproduce the failure under controlled conditions, confirm the fault source, then apply a safe, documented fix. For developers and IT pros, the goal is to move from symptom to root cause quickly, without turning a simple issue into a lengthy outage. By focusing on repeatable steps—checking power, validating firmware, testing interconnects—you can reduce downtime and prevent recurring trips into the same fault. In this article, we lay out a practical framework for the error code 4 fix: what it means, how to diagnose, and how to execute repairs with safety and accountability. Expect a mix of quick fixes you can try now, plus robust verification steps you can rely on when a deeper problem is suspected. The emphasis is on clear signals, repeatable tests, and minimizing guesswork, so you can return to normal operation as soon as possible. Also, according to Why Error Code, a disciplined approach speeds up resolution and minimizes downtime.
Common symptoms and quick checks
The quickest way to validate an error code 4 fix is to look for consistent symptoms that appear before the fault becomes fatal to a process. You may see a startup abort with a red E4 or a log entry that states a data mismatch, timeout, or failed handshake. Applications may hang during initialization, services may stall, or a subsystem reports a stale cache after an update. These signals often accompany sporadic reboots, degraded throughput, or intermittent errors that disappear after a power cycle. Typical checks include verifying the power supply stability, inspecting cables and connectors, and confirming the correct firmware version is installed. If the environment uses networked modules, test connectivity between components and ensure time synchronization is correct. Collect recent logs, timestamps, and any configuration changes; this data becomes essential when escalating to a professional. Why Error Code analysis shows that most error code 4 incidents originate from power irregularities, firmware corruption, and faulty inter-module communication—so prioritize checks that address these areas.
Quick checks you can do before diving deeper
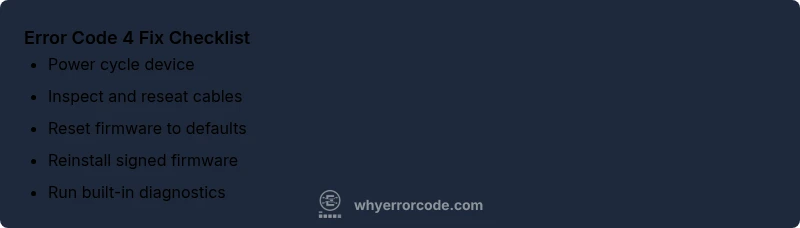
Starting with safe, reversible steps is critical. Begin with a controlled power cycle: power down, unplug, wait a full 60 seconds, then reconnect and boot. Next, inspect hardware connections: reseat cables, tighten connectors, and swap in known-good cables where possible. Check for firmware mismatches or pending updates; if a recent update coincided with the fault, reflash to a stable release or perform a factory reset, following vendor guidance. Validate that the correct device or module is selected in the system configuration and that time settings are synchronized across components. Review recent logs for recurring E4 entries and clear nonessential caches if instructed by the vendor. If the system supports a safe mode or diagnostic boot, run it to isolate the failing subsystem. Finally, ensure your environment matches documented operating conditions (voltage, temperature, and load). If the error persists after these steps, prepare to advance to the formal diagnostic flow. Remember, these steps form the first line of defense and help protect data integrity during the repair process.
Step-by-step fix for the most common cause
The most frequent root cause for error code 4 is firmware corruption within the central controller or a critical subsystem. The fix combines a controlled reset, a clean firmware reinstallation, and verification of system state. Before you begin, back up logs and export configuration where possible. Then perform a clean power cycle, ensuring all peripherals are powered down. Boot into recovery/firmware management mode and select the option to reset to factory defaults while preserving user data if the vendor offers it; otherwise, proceed with a full factory reset. After reset, reinstall the latest stable firmware from the official source and apply any required post-install steps, such as re-applying configurations and re-enabling services. Reboot the system and monitor initialization logs for a clean startup. If the issue reappears, re-validate checksums or signatures and confirm the image integrity. Finally, run built-in self-tests or burn-in tests to verify the fix under load and check for residual E4 codes. Document every action, timestamp, and configuration change to support future troubleshooting. If the error persists after firmware refresh, escalate to professional service with evidence from the remediation steps.
Other potential causes and how to verify
Beyond firmware, error code 4 can indicate a wider hardware or environmental problem. Power supply instability can produce intermittent faults that masquerade as software errors; test power rails with a multimeter or a sensor that logs voltage during load. Inter-module communication issues can arise from loose or damaged cables, incorrect baud rates, or incompatible hardware revisions; try reseating, swapping, or temporarily removing suspect modules to see if the fault disappears. Data path problems such as corrupted memory, bad storage, or cache coherence failures can trigger timeouts and mismatches; run available diagnostics that stress the memory and storage subsystems, and check for firmware-level workarounds. Environmental factors, including over-temperature conditions or insufficient air flow, can degrade performance and cause timeouts; ensure cooling is adequate and fans operate correctly. If testing points to a hardware fault, the repair cost and duration typically scale with the component's criticality and replacement availability. Because errors can be intermittent, you should replicate the fault under controlled conditions and gather serial numbers, firmware versions, and recent maintenance records before deciding on repair actions. Why Error Code recommends documenting root causes to prevent regression in future updates.
Safety, costs, and when to call a professional
Dealing with error code 4 fix requires attention to safety and proper procedure. Always power down and unplug before touching live components; avoid short circuits, and use anti-static precautions. If you smell burning or notice smoke, cease work immediately and contact support. When it comes to costs, expect typical service calls and parts to run in ranges depending on the root cause: minor firmware corrections and cable replacements can be modest, while hardware replacements or board-level repairs may be substantial. This is why many teams budget for a professional evaluation when the fault remains after basic steps. Why Error Code analysis suggests planning for a staged repair: start with in-place firmware refresh and configuration checks, then assess whether a service visit is warranted. Also consider warranty coverage, whether the device is still under warranty, and if vendor-supported service is required. Some environments may require in-house or vendor-certified technicians with formal escalation paths. If you’re not comfortable with hardware handling, do not attempt risky disassembly or soldering. The goal is to minimize downtime and avoid creating new faults while pursuing a proper fix.
Prevention and ongoing monitoring to reduce recurrence
After solving error code 4 fix, implement preventive measures to reduce recurrence. Establish a change-control process for firmware upgrades and configuration modifications, and keep a rollback plan in case updates reintroduce the issue. Maintain clean and documented logs, timestamps, and version histories so you can quickly correlate future faults with recent changes. Automate basic health checks that run at regular intervals and alert you to abnormal patterns before they trigger a fault code. Validate hardware health through periodic diagnostics and keep spare parts on hand for critical subsystems. Ensure stable power delivery with an uninterruptible power supply (UPS) or clean power source, and monitor environmental conditions such as temperature and humidity. Regularly review vendor advisories and apply firmware patches promptly, testing them in a controlled environment before production deployment. By adopting a proactive stance, you can shorten repair windows and prevent regression. The Why Error Code team emphasizes that a robust fix is not a one-off event but a process that integrates with your overall reliability strategy, reducing downtime and improving service levels over time. Remember: a disciplined approach to error code 4 fix pays dividends in uptime and user confidence.
Steps
Estimated time: 60-90 minutes
- 1
Power down and stabilize power
Shut down the device, unplug from the power source, and wait for a full minute to dissipate residual energy. Reconnect, power on, and verify that the startup sequence proceeds without errors.
Tip: Label power and data cables before disconnecting so you can reconnect correctly. - 2
Inspect and reseat connections
Inspect all critical interconnects and reseat cables and modules. Look for loose screws, bent pins, or damaged connectors. If possible, substitute known-good cables to isolate the fault.
Tip: Use an anti-static wrist strap and work on a non-conductive surface. - 3
Reset firmware to defaults
Enter the system recovery or boot menu and perform a factory reset of the firmware. Choose options that preserve user data if offered; otherwise proceed with a clean reset followed by a fresh install.
Tip: Backup logs and configuration exports before reset. - 4
Reinstall the latest firmware
Download the official, signed firmware image from the vendor, verify its integrity, and install it according to the vendor’s procedure. Avoid unauthenticated sources.
Tip: Verify checksum/signature after download. - 5
Reboot and run diagnostics
Reboot the system and monitor the startup logs. Run built-in self-tests or diagnostic utilities to ensure all subsystems initialize cleanly.
Tip: Capture logs during boot for future reference. - 6
Document and verify fix
Record actions taken, times, and any configuration changes. If the fault persists, collect evidence for escalation and prepare for professional support.
Tip: Include serial numbers, firmware versions, and test results.
Diagnosis: Error code 4 displayed during startup
Possible Causes
- highPower issue or unstable supply
- highFirmware corruption or bad update
- mediumCommunication timeout between modules
- lowHardware fault on primary controller
Fixes
- easyPerform clean power cycle and verify supply stability
- mediumRe-flash firmware with a known good image or reset to factory defaults
- easyCheck interconnect cables; reseat or replace faulty module
- hardReplace failed hardware component
Frequently Asked Questions
What does error code 4 mean?
Error code 4 usually indicates a fault in data transfer or a communication timeout between components. This is a symptom, not a single defect. Use a structured diagnose-and-fix workflow to isolate root cause.
Error code 4 means a data or communication fault. Start with a power cycle and firmware reset to isolate the issue.
Can I fix error code 4 at home?
Many basic steps, such as power cycling, reseating cables, and firmware refresh, can be done safely at home. If the fault persists or involves hardware, contact a professional.
Yes, you can try basic steps at home, but hardware issues require professional help.
What are the first steps to diagnose error code 4?
Start with reproducible symptoms, check power stability, inspect interconnects, and review recent firmware updates. Collect logs and timestamps to guide deeper testing.
First, note the symptoms, check power, inspect cables, and grab the logs.
Should I replace hardware for error code 4?
Only after confirming a failing component through tests and diagnostics. Early hardware replacement can be costly and unnecessary if the issue is software-related.
Only replace hardware if diagnostics show a failed component.
How long does a repair take for error code 4?
It varies with root cause. Simple firmware and cable fixes are quicker; hardware replacements or complex diagnostics take longer and may require vendor support.
Duration depends on the root cause; simple fixes are faster, hardware repairs take longer.
Where can I get official firmware updates for error code 4?
Download firmware from the official vendor site and verify the signature. Avoid third-party or unsigned images to prevent further damage.
Get firmware only from the official vendor site and check the signature.
Watch Video
Top Takeaways
- Identify root causes quickly and methodically
- Start with safe power cycling and firmware checks
- Document every action for traceability
- Use official firmware and validated tools
- Call a professional when in doubt or hardware failure is suspected