How to Troubleshoot Voltas E1 Error Code
Urgent guide to understanding voltas e1 error code, diagnosing common causes, and practical fixes. Learn safe resets, when to call a pro, and cost ranges to budget for repair.

voltas e1 error code typically signals a startup or sensor fault in Voltas appliances. Most users see E1 when a sensor or control board misreads input, or when the unit fails to complete its self-test. The quick fix starts with safety-first checks: unplug, wait 60 seconds, reseat connectors, and run a basic reset. If unresolved, seek professional service.
What voltas e1 error code means in plain language
The voltas e1 error code is an on-device indicator that something in the sensor network or control logic is not performing as expected. According to Why Error Code, E1 often points to a sensor fault, a failed temperature/pressure sensor, or a control-board communication glitch. The exact meaning can vary by model, so always consult your user manual for the model-specific definition. In most cases, you should start with a safe power cycle and a basic reset. If the issue persists, professional service may be required. In this guide, we’ll walk through quick checks you can perform safely, and how to map symptoms to probable causes.
Common symptoms and when to act
You may see voltas e1 accompanied by a blinking or steady error light, beeps, or an inability to start a cycle. Some models display E1 after a failed self-test or when sensors report out-of-range values. If the error appears during a critical operation (like cooling or heating), power down the unit immediately and unplug if accessible. The Why Error Code team notes that symptoms often correlate with sensor or motherboard issues, but model specifics matter—always reference your manual for exact definitions. If you notice water intrusion, burn smells, or overheating, stop use and call a technician right away.
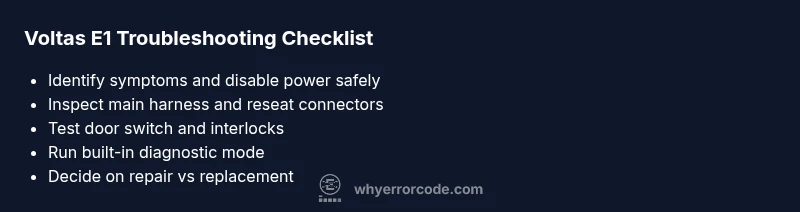
Quick checks you can perform safely
- Unplug the unit and wait at least 60 seconds before plugging back in to reset the microcontroller.
- Check for obvious loose cables at the service panel and reseat the main harness connectors with the power off.
- Test the door or lid switch and ensure it latches securely; a faulty switch can trigger E1 on some models.
- Verify the display and control panel operate normally after a reset; if panels remain unresponsive, do not attempt further disassembly without guidance.
- If you have model-specific self-test or diagnostic modes, run them according to the manual and note any codes that appear.
Notes on cost: simple resets and connector reseating are typically safe and inexpensive, while sensor or board replacements can involve parts and labor. Depending on the model and region, expect a wide range of total costs, from roughly $50-$300 for common sensor repairs, up to $300-$600 for control-board replacements when a pro is needed.
Diagnostic flow: symptom to causes mapping
In this section, we map typical E1 symptoms to probable causes and manifests in a practical way. The priority order is based on likelihood:
- Sensor fault or failing temperature/pressure sensor — high likelihood
- Control board or microcontroller communication issue — medium likelihood
- Loose or corroded internal connections — low likelihood
By aligning symptoms with these causes, you can decide whether a quick reset suffices or if a professional inspection is warranted. Always document the exact symptom, when it occurs, and any preceding events such as power outages or moisture exposure to help the technician diagnose faster.
Step-by-step quick fixes you can try now
When you encounter voltas e1, start with non-invasive, safe steps before opening panels. These fixes are intended to be quick and inexpensive and can often resolve the issue without professional service. If the error persists after these steps, prepare for a more thorough diagnostic by a qualified technician. Remember to consider model-specific instructions in the user manual.
Safety first: when to call a professional and cost expectations
If you are unsure about any step or the device shows signs of electrical fault, burning smells, or leakage, stop and call a professional immediately. For basic troubleshooting, you may save on costs by performing resets and connector checks yourself, but sensor or control-board replacements should be performed by an authorized technician. Cost ranges vary widely by region and model; typical parts may cost from $20–$120, with labor often ranging from $40–$180 per hour. A full control-board replacement can push total costs toward the higher end, often $150–$600 depending on the part and service rate.
Advanced diagnostics and replacement considerations
If E1 persists after all safe resets and harness reseating, the fault is more likely an underlying sensor or control board issue. In practice, you will want to confirm with a service professional which component is at fault using factory diagnostic tools. Sensor replacements are generally less costly than a new board, but both require estimation based on parts availability and labor. When evaluating replacement, compare the cost of a repair against the price of a new unit, factoring in the expected remaining lifespan and warranty status.
Steps
Estimated time: 30-45 minutes
- 1
Power down and unplug the unit
Shut off the appliance and disconnect from the power outlet. Wait at least 60 seconds to allow the microcontroller to reset. This safe reset often clears transient faults that trigger E1.
Tip: Have the model and serial number handy in case you need to reference parts or warranty. - 2
Open the access panel and inspect harnesses
With dry hands, remove the rear access or service panel as instructed by the user manual. Look for loose, discolored, or corroded connectors. Gently reseat the main harness and any control-board cables to ensure a solid connection.
Tip: Avoid wiggling cables excessively; reseat with a deliberate, firm push to ensure contact. - 3
Test the door/lid switch and safety interlocks
A faulty door switch or lid interlock can falsely report a fault, triggering E1. Manually depress the switch to verify it engages and releases cleanly. If you have diagnostic mode, run it to confirm the switch state.
Tip: If the switch feels stiff or loose, replace it rather than continuing to test. - 4
Run a built-in self-test or diagnostic mode
Many Voltas models include a self-test routine accessible from the control panel. Follow the manual to initiate the test and record any error codes that appear besides E1. This helps narrow the fault to a sensor or board issue.
Tip: Document the exact sequence used and any additional codes shown. - 5
Inspect sensors with basic checks or multimeter (if equipped)
If you are comfortable, access sensors per the manual and verify resistance or signal values within spec. A failed sensor commonly causes E1 and should be replaced by a professional if readings are out of range.
Tip: Do not attempt complex sensor testing without documentation; incorrect tests can damage components. - 6
Decide on next steps based on results
If resets and reseating clear the code, monitor the unit for a few cycles. If E1 persists, schedule a service call. Prepare for potential part replacement and discuss cost ranges with your technician.
Tip: Keep receipts and document repair details for future reference.
Diagnosis: Voltas E1 error shows on display; unit won’t start or cycles fail
Possible Causes
- highSensor fault or failing temperature/pressure sensor
- mediumControl board or microcontroller communication issue
- lowLoose or corroded internal connections
Fixes
- easyPower cycle the unit and perform a basic reset
- easyCheck and reseat main harness connectors with power off
- hardReplace faulty sensor or control board as diagnosed by the technician
Frequently Asked Questions
What does voltas e1 error code mean on my appliance?
E1 usually indicates a sensor fault or a control-board communication problem. Exact meaning depends on the model, so check your manual for model-specific definitions. Start with a safe reset and consider professional diagnostics if the code returns.
E1 usually means a sensor or board issue. Check your model manual and try a safe reset first; contact a professional if it persists.
Is voltas e1 dangerous to ignore?
While not typically explosive, continuing to use a device with E1 can worsen internal faults or cause electrical hazards. Power down and unplug if you notice burning smells, moisture, or overheating, and seek professional help.
Not usually immediately dangerous, but it can lead to bigger problems. Power down and call a technician if it persists.
Can I fix voltas e1 myself?
Some basic resets and connector reseating are safe for non-specialists. More advanced work, especially sensor or board replacement, should be performed by a trained technician to avoid injury and further damage.
You can try basic resets, but sensors and boards need a pro.
How much does repairing voltas e1 typically cost?
Costs vary by part and service. Expect parts and labor to range from about $50 to $600, depending on whether you replace sensors, a control board, or both, and on local rates.
Repair costs vary; expect a broad range depending on the parts and labor involved.
What steps should I take after seeing E1?
Power cycle, inspect connections, test safety interlocks, and run any built-in diagnostic modes. If the issue persists, schedule professional service and clearly communicate all symptoms and steps you've tried.
Reset, check cables, run diagnostics, and call a pro if it stays.
Should I replace the unit if E1 keeps recurring?
Recurring E1 after professional service indicates a significant component issue or aging hardware. Compare the repair cost and the unit’s remaining lifespan to the price of a replacement unit plus potential warranty coverage.
If E1 keeps returning, think about replacement and weigh cost against lifespan.
Watch Video
Top Takeaways
- Start with a safe reset and reseat connections.
- E1 commonly signals sensor or board faults; model specifics matter.
- Use diagnostic mode and keep records for faster service.
- Costs vary; weigh repair vs replacement after evaluation.