What Happens If You Erase Trouble Codes: A Troubleshooting Guide
Discover what happens when you erase trouble codes, why clearing them isn’t a fix, and how to diagnose, repair, and prevent repeating faults with a safe, step-by-step approach.

Erasing trouble codes hides a fault rather than fixing it. The quick answer: you’re removing the alert and the stored data, but the underlying problem remains and may return the moment the condition recurs. Always diagnose first, fix root causes, then clear codes if the system prompts a test or you’re confirming a repair.
What happens if you erase trouble codes and why you might consider it
The phrase what happens if you erase trouble codes often comes up when a warning light blinks or a fault is logged in the vehicle’s memory. Clearing codes can quiet the dashboard temporarily, but it does not repair the root cause. In many situations, erasing codes buys you time to perform a careful diagnostic, but it can also mask a real problem that could worsen if ignored. According to Why Error Code, the safest posture is to treat erasing as a diagnostic aid rather than a repair. If you erase codes without addressing the underlying issue, the fault may reappear, and you’ll lose important historical data that could help future repairs. This is especially true for persistent system faults or intermittent problems that trigger only under certain conditions.
Why clearing codes is not a repair
Clearing trouble codes is akin to turning off a console error message rather than fixing the software or hardware flaw. The fault memory in most modern systems tracks real-time data, sensor status, and fault counts. When you erase codes, you reset the alert, but the sensor or wiring problem—if it exists—still affects operation. In some cases, the system enters a temporary ‘no fault’ state, yet the glitch remains latent and can return after a few drive cycles. If the root cause isn’t corrected, the issue can compromise emissions, fuel economy, or safety features. Understanding this distinction is crucial for developers, IT pros, and everyday users who troubleshoot error codes.
How trouble codes are stored and how an erase affects the data
Trouble codes are stored in the vehicle’s or device’s memory along with freeze-frame data and readiness monitors. The freeze-frame captures the exact conditions when the fault occurred, while readiness monitors track whether systems have completed required diagnostic checks. Erasing codes typically clears the active fault and resets those indicators, but recent data and historical faults may still exist in logs or shadow tables. In some systems, erasing codes also resets the trip counters and may affect how the next fault is reported. For accurate diagnosis, you should re-scan after repairs to view live data, not rely on an empty history.
Core categories of trouble codes and what they mean
Trouble codes fall into several categories (often labeled by prefixes like P, B, C, U). Each category points to a different subsystem: Powertrain (P) codes relate to engine and transmission; Body (B) codes cover doors, seats, and safety features; Chassis (C) codes involve suspension or braking; and User (U) codes address communications between modules. The meaning of each numeric code guides you toward a likely fault class, but it rarely pinpoints a single defective part. For example, a P0300 series code indicates misfire activity across multiple cylinders, which could be caused by spark plugs, coils, or fuel delivery issues. Always cross-check with live data to avoid chasing symptoms rather than causes.
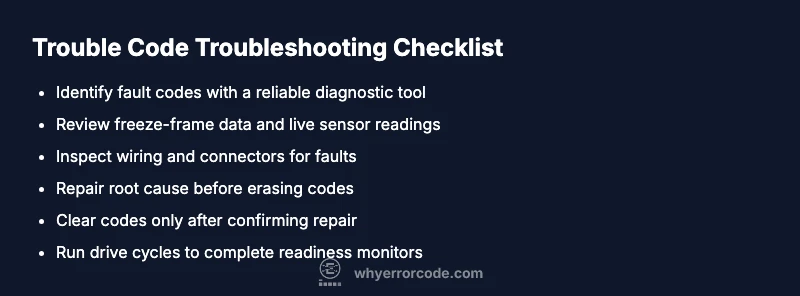
Diagnostic before erasing: a safe checklist
Before you clear any codes, perform a quick but thorough diagnostic check:
- Confirm safety: ensure there are no obvious hazards or fuel leaks.
- Read live data: inspect sensor values, fuel trims, and ignition timing in real-time.
- Check freeze-frame: review the conditions (engine load, temperature, RPM) at the fault occurrence.
- Inspect connectors and wires: loose or corroded connections are a common cause of intermittent faults.
- Validate readiness: drive the vehicle to see if monitors complete successfully. If any of these steps reveal a root cause, address it before erasing codes.
Step-by-step: a practical approach to erasing codes when appropriate
- Prepare your diagnostic tool and vehicle; ensure the engine is off and the key is in the correct position. 2) Retrieve current codes and live data to identify the fault context. 3) Repair the root cause if identified (e.g., sensor replacement, wiring repair, connector reseat). 4) Clear the codes only after confirming repairs with fresh data. 5) Perform drive cycles to complete readiness monitors and verify the fault does not reoccur. 6) Document the results and retest after a reasonable period of operation.
Tip: If the fault reappears, stop erasing codes and escalate to a deeper diagnostic or professional service.
Real-world scenarios: emissions, sensors, ignition
Emissions-related faults (like catalytic converter or Oxygen sensor codes) often require careful testing and sometimes a physical replacement, not mere code erasure. Sensor faults (MAP, MAF, or airflow sensors) can trigger codes that disappear briefly after a reset but return under load. Ignition and fuel system faults (misfire codes) may be caused by spark plugs, coils, or fuel injectors. In every case, erasing codes first should be accompanied by a structured diagnostic plan to confirm root cause rather than mask symptoms.
Prevention: maintenance to reduce false codes and unnecessary resets
Regular maintenance reduces the likelihood of nuisance codes. Use manufacturer-recommended intervals for spark plugs, filters, and fluids; keep electrical connections clean and tight; and address vacuum leaks or intake restrictions promptly. Staying up to date with software updates for the control modules can also prevent spurious codes. A proactive approach minimizes the need to erase codes and helps ensure that issues don’t escalate into more serious failures.
Steps
Estimated time: 30-60 minutes
- 1
Prepare and verify safety
Ensure the vehicle is on a flat surface, in park, with parking brake engaged. Gather the diagnostic tool and owner’s manual, and verify that you are working in a well-ventilated area. Safety first prevents injuries during repair or data collection.
Tip: Disconnect battery only if instructed by service procedures to avoid damage to modules. - 2
Read codes and live data
Connect the scanner and pull current codes along with live sensor data. Note freeze-frame data and monitor status. This step helps determine whether the fault is persistent or intermittent.
Tip: Save a screenshot of live data for later comparison after repairs. - 3
Inspect and repair root cause
Inspect wiring, connectors, and likely failure points related to the fault code. Replace faulty components, reseat connectors, and repair any leaks or corrosion before proceeding.
Tip: Do not rush replacement parts; verify part numbers and compatibility before installing. - 4
Clear codes after validation
Clear the fault codes only after you have verified the repair and the fault is not repeating in live data. Confirm that the system’s monitors can complete their checks during a drive cycle.
Tip: If the code returns immediately, re-check the repair before attempting another clear. - 5
Run drive cycles to completion
Drive the vehicle as recommended to complete all readiness monitors. Short trips may not be sufficient for full diagnostic coverage.
Tip: Keep a log of drive conditions to correlate with monitor completion. - 6
Document results and plan next steps
Record the codes cleared, the repair performed, and the final data after drive cycles. If monitors still fail, escalate to deeper diagnostics or professional support.
Tip: Share logs with a technician to speed up troubleshooting.
Diagnosis: Check Engine Light stays on or returns after attempting to erase codes
Possible Causes
- highUnresolved fault persists after erase
- mediumTransient fault that reoccurs only under certain conditions
- lowUser erased codes without confirming root cause or completed drive cycle
Fixes
- easyRun a full diagnostic scan with live data and freeze-frame to identify the exact faulting subsystem, then repair or replace faulty parts before erasing codes
- mediumRepair the root cause (sensor, wiring, or actuator) and re-test the system, ensuring readiness monitors complete
- easyIf fault is intermittent, perform a controlled road test and re-scan after driving to verify stability
Frequently Asked Questions
Can I erase trouble codes safely?
Erasing codes can be safe only after you have diagnosed and fixed the root cause. If the fault persists, the codes will return, and the issue may worsen. Always verify repairs with fresh data before erasing.
Erase codes only after confirming the root cause is fixed; otherwise the fault will likely return.
Will erasing codes reset the check engine light?
Erasing codes clears the active fault, which can turn off the light temporarily if the fault does not recur immediately. If the fault returns, the light will come back on.
Clearing codes may turn off the light briefly, but it will come back if the fault remains.
What is the difference between clearing codes and fixing the problem?
Clearing codes simply removes the alert; fixing the problem involves repairing or replacing faulty components so the fault cannot reoccur. Erasing is a stopgap, not a fix.
Erasing codes is a temporary measure; fix the root cause for a lasting solution.
Why do codes reappear after erase?
If the underlying issue is unresolved or related to a condition that triggers fault thresholds again, the code will reappear when the system tests run or when the fault reoccurs.
Codes return when the fault still exists or conditions trigger it again.
Should I erase codes before selling a vehicle?
Clearing codes before sale can be misleading. Disclose known faults and provide repair history instead of masking issues with erasure.
Be transparent about faults and repairs rather than erasing codes to hide them.
When should I seek professional help?
If codes recur after repairs, if you lack the diagnostic tools, or if the fault affects safety or emissions, consult a qualified technician.
If you’re unsure or the fault returns, get professional help.
Watch Video
Top Takeaways
- Do not erase codes without diagnosing first
- Clearing codes does not repair the underlying fault
- Use live data and freeze-frame to identify root causes
- Run drive cycles to complete readiness monitors
- Seek professional help if a fault recurs