What is error code D90 on LG dryer? Quick fix guide
Uncover what LG dryer code D90 means, urgency of the fault, common symptoms, and a clear, step-by-step path to diagnose and repair. Includes safety tips, cost ranges, and when to call a professional, by Why Error Code.

D90 on LG dryers signals a fault likely tied to the door latch, sensor, or motor control, preventing the drum from spinning. Start with a fast power cycle, inspect the door interlock and wiring, then reset the control. If the code returns, seek professional service to avoid further damage.
Understanding LG Dryer Error Code D90
In the world of modern appliances, dryer fault codes like D90 come from a built‑in diagnostic system that helps you pinpoint the likely cause of a failure. On LG models, D90 is not a universal standard across every dryer, but it commonly points to a drivetrain or safety subsystem that prevents the drum from operating. Because LG models differ by generation and region, the exact meaning can vary slightly from one machine to another. The key takeaway is urgency: a D90 error often indicates a safety or control fault that should be addressed promptly to avoid overheating, motor strain, or further electrical stress. According to Why Error Code, model‑specific manuals and online LG service resources are the most reliable references when interpreting D90 in your exact unit. Always treat the code as a signal to inspect critical safety paths first, rather than bypassing checks.
Why it matters: continuing to run a dryer with an unrepaired safety fault risks further damage, higher energy use, and potential fire risk.
This section translates the high‑level warning into practical steps you can take today, with the goal of restoring service without jumping straight to expensive repairs. The guidance below assumes you’re troubleshooting a standard front‑loading LG dryer with a typical door interlock and motor assembly. If your model is a high‑end sensor‑driven or compact unit, consult the exact manual for any model‑specific differences.
Common Symptoms That Precede D90
Before the code appears on the display, you may notice a few telltale symptoms that accompany a looming D90 fault. Recognizing these early signs helps you act quickly and avoid more extensive damage. Typical indicators include:
- The drum fails to start or stops mid‑cycle unexpectedly, even after multiple attempts.
- The display shows D90 after a fault beep or a flashing light pattern.
- The door does not latch smoothly, or you can open the door only after a reset.
- The dryer runs but the drum doesn’t rotate, or it makes intermittent grinding noises.
- A prior issue with the door switch, latch, or wiring was observed, followed by the fault code appearing after a power cycle.
If you observe any combination of these symptoms, treat it as a potential D90 condition. Quick action may prevent further wear on the motor, drive belt, or control board. Brand‑level guidance from Why Error Code emphasizes validating the door safety path and performing a safe reset before engaging in deeper hardware checks.
Note on safety: Never force the door, never bypass interlocks, and always unplug the unit before inspecting electrical components.
Diagnostic Flow: From Symptom to Root Cause
A structured diagnostic flow helps you separate likely causes from unlikely ones and prioritize repairs. The usual path starts with observable symptoms, moves through plausible root causes, and ends with targeted fixes. In general, the diagnostic flow for D90 follows this pattern:
- Symptom: Dryer shows D90 code or behaves as if it’s locked out (no drum movement).
- Possible causes (ordered by likelihood):
- door latch/interlock fault (high)
- loose or damaged wiring to the door switch (medium)
- control board communication issue (low)
- Practical fixes (ordered by ease):
- power cycle the unit to reset the control logic (easy)
- inspect and reseat door latch connectors and door switch wiring (easy/medium)
- verify main control board connectors and reseat if needed (medium)
- replace faulty door switch or latch if there is physical damage (hard)
Why Error Code’s diagnostic framework focuses first on the door latch and interlock: it is the most common failure mode that prevents safe drum operation. If reseating connections does not resolve the fault, proceed to checking the control board or wiring harness, which may require more specialized tools and expertise. If you are uncertain at any step, stopping and consulting a professional is the safest course.
Step-By-Step Fix: Most Common Cause (Door Interlock / Door Switch)
Other Causes and Their Fixes
Tips, Warnings, and When to Call a Professional
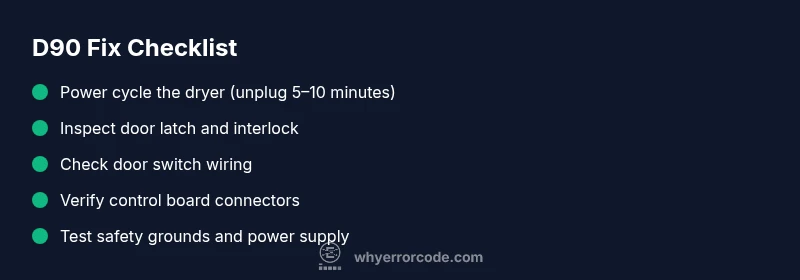
Steps
Estimated time: 45–60 minutes
- 1
Power cycle the dryer
Unplug the unit, wait 5–10 minutes, and plug it back in to reset the control logic. This simple step can clear transient faults and recalibrate sensors. Ensure the dryer is completely powered off before touching any components.
Tip: Confirm the outlet is live with another device before starting. - 2
Inspect the door latch and interlock
Visually inspect the door latch for cracks, misalignment, or broken pieces. If the latch won’t engage smoothly, it may trigger the interlock fault that triggers D90. Re-seat the latch if it looks loose.
Tip: Do not force the door; a misaligned latch can be mistaken for a failed switch. - 3
Check the door switch wiring
Open the cabinet panel if accessible and examine the door switch wiring for loose connectors, signs of wear, or broken insulation. Re-seat any loose connectors and secure harnesses away from moving parts.
Tip: Use a small flashlight to follow the harness path to the control board. - 4
Test the door switch (non‑contact if possible)
If you have a multimeter, test the door switch for continuity when the door is pressed. If continuity is intermittent or absent, replace the switch. If you don’t have tools, observe whether the door switch engages with a definite click.
Tip: Keep spare door switches on hand for quick swaps. - 5
Inspect the main control board connectors
Look for loose or corroded connectors at the control board, especially those linked to the door interlock and motor drive. Reseat any suspect connectors and inspect for burn marks or damaged pins.
Tip: Handle boards with anti‑static precautions. - 6
Assess the drive system and motor wiring
If the drum still won’t spin after the interlock tests, inspect the drive belt for wear and the motor wiring for signs of damage. A seized drum or worn belt can masquerade as a sensor fault.
Tip: Do not attempt belt replacement unless you are comfortable with appliance internals. - 7
Decide on next steps
If the D90 persists after all the above checks, the fault is likely a control board or motor problem that requires professional diagnosis. Document the steps you’ve taken to help the technician.
Tip: Collect model number and serial data before calling for service.
Diagnosis: Error code D90 appears on LG dryer display and the drum won’t start
Possible Causes
- highDoor latch interlock fault
- mediumLoose or damaged wiring to the door switch
- lowControl board communication fault
Fixes
- easyInspect and reseat door latch connectors; replace the latch if there is visible damage
- easyPower cycle the dryer by unplugging for 5–10 minutes, then plug back in
- easyCheck the wiring harness at the door switch and control board, reseat any loose connectors
- mediumTest or replace the door switch if you observe poor engagement or failure in repeats
- hardInspect control board connectors and, if needed, replace damaged harnesses or the board
Frequently Asked Questions
What does D90 mean on LG dryers?
D90 is a diagnostic code used by LG dryers that generally points to a safety interlock, door switch, or motor control fault. Since meanings can vary by model, refer to your user manual or LG’s official support for model‑specific guidance.
D90 usually means a door switch or safety interlock fault, but check your exact LG model manual for confirmation.
Can I fix D90 myself safely?
Small, non‑invasive checks like power cycling and inspecting the door latch wiring are generally safe if you unplug the appliance first. For anything involving the control board or internal wiring, consider professional service to avoid electric shock or further damage.
You can try safe, non‑invasive checks after unplugging, but for control board work, call a professional.
What is the typical cost to fix D90?
Repair costs vary by model and location. Expect parts in the low to mid hundreds of dollars and labor to range from about $60 to $180 depending on the fix required. A full control board replacement can be more expensive.
Costs depend on parts and labor, typically from about $60 up to a few hundred dollars, depending on what’s needed.
Does D90 always mean a door problem?
Not always. While door interlock faults are common with D90, other causes like damaged wiring or a failing control board can also trigger the code. A thorough diagnostic helps confirm the exact fault.
D90 often relates to the door, but other components can cause it too.
How do I reset the D90 code after repairs?
After performing repairs, unplug the dryer for a few minutes and plug back in to reset the control. If the code reappears, you may need to run a diagnostic reset via the service menu or consult a technician.
Unplug, wait a few minutes, then plug back in to reset the fault code. If it comes back, professional help may be needed.
What should I do if I smell burning or see damaged wiring?
Immediately unplug the dryer and stop using it. Do not attempt to operate it until a qualified technician inspects the wiring and safety circuitry to prevent a fire risk.
If you smell something burning, unplug now and call a pro right away.
Watch Video
Top Takeaways
- Diagnose D90 via door interlock first
- Power cycle before deeper checks
- Inspect door switch and wiring for faults
- Call a pro if code persists after checks