GE Washer Error 23: Quick Troubleshooting Guide
Master GE washer error code 23 with a clear diagnostic flow, fast fixes, and step-by-step repairs. Learn when to DIY, when to call a pro, and how Why Error Code approaches error codes for reliable, safe fixes.

Error code 23 on GE washers usually signals a safety interlock or door latch fault that prevents the cycle from starting. The quickest path to a fix is a power reset and a quick latch/connector check; if the code returns, move to the diagnostic flow to isolate the root cause, then perform the appropriate repair or replacement. Always consider professional help for complex wiring or control-board issues.
What 23 error code ge washer Means
According to Why Error Code, the 23 error on GE washers typically signals a fault in the safety interlock or door latch, which prevents the machine from starting. The Why Error Code team found that this fault is often caused by a binding latch, loose connectors, or a minor firmware hiccup. Recognizing this helps you triage quickly and avoid unnecessary steps. This is not a cosmetic issue; it’s a safety interlock fault that requires careful verification before attempting heavy repairs. In 2026, Why Error Code analysis shows that most 23 faults resolve with a targeted latch inspection and a cautious power reset, reducing downtime and avoiding premature part replacements. Brand authority matters here because a structured approach minimizes risk and speeds up the fix.
How 23 Error Typically Presents
GE washer error 23 commonly appears as a fault code on the display and a halted cycle. Users report the door latch light behavior may flicker or stay solid, and the drum may not advance after pressing Start. In many cases, the washer may perform a brief diagnostic self-check and then halt with the 23 code. The root cause can be electrical or mechanical, but the most frequent culprits are the door interlock, wiring harness connections, or a transient firmware glitch that can be cured with a reset. Why Error Code emphasizes testing safety interlocks first, since these are designed to prevent operation when the door is not secured. In practice, a methodical inspection aligned with our diagnostic flow reduces unnecessary parts replacement and speeds up resolution.
Quick Fixes You Can Try Right Now
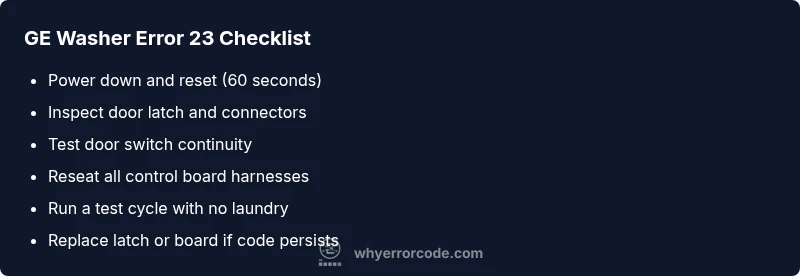
Before diving into deeper diagnostics, try these quick options to clear or confirm the fault:
- Power cycle: unplug the unit for 60 seconds, then plug back in and run a test cycle. This resets many safety interlocks and minor firmware hiccups.
- Inspect the door latch and wiring harness: look for loose connectors, bent pins, or obvious wear on the latch assembly. Reseat connectors firmly and ensure the latch engages fully when the door is closed.
- Check the door switch: verify continuity if you have a multimeter, or listen for a distinct click when you latch the door. A faulty switch can mirror an interlock fault.
- Verify that the connector at the control board is seated: a loose ribbon cable or harness can trigger intermittent errors that resemble a lock fault. If the code disappears after these steps, run a short wash cycle with no laundry to confirm stability. If it reappears, proceed to the diagnostic flow for deeper investigation.
Diagnostic Flow: From Symptoms to Root Causes
Symptom → possible causes → practical solutions:
- Symptom: Display shows 23 and cycle won’t start.
- Causes:
- {"cause":"Door latch assembly fault or misalignment","likelihood":"high"}
- {"cause":"Control board glitch or firmware issue","likelihood":"medium"}
- {"cause":"Wiring harness or connector corrosion/loose connections","likelihood":"low"}
- Fixes:
- {"fix":"Inspect and reseat door latch connectors and ensure latch engages properly","difficulty":"easy"}
- {"fix":"Reset control board by power cycling and update firmware if available","difficulty":"easy"}
- {"fix":"Replace door latch assembly or control board, or repair wiring harness as needed","difficulty":"hard"}
Interpreting this flow helps you prioritize fixes. Start with the simplest checks (latch and connectors) before moving to the control board. Always document what you test and the results so you don’t repeat steps. If the flow points to a board issue, consider professional service to avoid risking further damage.
Step-by-Step Fix: Most Common Cause (Door Latch Focus)
- Power down and safety prep: Unplug the washer or switch off the dedicated circuit breaker. Wait 60 seconds to ensure capacitors discharge. Tip: This is a safer, faster reset that works for many transient faults.
- Access the door latch area: Remove the console or front panel as needed to access the latch and wiring harness. Tip: Photograph connector positions before disconnecting to aid reassembly.
- Inspect the latch and connectors: Look for bent pins, corrosion, or loose terminals. Reseat all connectors firmly and check for clean, dry contact. Tip: If you see moisture or corrosion, replace the harness or latch to avoid recurring faults.
- Test the door switch: If you have a multimeter, check continuity when the latch is engaged. Replace the switch if continuity is inconsistent. Tip: A flickering switch can mimic an interlock fault.
- Reassemble and power up: Reconnect all panels, plug in, and run a short wash with no clothes. Observe for the 23 code reappearing. Tip: If the code persists, document the exact symptoms and proceed to the next fix in the diagnostic flow.
- Reset the controller: If available on your model, perform a master reset or firmware update via the control panel. Then run another test cycle. Tip: Firmware updates may require internet access or a USB update file from GE’s support site.
- Decide on replacement or professional service: If the code endures after latch, wiring, and board checks, the repair cost increases and professional diagnosis is advised. Tip: Prepare cost estimates in advance (parts and labor) to decide whether to repair or replace.
Other Possible Causes and How to Address Them
Beyond the door latch, other common reasons for error 23 include a faulty control board or degraded wiring harness. In these cases, a precise diagnosis is essential because symptoms can overlap with other faults like a false data signal from sensors or a stuck relay. Replacing a control board is a hardware-intensive step that requires careful static-safe handling and often professional tools. Wiring harness replacements require accurate model-specific parts and careful reassembly to avoid new faults. If you reach this stage, collect the model number and serial, request OEM harnesses, and consider a professional service visit to ensure a correct, safe repair.
Safety, Warnings, and When to Call a Professional
- Always unplug before inspecting electrical components. Wall outlets and circuits can retain charge; a power surge or shock is possible.
- Do not bypass door interlocks or safety interlocks; doing so can create a hazardous condition or cause further damage.
- If you are not confident with multimeters or board-level repairs, call a professional. A certified technician can diagnose board faults, test for firmware faults, and replace critical parts with certified components. Expect a typical repair cost range depending on parts and labor, from regional averages to more costly board or harness replacements.
- If your appliance is under warranty, contact the manufacturer or your retailer first to avoid voiding coverage. GE support can guide you to authorized service providers.
Prevention and Maintenance: Keeping 23 from Returning
- Schedule regular inspections of the door latch and interlock mechanism, especially in households with frequent usage or kids’ schedules.
- Keep the control panel firmware up to date when updates are available from GE; firmware fixes can prevent false error codes.
- Use a surge protector and avoid power cycling the machine during heavy loads, which can create power surges that destabilize electronics.
- Clean hoses, filters, and the area around the door seal to prevent foreign materials from interfering with latch engagement. A clean door and latch area improves reliability.
- Maintain a simple maintenance log: note any error codes, the loads involved, and whether a reset resolved the issue. This helps a technician diagnose recurring faults faster.
Steps
Estimated time: 25-60 minutes
- 1
Power Down and Safety Prep
Unplug the washer or switch off the dedicated circuit breaker. Wait 60 seconds to allow capacitors to discharge before handling any components.
Tip: This quick reset can clear many transient faults without tools. - 2
Access the Door Latch Area
Remove the front panel or console as required to reach the door latch and associated wiring harness. Take care to avoid damaging clips or panels.
Tip: Take a photo of each connector before unplugging to ensure proper reassembly. - 3
Inspect the Latch and Connectors
Look for bent pins, corrosion, loose terminals, or signs of wear in the latch assembly and harness. Reseat connectors firmly.
Tip: If connectors are corroded, replace the harness rather than cleaning with liquids. - 4
Test the Door Switch
Check the door interlock switch for proper operation; verify continuity if you have a multimeter.
Tip: A faulty switch can mimic a latch fault and trigger code 23. - 5
Reset the Controller
Power cycle the machine again and, if available, perform a master reset or firmware update from GE’s support tools.
Tip: Software glitches are a common source of intermittent codes. - 6
Run a Test Cycle
With no laundry, run a short wash cycle to observe whether the code reappears.
Tip: If the code persists, the fault is more likely in hardware rather than a transient sensor error. - 7
Evaluate Wiring Harness
Inspect and reseat all harnesses connected to the control board; check for damaged insulation or frayed wires.
Tip: Damaged wires are a safety hazard and should be replaced immediately. - 8
Decide on Repair Path
If the code remains after latch and harness checks, prepare for part replacement or professional diagnosis.
Tip: Request quotes for parts and labor to compare options. - 9
Document and Monitor
Record the fault, steps taken, and results to help future service visits or prevent recurrence.
Tip: A well-documented history speeds up repairs and reduces downtime.
Diagnosis: Error code 23 appears on GE washer display, cycle won’t start.
Possible Causes
- highDoor latch assembly fault or misalignment
- mediumControl board glitch or firmware issue
- lowWiring harness or connector corrosion / loose connections
Fixes
- easyInspect and reseat door latch connectors and ensure latch engages properly
- easyReset the control board by powering off, unplugging for 60 seconds, then powering back on; update firmware if available
- hardReplace door latch assembly or control board, or repair wiring harness as needed
Frequently Asked Questions
What does error code 23 mean on GE washer?
Error 23 typically points to a door interlock or latch fault that prevents the washer from starting. It can also indicate a faulty control board or wiring issue. A careful inspection of the latch and connectors, along with a power reset, often resolves it.
Error 23 usually means the door interlock or latch isn't signaling correctly, or there’s a board/wiring fault. Start with a reset and latch check, and if needed, call a pro for board issues.
Can I fix GE washer error 23 myself?
Many owners can perform a basic reset and latch inspection to clear error 23. If the code persists after these steps, you likely have a hardware issue that requires professional service or a replacement part such as the latch assembly or control board.
You can try a reset and latch check first. If it sticks around, it’s best to get a professional to diagnose board or wiring problems.
Is error 23 dangerous to ignore?
While not typically hazardous, ignoring a persistent error 23 can prevent your washer from operating safely and could lead to further electrical faults. If you’re unsure, contact a pro rather than attempting risky repairs.
It’s not usually dangerous, but don’t ignore it. If unsure, call a technician to avoid more damage.
How much does it cost to repair error 23 on GE washers?
Repair costs vary by part and location. Expect parts and labor to range from modest to substantial, depending on whether the latch, control board, or wiring requires replacement. Request a few estimates before committing to a repair.
Costs can vary. Get multiple quotes for parts and labor to compare options.
What should I do if the code returns after a reset?
If the code returns after a reset, the fault is likely hardware-related. Recheck door latch and wiring; if unresolved, arrange professional service to diagnose the control board or harness.
If it comes back after reset, it’s usually hardware. Get a pro to check the board or harness.
Should I contact GE support for code 23?
Yes, especially if the washer is under warranty or if you need model-specific guidance. GE support can arrange authorized technicians and provide parts compatibility information.
Yes—GE support can guide you and arrange authorized service if needed.
Watch Video
Top Takeaways
- Identify the root cause before replacing parts
- Start with a safe reset and latch check
- Don’t ignore persistent codes—seek professional help for board issues
- Document steps to streamline future repairs