Bosch EO11 Error Code: Diagnostic Guide and Fixes
Urgent guide to diagnosing and fixing the Bosch EO11 error code. Learn meanings, quick fixes, diagnostic flow, step-by-step repairs, safety tips, cost ranges, and when to call a technician.

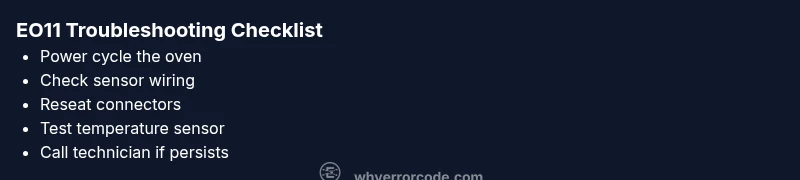
Bosch EO11 usually indicates a fault in the oven's sensor or control circuit that prevents normal operation. Quick fixes include powering the oven off, unplugging for a minute, and reseating sensor connectors or door latch. If the EO11 code persists after a safe reset, contact a Bosch-certified technician for a precise diagnosis.
EO11 Meaning and Urgency
If you’re seeing the bosch oven eo11 error code on your display, it signals a fault that requires prompt attention. Unlike a simple bake-time reminder, EO11 affects the oven's temperature sensing and control logic, often snapping the system into a safe-lock mode to prevent overheating or miscalibrated results. That makes diagnosing and addressing EO11 an urgent task, especially if you rely on your Bosch oven for frequent meals or if you notice inconsistent heating. The root causes range from a loose sensor connector to a failing control board, but the quickest way to determine the right fix is to follow a structured diagnostic path. In this article, we’ll walk you through the most common scenarios, safe DIY steps you can try, and when it’s time to call a professional. As always, Why Error Code emphasizes safety and accuracy when dealing with appliance fault codes.
Symptoms and Trigger Scenarios
The EO11 code can appear in multiple ways, and recognizing the symptom pattern helps you prioritize fixes. You might see an immediate halt after selecting bake or broil, a failure to preheat, or a display that flickers and then freezes. Some users report intermittent heating or temperatures that drift far from the setpoint. In many Bosch models, EO11 threads through sensor integrity, wiring harness connections, and controller board health. External factors like recent power surges, a door being left ajar, or even a dusty sensor can trigger the code. By noting when EO11 appears (during preheat, during timed bake, or after a door action), you can narrow down the likely culprits and speed up your troubleshooting.
Immediate Quick Fixes You Can Try Now
Before diving into tools or disassembly, try these safe, fast steps. First, power-cycle the oven by unplugging or turning off the circuit breaker for 60–120 seconds, then restore power. Next, ensure the oven door latch is fully closed and signaling correctly to the control board. If you have access to the back panel and feel comfortable, reseat the temperature sensor connector and inspect for loose wires, corrosion, or obvious damage. Some Bosch ovens allow a soft reset from the control panel; check your manual for a reset option. Do not operate the oven if you smell burning, notice damaged wiring, or feel warm components beyond normal temperature. If EO11 persists after these steps, move to the diagnostic path described below.
Diagnostic Flow Overview
To diagnose EO11 efficiently, follow a simple flow: (1) confirm the symptom is consistent across attempts, (2) inspect wiring and sensor connections for looseness or damage, (3) test the temperature sensor or replace with a known-good unit if you have access to spares, and (4) evaluate the control board health or consider a board reprogramming options if available. Typical causes are sensor wiring issues (high likelihood), a faulty temperature sensor or sensor board (high likelihood), and control-board faults (medium likelihood). For each cause, apply the corresponding fixes: reseat connectors, replace the sensor, or replace the board. If you’re unsure about any step, contact a professional.
Step-by-Step Repair: Most Likely Sensor/Board Fault
The most common EO11 fault in Bosch ovens is a failing temperature sensor or its wiring. Follow these steps carefully. 1) Power off and unplug the oven, then gain access to the sensor area per your model’s manual. 2) Visually inspect the sensor and its harness for signs of wear, burns, or loose clips. 3) Disconnect the harness, remove the sensor, and measure continuity with a multimeter if available. 4) If the sensor is out of spec, replace with an OE-compatible part and reattach wiring. 5) Reconnect everything, restore power, and run a basic self-test. 6) If the EO11 reappears, proceed to a control-board or wiring harness diagnosis. 7) If you’re unsure, consult the service manual or a qualified technician. Tip: take clear photos during disassembly to ensure correct reassembly.
Other Potential Causes and How to Fix Them
If the sensor path checks out but EO11 remains, other sources include a loose control-board connector, a failed relay, or a damaged wiring harness behind the panel. Inspect the control-board connectors for signs of corrosion or burn marks; reseat connectors firmly. Inspect the harness for cracked insulation or pinched wires. For stubborn issues, testing with a known-good sensor or a temporary replacement board can help identify the source. Always follow safety procedures and disconnect the power before touching internal components. If warranty coverage exists, contact Bosch-authorized service for accurate diagnosis and parts replacement.
Safety, Costs, and When to Call a Technician
Electrical appliances carry safety risks, especially when fault codes involve heating elements and control circuitry. If you see smoke, a powerful burning odor, or you cannot safely disconnect power, stop and call a pro immediately. Typical repair cost ranges for EO11-related fixes vary by model and part: sensor replacement may run about 100–250 USD, while a full control-board replacement can range from 300–700 USD, plus labor. On pricey Bosch ovens with integrated electronics, expect higher service charges. If your unit is still under warranty or covered by an extended service plan, the manufacturer or retailer will usually coordinate the fix. The Why Error Code team recommends starting with a safe reset and basic inspection, then consulting a certified technician for persistent faults.
Prevention and Maintenance to Avoid EO11 Recurrence
To minimize future EO11 occurrences, perform regular maintenance: clean the interior and sensor housing, ensure proper ventilation around the appliance, and avoid rapid changes in power. Keep the sensor connectors clean and dry, check door seals for wear, and schedule periodic professional checkups if you frequently use high-heat cooking modes. Document any EO11 events with dates and model numbers to aid future diagnostics. Why Error Code emphasizes proactive care as the best defense against recurring faults.
Steps
Estimated time: 45-90 minutes
- 1
Power cycle the oven
Power off the oven completely, unplug for 60–120 seconds, then plug back in and retry. This clears transient faults that can trigger EO11.
Tip: Ensure the oven is completely de-energized before touching any plug or panel. - 2
Check door latch and display
Confirm the door latch engages fully and that the display responds normally after a reset. A faulty latch or sensor can mimic EO11 symptoms.
Tip: If the latch feels loose, avoid forcing it; replace if necessary. - 3
Access sensor connector
Carefully remove the back panel per your model’s manual to access the temperature sensor harness. Reseat the connector and inspect for corrosion or damage.
Tip: Take a photo of connector orientation before unplugging. - 4
Test sensor continuity
With a multimeter, check the sensor circuit’s continuity. If readings are out of spec, the sensor is likely bad and should be replaced.
Tip: Only perform this test if you’re comfortable with basic electronics. - 5
Replace the sensor
Install a compatible EO11 temperature sensor and reattach the wiring harness securely. Re-test the oven after reassembly.
Tip: Handle new parts with clean gloves to prevent contamination. - 6
Run a self-test
Power the unit back on and run a basic self-test or bake cycle to confirm EO11 is cleared. If the error reappears, proceed to board diagnosis.
Tip: Document any repeating behavior for service personnel.
Diagnosis: Bosch EO11 is displayed and oven won't heat
Possible Causes
- highLoose or damaged temperature sensor wiring
- highFaulty temperature sensor (NTC) or sensor board
- mediumControl board failure
Fixes
- easyInspect and reseat sensor connectors; look for burnt wires
- mediumReplace temperature sensor or sensor board
- hardReplace control board
Frequently Asked Questions
What does the EO11 error code mean on a Bosch oven?
EO11 generally points to sensor wiring or a fault in the temperature sensor or control board. It stops heating and may lock the oven for safety. A structured diagnostic path helps identify whether the issue is sensor-related or a board fault.
EO11 usually means there’s a sensor or control board fault. Start with safe resets and wiring checks, then move to sensor replacement or board service if needed.
Is EO11 dangerous or should I stop using the oven?
EO11 is not typically dangerous in the sense of fire risk, but it signals an electrical or sensor fault that could worsen if ignored. Stop using the oven until you can confirm the fault and have it checked by a professional if you smell burning or see smoke.
EO11 isn't usually dangerous, but treat it as an urgent fault. Do not use the oven if you notice burning smells or smoke.
Can I fix EO11 myself, or do I need a technician?
You can perform safe, non-destructive checks like power cycling and reseating connectors. If the problem persists, or if you must replace a sensor or control board, a technician with Bosch-authorized parts is recommended.
You can try safe resets and connector checks, but for sensor or board replacement, call a pro.
What are typical costs for EO11 repairs?
Repair costs vary by model and part. Sensor-related fixes are often in the lower hundreds, while control-board replacements can range into the several hundreds. Labor adds to the total, depending on local rates and service plan coverage.
Sensor fixes are usually cheaper; board replacements can be pricier. Labor varies by region and warranty.
Will resetting erase settings or data in the oven?
A soft or factory reset typically affects memory settings, presets, and timers. Most user data remains, but specific configurations may revert to default. Always note your presets before performing a reset.
Reset can revert some settings to default, so back up presets if possible.
How long does a Bosch EO11 repair typically take?
On-site diagnostics and part replacement usually take from 1 to 3 hours, depending on model and part availability. Complex board issues could require additional time for ordered parts and testing.
Most repairs take 1 to 3 hours, longer if a board needs replacement.
Watch Video
Top Takeaways
- Identify EO11 symptoms and act quickly.
- Start with safe resets and connector checks.
- Sensor or wiring issues are the most common causes.
- Costs vary; sensor repairs are typically lower than board replacements.
- Call a technician if the problem persists after basic fixes.