F9 E1 Error Code: Whirlpool Washer Fix Guide
Understand the F9 E1 error on Whirlpool washers, its causes, and practical fixes. Learn safe resets, latch checks, wiring inspections, and when professional help is advisable.

F9 E1 on a Whirlpool washer signals a control-system fault that interrupts operation and may lock the door. The quickest fix is to power cycle the machine, inspect the door latch wiring, and verify the timer or control board connections. If the error persists after a reset, pursue a deeper diagnostic or professional service to avoid further damage.
What the F9 E1 Means for Whirlpool Washers
The F9 E1 error on Whirlpool washers indicates a fault in the control system that can halt a cycle and lock the door. In plain terms, the washer is signaling that it cannot complete the requested operation because a control component or its communication with other parts has detected an error. The Why Error Code team emphasizes that this is usually not a single blown fuse but a fault path that involves the control board, door latch wiring, or sensor inputs. Begin with safe resets and a visual inspection of connectors and cables before moving to more invasive checks. A calm, methodical approach reduces the risk of misdiagnosis and helps you decide whether a DIY fix is feasible or if professional service is required.
Common Causes Behind F9 E1
There are several frequent sources for this code in the f9 e1 error code whirlpool washer scenario. The door latch or its wiring is a common culprit because the unit must confirm a closed door before any cycle will run. Loose or damaged wiring harnesses, especially those connected to the control board, can create intermittent signals that trigger F9 E1. In some cases, a failing or aging control board, sensor, or software fault can produce the same code. If you recently moved the washer or performed a service, reseat all harness connectors first, then recheck the display for the error.
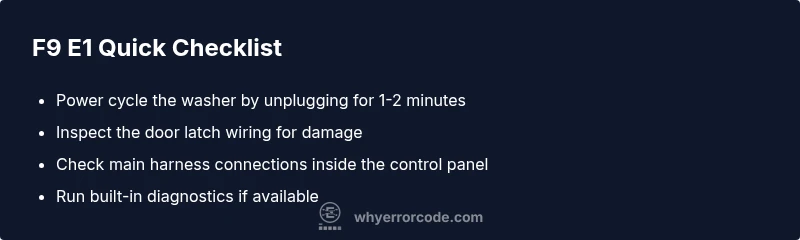
Quick Fixes You Can Try Right Now
Try these fixes in order before deeper diagnostics. First, perform a full power cycle by unplugging the washer for 60 seconds, then plug back in and attempt a test cycle. Second, inspect the door latch and immediate wiring for obvious damage or loose connections; reseat or replace as needed. Third, inspect the main control harness inside the console; unplug gently and reseat each connector, keeping track of positions. If your model supports a diagnostic test, run it to see if additional fault codes point to a bad sensor or module. If the error persists after these steps, you should plan for professional service or potential parts replacement as indicated by the test results.
In-Depth Diagnostic Flow: Symptoms, Causes, and Fixes
Using a structured diagnostic flow helps identify the root cause of the f9 e1 error code whirlpool washer. Start with the symptom: the washer stops and displays F9 E1 during a cycle. Then compare possible causes: door latch issues, wiring harness faults, or control board problems. For each cause, map a fix: secure or replace the latch; reseat all harness connections; or test the control board for voltage and feedback signals. Document findings as you go and test after each step. The most reliable results come from a methodical sequence rather than random part swapping.
Safety, Costs, and When to Call a Professional
Safety first: unplug the machine before any panel removal, use dry hands, and avoid water exposure around electrical components. Cost estimates vary by region and repair scope. A simple latch or wiring repair might cost a few dozen to a few hundred dollars in parts, plus labor, while a full control-board replacement can be significantly more. If you are uncertain about wiring or electronics, the safest option is to contact a qualified technician. A pro can run advanced diagnostics and provide a precise quote.
Preventive Tips to Reduce Future F9 E1 Incidents
Regular maintenance, careful loading, and avoiding sharp impacts to the rear panel can extend the life of your washer and reduce issues that trigger F9 E1. Keep the door latch and wiring clean and dry, and inspect the control panel connections every 6–12 months. Consider scheduling annual service checks if your unit is older or heavily used. By following these practices, you can minimize future interruptions and keep cycles running smoothly.
Steps
Estimated time: 45-90 minutes
- 1
Power down and unplug
Ensure the machine is unplugged and all power sources are disconnected before opening any panels. This prevents electric shock and protects sensitive electronics.
Tip: Use a dry environment and keep a photo log when disconnecting wires - 2
Reset the washer
Wait 1-2 minutes after unplugging, then plug back in and reset the cycle. If your model supports a soft reset, perform it as described in the manual.
Tip: Do not use a power strip or extension cord for testing - 3
Inspect the door latch and wiring
Open the door, access the latch and nearby wiring. Look for loose connectors, frayed wires, or corrosion. Reseat connectors firmly.
Tip: Use a flashlight to check for pinched or damaged harnesses - 4
Check control panel harnesses
Remove the console cover carefully and inspect main harnesses for snug fit. Disconnect and reconnect each harness to ensure solid contact.
Tip: Photograph wire positions before disconnecting to aid reassembly - 5
Run diagnostic mode or self-test
If your model supports it, enter the service or diagnostic mode and run the built-in tests to identify failing components.
Tip: Consult the manual for the exact sequence, as it varies by model - 6
Decide on the next steps
If the error remains after resets and inspections, plan for professional service or potential parts replacement as indicated by the test results.
Tip: Keep records of codes and test results for the technician
Diagnosis: Error code F9 E1 displayed on Whirlpool washer and the machine stops mid cycle
Possible Causes
- highFaulty door latch or wiring
- mediumLoose power or control board connections
- lowControl board fault or failed sensor
Fixes
- easyInspect door latch and wiring for damage; reseat or replace as needed
- easyCheck main wiring harness connections inside the control panel; reseat and inspect for corrosion
- hardReplace control board or affected sensor module if diagnostics indicate
Frequently Asked Questions
What does F9 E1 mean on a Whirlpool washer?
F9 E1 indicates a control-system fault that interrupts operation. It often involves the door latch, control wiring, or the main board. Start with resets and connector checks before deeper repairs.
F9 E1 means a control system fault. Start with a safe reset and inspect latches and wiring before deeper repairs.
Is F9 E1 dangerous?
Not directly dangerous, but the appliance should be unplugged and panels treated carefully. If you smell burning or see smoking, stop and call a professional.
Not dangerous, but unplug and inspect. If you smell burning, call a pro.
Can I fix F9 E1 myself?
Yes for initial checks and resets. Complex fixes like board replacement should be done by a technician.
You can try resets and latch checks, but avoid replacing boards yourself unless you have experience.
How long does a repair take?
DIY diagnostics can take 30-60 minutes; professional service may take 1-2 hours depending on access and parts.
Diagnostics can take about an hour; a repair may take a couple of hours if parts are needed.
Will replacing the control board fix F9 E1?
If tests indicate the control board is faulty, replacement can fix the issue. If not, the problem could lie elsewhere.
Board replacement can fix it if the board is faulty, otherwise not.
Does warranty cover F9 E1?
Warranty status depends on purchase date and policy. Check with Whirlpool support or the retailer for coverage specifics.
Warranty depends on coverage; check with support or retailer.
Watch Video
Top Takeaways
- Identify that F9 E1 likely involves the control system
- Start with safe resets and latch checks before deeper repairs
- If unresolved, rely on professional diagnostics and replacement parts as needed
- Document steps and test results to aid future troubleshooting