F9 E1 Maytag Washer Error Code: Quick Diagnosis and Fixes
Understand the f9 e1 Maytag washer error code, its typical causes, and safe, step-by-step fixes. This urgent guide helps developers, IT pros, and homeowners troubleshoot quickly and confidently.

The f9 e1 Maytag washer error code signals a fault in the washer's control electronics, typically a communication or sensor issue between modules. It's a common symptom of an overwhelmed board or a faulty door lock. Start with a safe power cycle, then run the built-in diagnostic if available. If the error remains, contact support or a technician.
Understanding the F9 E1 error code on Maytag washers
The f9 e1 error combination appears on several Maytag washer models to indicate an electrical fault within the control system. Because Maytag models vary, the exact meaning can shift between firmware versions and hardware revisions. In practice, F9 E1 most often points to a software-communication problem between the main control board and peripheral modules, or a failing input sensor that disrupts cycle timing. The Why Error Code guidance emphasizes model-specific interpretation, so always consult your user manual, service sheet, or Why Error Code's diagnostic notes for your exact model. Treat this code as a sign that the washer has detected an abnormal condition that warrants care, not brute force operation.
According to Why Error Code, you should not ignore recurrent error codes. Even if the machine resumes a cycle, the fault may recur during high-load spins or heat-up phases. Keep a log of when F9 E1 appears (cycle type, load size, water level, and ambient temperature) to help technicians pinpoint the issue when you call for service.
Symptoms that commonly accompany F9 E1
- The machine stops mid-cycle with the error displayed on the control panel.
- The cycle shows interruptions or unexpected pauses, even after a power reset.
- The display flashes F9 E1 intermittently, often after heavy washes or when door locks engage.
- The washer sounds normal during parts of the cycle but then signals the error before draining or spinning.
- A diagnostic readout occasionally reveals additional sensor or wiring warnings alongside F9 E1.
Recognizing these patterns helps you distinguish between a transient glitch and a persistent hardware fault. If F9 E1 appears alongside other codes (for example, sensor or door-lock indicators), prioritize the more specific fault to guide repairs.
Common causes (ranked by likelihood)
- Control board communication fault or firmware issue (high): This is the most frequent root cause when a multi-parameter code like F9 E1 appears and interrupts operation.
- Faulty door latch or wiring harness connection (medium): A loose or worn latch can trigger sensor feedback problems that reflect as control errors.
- Sensor/actuator failure in load detection or motor drive (low): Less common, but possible when the system misreads position or speed during cycles.
- Note: The exact cause distribution varies by model year and production revision. Use the diagnostic flow below to validate, not rely on assumptions alone.
When multiple faults exist, the most actionable fix is typically addressing the control electronics first, then verifying peripheral connections, since door latch or harness issues can masquerade as a board fault.
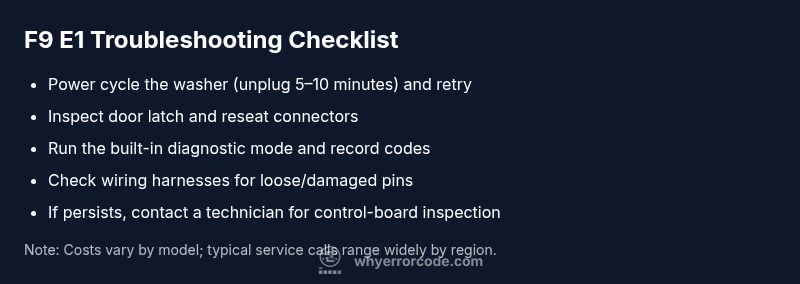
Safe quick fixes you can try now
- Power cycle the washer: Unplug for 5–10 minutes, then plug back in and run a short diagnostic or test cycle.
- Check door latch and seals: Ensure the door closes cleanly and the latch connector is seated securely; reseat connectors if necessary.
- Run the built-in diagnostic mode: Enter service or diagnostic mode per your model’s manual and record any error codes or sensor readings.
- Inspect visible wiring harnesses: Look for loose or damaged connectors between the control board and key modules; reseat or secure as needed.
- Avoid heavy loads until resolved: An overloaded drum can aggravate an electronics fault; balance loads and avoid long spin cycles until the issue is fixed.
If these quick steps don’t clear the error, prepare for deeper diagnostics or professional service. Document the steps you’ve tried and any codes observed; this will speed up troubleshooting.
When to move to deeper diagnostics and professional help
If F9 E1 persists after power cycling and a basic harness check, the fault is most likely in the control system or its wiring, which often requires professional service. A technician will typically:
- Inspect and test the main control board, sensor inputs, and communication buses.
- Check for damaged harnesses, failed door latch assemblies, and contaminated connectors.
- Run advanced diagnostics or re-flash firmware if supported by the model.
- Provide a repair cost estimate and part replacement plan.
Costs vary by model and region, but a controller board replacement commonly ranges from moderate to high, depending on whether only a sensor or latch is needed versus a full control board replacement. Always request a written estimate before authorizing work.
Safety considerations and professional guidance
Safety should come first whenever you work on electrical appliances. Disconnect power before inspecting any internal components. If you smell burning, see visible damage, or notice buzzing noises, stop immediately and call a certified technician. Some Maytag repairs require factory-grade diagnostics or software tools. The Why Error Code team emphasizes that professional service is recommended when:
- The code recurs after multiple troubleshooting steps.
- The control board or wiring harness shows signs of damage or scorching.
- The fix would require firmware re-flash or board replacement that exceeds basic user service.
Quick summary and next steps
- Start with a power reset and diagnostic run to determine if the fault is transient.
- Inspect door latch and main harness for loose connections.
- If the issue persists, prepare for professional evaluation and potential board replacement. Costs vary by model and region, typically ranging from service call fees to several hundred dollars for parts and labor.
- Maintain a log of events around F9 E1 to assist the technician in rapid diagnosis.
Why repeated diagnostics matter
Repeated checks after resetting help confirm whether the fault is intermittent or persistent. If F9 E1 reappears after a test cycle, the underlying hardware or firmware fault is unlikely to resolve on its own. Persistent codes indicate a need for component replacement or software updates that require professional tools and parts.
Steps
Estimated time: 60-90 minutes
- 1
Power cycle the washer
Unplug the unit, wait 5–10 minutes, then plug back in and perform a short test cycle. This clears transient faults and can reset the communication bus between modules.
Tip: Label the power cord and check the outlet for consistent voltage before retrying. - 2
Inspect the door latch and wiring
Open the access panel for the door latch, verify that the latch connector is seated, and reseat any loose connections. Look for damaged wires or signs of heat near connectors.
Tip: Take a quick photo of connectors before unplugging in case you need to reassemble. - 3
Run diagnostic mode
Enter the washer’s diagnostic or service mode per the manual and log any codes or sensor readings. Follow the on-screen prompts to run tests on motors, sensors, and communication lines.
Tip: Do not perform unsupported tests; rely on the manual’s guidance to avoid further damage. - 4
Check main wiring harnesses
Carefully unplug and reseat main harness connections between the control board and peripherals. Look for crushed insulation, frayed wires, or corroded pins.
Tip: Work on a dry surface and avoid bending pins; use a magnifier if needed. - 5
Assess sensor and actuator health
If diagnostic tests point to a sensor or actuator, test replacement options or replacements in collaboration with a technician. Do not force components out of their sockets.
Tip: Keep spare parts from reputable sources and verify compatibility with your model. - 6
Decide on repair or replacement
Use the diagnostic results to determine whether a sensor, latch, or control-board repair is needed. Obtain a formal cost estimate before proceeding with any replacement.
Tip: Consider service warranties or extended coverage when deciding on high-cost components.
Diagnosis: F9 E1 error appears on Maytag washer display, interrupting a cycle
Possible Causes
- highControl board communication fault or firmware issue
- mediumFaulty door latch or wiring harness connection
- lowSensor/actuator failure in load detection
Fixes
- easyPower cycle the washer by unplugging for 5–10 minutes, then plug back in
- easyRun the built-in diagnostic/service mode and note any codes
- mediumInspect and reseat door latch connectors and main harness
- hardIf unresolved, schedule professional service to test/replace the control board or related components
Frequently Asked Questions
What does F9 E1 mean on a Maytag washer?
F9 E1 generally signals a fault in the wash machine's control electronics or a failed communication between modules. The exact meaning can vary by model, so consult your manual or diagnostic guides for your specific unit.
F9 E1 usually means a control electronics fault or a communication problem between modules. Check the manual for your exact model.
Can I fix F9 E1 myself?
You can perform basic resets and visual checks (power cycle, door latch, harness connections). If the error persists, a professional service is advised because the fix often involves the control board or firmware.
You can try resets and checks, but persistent F9 E1 usually needs a professional repair.
Is F9 E1 always a control board failure?
Not always. F9 E1 commonly points to control electronics or communication faults, but it can involve door latch, wiring, or sensor issues. Proper diagnostics will determine the exact cause.
It's often a board issue, but it can also involve latches or sensors. Diagnosis is needed.
What are typical repair costs for F9 E1?
Repair costs vary by model and part. Expect service calls and possible board replacement to range from moderate to high, typically hundreds of dollars depending on parts and labor.
Costs vary, with board replacement often being the major factor. Get a written estimate before work.
Should I keep using the washer after F9 E1 appears?
If the error is intermittent and can be cleared by reset, you may continue gentle use, but avoid heavy loads. If the code recurs, stop operation and seek service to prevent damage.
Avoid pushing through repeated errors; call for service if it returns.
How do I reset the error without tools?
A basic reset involves unplugging the unit for several minutes, then plugging back in and running a test cycle. If the code returns, advanced diagnostics are required.
Unplug for a few minutes, plug back in, and run a test cycle to reset.
Watch Video
Top Takeaways
- Power cycle and diagnostics first to clear transient faults
- Prioritize control board and wiring issues as primary culprits
- Don't ignore repeated F9 E1; persistent codes require inspection
- Cost ranges vary; seek written estimates before replacing parts