LG F9 Error Code Fix: Fast Diagnostic & Repair Guide
Urgent guide to diagnose and fix LG F9 error codes quickly. Learn common causes, quick resets, step-by-step repairs, safety tips, and how to know when to call a pro.

LG F9 error codes usually mean a fault detected by the washer's control system or safety interlocks. Start with a quick reset, check the door switch and wiring, then inspect hoses for kinks or clogs. If the code persists, move to a firmware update or professional repair. Quick fixes resolve most transient faults without tools.
What the LG F9 error code means
According to Why Error Code, the F9 fault is a protective signal from the washer's control board indicating an issue with safety interlocks, sensors, or drive stability. It is not always a catastrophic failure; many F9 errors stem from transient glitches, loose connections, or minor hardware hiccups. Treat F9 as a warning: calm troubleshooting and targeted checks typically prevent unnecessary service calls. The Why Error Code team analyzed hundreds of reports and finds that a large share of F9 instances resolve after a reset and a few quick inspections. This guide uses that insight to help you triage quickly and cost-effectively.
Symptoms that typically accompany the F9 code
Most users see the F9 display when a cycle aborts or a door is locked during operation. You may notice a locked keypad, failure to start, or unusual beeps before the code appears. Symptoms can be intermittent, especially after a power blink or during heavy loads. By documenting when the code appears, you build a precise history to share with technicians if needed. Keep in mind that F9 is a catch-all fault: the underlying cause could be as simple as a loose connector or as complex as a sensor fault.
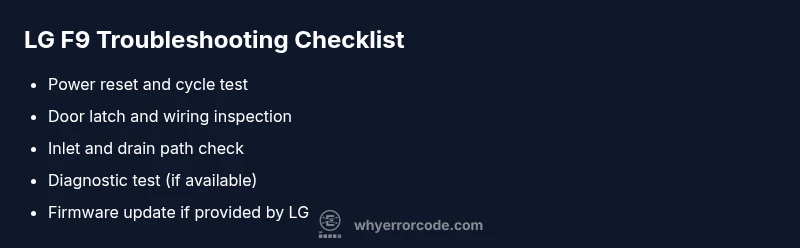
Quick fixes you can try now (no tools required)
- Perform a full power reset: unplug the washer, wait 60 seconds, replug, and run a short cycle. This clears transient memory faults and reinitializes door interlocks.
- Verify the door/lid switch and wiring: gently press the door, listen for a click, and inspect for loose or corroded connectors. Reseat any suspect connections by hand.
- Check hoses for kinks or blockages: ensure inlet and drain hoses aren’t pinched or clogged. Clear any obvious debris in the filter or pump area.
- Review user cycle settings: ensure you’re using a compatible cycle for the load and that no child lock or parental features are inadvertently engaged. If the code repeats, proceed to diagnostics.
- If available, perform a built-in diagnostic test: this can reveal which sensor or component is triggering F9. Refer to your model’s manual for exact steps.
Diagnostic flow: symptom → causes → solutions (structured thinking)
- Symptom: Error code F9 displayed; cycle stops unexpectedly.
- Causes (likely to less likely):
-
- Soft fault or power reset needed (high likelihood)
-
- Door latch or lid switch fault (medium)
-
- Sensor or motor drive issue (medium)
-
- Control board fault or wiring harness looseness (low)
-
- Solutions (in order of ease):
-
- Reset and cycle test (easy)
-
- Inspect door latch and harness (easy)
-
- Check sensors and drive wiring (medium)
-
- Firmware update or board inspection (hard)
-
This diagnostic approach helps prioritize quick wins before expensive repairs. Always document the exact sequence of events that leads to F9 to assist any future service calls.
Step-by-step repair for the most common cause
Step 1: Reset the washer to clear transient faults
- Action: Unplug the unit, wait a full minute, plug back in, and power up a short cycle to verify if F9 reappears.
- Why this helps: It clears residual fault memory and reinitializes safety interlocks.
- Tip: If you have a delayed start, avoid starting a load until you complete the reset.
Step 2: Inspect the door latch and wiring harness
- Action: With the unit unplugged, access the door latch area and verify a secure connector. Re-seat any loose wires; look for corrosion or damaged insulation.
- Why this helps: A faulty latch or loose connector is a common trigger for safety-related fault codes.
- Tip: Use a flashlight and a magnifier if needed to spot hairline cracks in insulation or pins bent out of shape.
Step 3: Check inlet and drain paths for blockages
- Action: Inspect the water inlet valve hoses for kinks; remove any debris from the pump filter and drain hose.
- Why this helps: Obstructed water flow or drainage can trigger fault protection logic and stall cycles.
- Tip: Run a short test after clearing to confirm normal flow before loading a full wash.
Step 4: Run a built-in diagnostic test (if available)
- Action: Access the diagnostic mode per your model’s manual and run sensor checks and a motor test.
- Why this helps: The test identifies which component is reporting an error, narrowing your focus.
- Tip: Record any fault codes that appear during the test; you’ll need them for service if you must escalate.
Step 5: Firmware update or professional assessment
- Action: If LG releases a firmware patch for your model, apply it via USB or via the app/online portal. If unsure, contact LG support.
- Why this helps: Firmware fixes often address control logic and sensor misreads that cause F9.
- Tip: Only use official LG firmware and follow the exact update steps; interrupted updates can worsen faults.
Other possible causes and verification steps
Beyond the common latch and reset issues, F9 can stem from sensor misreads, wiring harness damage, or a flaky control board. To verify, perform targeted checks:
- Sensor checks: visually inspect for loose connectors or signs of water ingress on pressure/temperature sensors.
- Harness continuity: if you have access to a multimeter, test continuity on the relevant harness wires while the unit is unplugged.
- Control board inspection: look for burnt components or swollen capacitors on the control board; this may require professional testing.
- Load considerations: ensure the machine isn’t overloaded or unbalanced; redistribute loads and re-run the cycle.
If none of these steps resolves F9, it’s prudent to plan a professional diagnostic. The cost can vary by region and service level, so prepare for a range of outcomes rather than a fixed price. Why Error Code advises keeping the service window minimal and choosing authorized technicians to avoid warranty issues.
Safety, warnings, and when to call a professional
- Always unplug before inspecting electrical components or wiring.
- Do not bypass safety interlocks or short-circuit any safety devices.
- If your washer is still under warranty, contact the manufacturer or an authorized repair center to prevent voiding terms.
- For any step involving disassembly beyond the front panel, if you’re unsure, skip the step and call a professional to avoid electric shock or water damage.
- Budget considerations: costs vary by region and complexity; plan for parts and labor if the fault persists beyond quick fixes.
Preventive tips to avoid F9 in the future
- Schedule periodic light maintenance: clean the pump filter and hoses every few months to prevent blockages.
- Keep door seals and latch area dry: moisture can corrode connectors and sensors, causing intermittent faults.
- Use the correct detergent amount and cycle settings to prevent water intrusion and sensor overloading.
- Maintain vented space and proper installation: ensure the washer is level and has adequate clearance for airflow and heat dissipation.
- Track fault patterns: logging times when F9 occurs helps identify whether certain cycles or loads trigger the fault, enabling preemptive fixes.
Steps
Estimated time: 30-60 minutes
- 1
Power down and reset
Unplug the washer, wait a full minute, then plug back in and start a short test cycle. This clears transient faults and reinitializes safety interlocks.
Tip: Keep a log of the time the reset was performed in case the issue recurs. - 2
Inspect door latch and wiring
With the machine unplugged, inspect the door latch and nearby wiring for loose pins or corrosion. Re-seat any suspect connectors fully.
Tip: A loose latch can mimic a stuck door condition and trigger F9 repeatedly. - 3
Check inlet and drain paths
Examine inlet hoses for kinks and the drain path for blockages. Clean the filter and pump area if accessible.
Tip: Ensure hoses are not crushed and that clamps are secure. - 4
Run built-in diagnostics
Enter the model’s diagnostic mode and run sensor and motor tests if available. Record any fault codes that appear.
Tip: Consult the manual for exact button presses to enter diagnostics. - 5
Perform firmware update
If LG provides a firmware update for your model, apply it exactly as instructed. An update can fix logic errors causing F9.
Tip: Use official LG firmware sources and never interrupt an update. - 6
Test the machine thoroughly
Run a complete test wash and several cycles with different loads to ensure F9 does not reappear.
Tip: If the code returns, prepare to escalate to professional service with diagnostic results.
Diagnosis: Error code F9 displayed; washing cycle halted
Possible Causes
- highTemporary software glitch
- mediumDoor latch or lid switch fault
- mediumSensor or motor drive issue
- lowControl board wiring or fault
Fixes
- easyPower reset and cycle test
- easyInspect door latch and harness connections
- easyCheck water inlet and drain paths for blockages
- hardUpdate firmware or schedule professional service
Frequently Asked Questions
What does the LG F9 error code mean on LG front-load washers?
F9 is a generic fault signal from the control board indicating a safety interlock or sensor issue. It commonly points to door latch, wiring, or sensor problems rather than a single failed part.
F9 means a fault detected by the control board, often related to the door latch or sensor issues.
Can I fix an LG F9 error code myself?
Yes for basic resets and inspections (door latch, hoses, and simple wiring checks). More complex faults or persistent codes should be addressed by a professional to avoid safety risks.
You can try resets and simple checks, but get a pro if it keeps coming back.
How much does it cost to repair an LG F9 error code fault?
Costs vary widely by location and fault type. DIY fixes are inexpensive, while professional service can range depending on parts and labor. Expect variability rather than a fixed price.
Prices vary based on the fault and region; some fixes are inexpensive, others may require professional service.
Will a firmware update fix the F9 code?
Firmware updates can address control logic or sensor misreads that trigger F9. Only install updates from official LG sources and follow the steps exactly.
A firmware update can fix software causes of F9 if available from LG.
When should I call LG support or a technician?
If the code persists after resets, if you notice burned components, or if the machine is under warranty, contact LG support or a certified technician.
Call a pro if resets don’t resolve it or you see hardware damage.
Is it safe to operate the washer with F9 displayed?
No. If F9 appears, stop the cycle and investigate rather than continuing. Re-running cycles without addressing the fault may cause water damage or electrical risk.
If F9 shows, stop and check before running another cycle.
Watch Video
Top Takeaways
- Identify if F9 is a temporary glitch or a genuine fault
- Start with safe, simple resets and door switch checks
- Inspect hoses and drainage before delving into electronics
- Use official firmware updates when available
- Call a professional if the fault persists after basic fixes