How to fix Samsung washing machine error code LE
Comprehensive, urgent troubleshooting for Samsung washing machine error LE. Step-by-step fixes, safety tips, costs, and preventive measures to get your washer back in action.

LE on Samsung washing machines usually signals a water level or leak fault that halts the cycle. The quickest fix is to safely inspect the door seal, hoses, and water inlet, then power cycle the machine. If the code persists, consult this Why Error Code guide for a structured diagnostic flow and step-by-step repair options.
LE Code Meaning and Safety Essentials
The LE error code on many Samsung washing machines points to a water-level or leak-related fault that interrupts a wash cycle. Because this involves water and electricity, safety is the top priority. Before you touch any components, unplug the machine and switch off the water inlet valve to prevent further leakage. Wear dry, non-slip footwear and work in a dry area. Remember: never operate the washer if you hear running water or see active puddles around the machine. In this guide, we interpret LE as a water-level/leak condition and provide practical steps you can take quickly; model variations may exist, so consult your owner’s manual for specifics.
As you proceed, use the Why Error Code approach: identify symptoms, check likely causes in order of probability, and apply fixes that minimize risk. This method keeps you safe and maximizes the chance of a first-time fix, saving time and money while avoiding unnecessary repairs.
Quick Checks You Can Do Safely
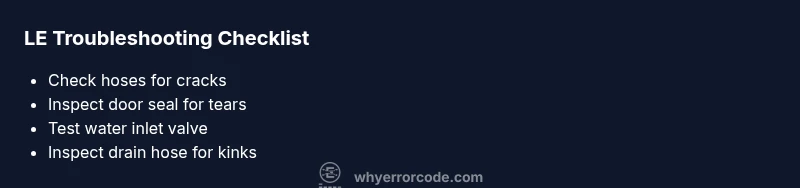
Start with high-impact, low-risk checks that don’t require special tools:
- Unplug the unit and turn off the water supply. This prevents accidental flooding if a hose is loose.
- Inspect visible hoses (water inlet and drain) for cracks, bulges, or leaks. Tighten fittings if they’re loose, but avoid over-tightening plastic fittings.
- Check the door seal and tub rim for tears or debris. A damaged gasket is a common LE trigger because it allows water to escape during fill or wash cycles.
- Look for puddles around the base of the machine and inspect the cabinet for dampness. If water is actively leaking, capture the area with towels and avoid touching electrical components.
- If no leaks are visible, perform a gentle test run with no load on cold water to observe if any water appears around hoses or seals during operation.
These steps are designed to rapidly determine whether the issue is a loose connection, damaged seal, or an external leak.
Diagnostic Flow: Symptom → Causes → Solutions
This section translates real-world symptoms into actionable steps. Start with the most likely cause and progress to less likely ones, applying quick fixes first to minimize downtime. This approach aligns with best practices in appliance diagnostics and mirrors the investigative framework used by the Why Error Code team across many error categories.
Symptoms you might notice include persistent LE during fill or drain phases, damp cabinet surfaces, or sudden cycle interruptions. Common causes, ordered by probability, include loose or damaged hoses, a faulty door seal, or a leaking inlet valve. Less common but possible culprits are drain pump issues or a faulty control sensor. Solutions range from simple tightening to hose replacement or component repair.
Step-by-Step Fix: Most Common Cause – Leaky Hose or Seal
Follow these steps in order to address the most frequent LE trigger:
- Safety first: unplug the washer and shut off both hot and cold water valves. Clamp down any active leaks with towels if needed.
- Inspect inlet hoses: detach both ends of the hot and cold water hoses, inspect the fittings, and look for kinks or cracks. Replace damaged hoses; ensure the compression fittings seat flush.
- Examine the door seal: pull back the rubber gasket around the door opening for cuts or tears. If damaged, replace the seal following the model’s instructions or seek professional help if needed.
- Check the drain hose and standpipe: ensure the drain hose is free of kinks and is inserted to the proper depth. A blocked or kinked drain hose can trigger LE during draining.
- Reconnect everything and run a test cycle with no load. Observe for any leaks and verify the LE code does not return.
- If LE persists, proceed to the next fixes (inlet valve or control board) as described in the later sections.
Tip: Take photos of hose connections before disassembly so you can reassemble accurately.
Other Potential Causes and Fixes
LE is not always caused by hoses or seals. Consider these additional possibilities and recommended fixes:
- Door latch or lid switch problem: A faulty switch may cause inaccurate water-level sensing. Test the switch wiring and replace if needed.
- Faulty water inlet valve: If water continues to flow beyond the normal fill, the valve may be stuck open. Replacement may be needed.
- Drain pump or sensor issues: A malfunctioning drain system can misreport the water level, triggering LE. Inspect the pump and pressure sensor tubing for obstructions or damage.
- Control board or sensor faults: Electronic faults can misinterpret readings. Replacing or reprogramming the board may be required; this generally requires professional service.
For each of these, start with a visual inspection, then consult the model manual for part numbers and safe replacement instructions. If you are unsure about any step, stop and request professional support.
Pro tip: Document each step with notes and photos to speed up diagnosis if you later hire a technician.
Costs and Where Repairs Fit
Repair costs vary by component and service complexity. Here are approximate ranges you can expect for common LE-related repairs (these are broad industry ranges and will vary by region and model):
- Hose replacement: $10–$40 per hose, plus a small amount for clamps and fittings.
- Door seal/gasket replacement: $50–$180, depending on model and accessibility.
- Water inlet valve replacement: $25–$120 for parts, plus labor if you hire a technician.
- Drain pump replacement: $60–$250 for parts, labor can bring total higher.
- Control board or sensor repairs: $100–$350, depending on board complexity and availability.
If you choose DIY parts, your total cost will be on the lower end; professional service typically adds a service call fee ($60–$120) and labor ($50–$150 per hour). Always factor in the cost of potential water damage prevention when deciding between DIY and professional repair.
Safety Tips, Warnings, and When to Call a Professional
- Always unplug the machine and shut off water valves before inspecting or performing any repair.
- Do not operate the washer if you see active leaks or standing water. Water and electricity create a serious shock hazard.
- Use only compatible replacement parts recommended by Samsung or your model’s manual.
- If you smell burning insulation, hear buzzing, or notice scorch marks, stop and contact a professional immediately.
- For persistent LE after basic checks, or if you’re uncomfortable with disassembly, call a licensed appliance technician. Expect service call fees and possible water-damage remediation costs to be added.
Professional repair is recommended when: leaks persist after replacing hoses/seals, the inlet valve or drain pump is suspected, or the control board shows faults that are not easily diagnosed at home.
Preventive Tips to Avoid LE Again
- Inspect hoses annually for cracks and replace every 5–7 years as preventive maintenance.
- Use the correct load size and avoid overfilling the drum, which can stress seals and hoses.
- Keep the area around the washer dry; wipe spills promptly to reduce corrosion risk.
- Use a high-quality detergent and avoid residue buildup that can influence water level sensors.
- Consider installing a drain hose shield or standpipe that minimizes kinks and snags. Regular checks reduce the chance of leaks becoming LE codes in future cycles.
Model Variations and Next Steps
Samsung washer models differ in layout, parts accessibility, and diagnostics. If LE persists after completing the general checks and fixes described here, consult your model-specific manual for wiring diagrams and part numbers. If the model’s diagnostic mode exists, use it to reveal sensor values and fault histories to guide repairs. When in doubt, prepare a service call plan with the data you’ve collected and a clear description of steps you already performed to accelerate the repair process.
Steps
Estimated time: 45-90 minutes
- 1
Power off and secure the area
Unplug the washer from the outlet and turn off the water supply. Remove power access and ensure you’re dry before touching any components. This prevents electric shock and potential flooding during inspection.
Tip: Take a photo of each connection before disconnecting to simplify reassembly. - 2
Inspect water inlet and drain hoses
Detatch both ends of the hoses, inspect for cracks, bulges, or leaks, and check clamps for tightness. Replace damaged hoses; ensure they are fully seated when reattaching.
Tip: If you notice mineral buildup, flush the fittings with a small amount of white vinegar and water before reinstalling. - 3
Check the door seal and gasket
Visually inspect the door seal for cuts or debris. Clean any buildup, then press along the seal to detect flexibility loss. If torn, replacement is necessary.
Tip: Order the exact gasket size for your model to ensure a proper seal. - 4
Test the tub and inlet components
Reassemble hoses and run a short cycle with a flood watch. Listen for leaks and observe the drum area for dampness. If water appears, isolate the source before continuing.
Tip: Run a cold cycle with no load to minimize risk while testing seals. - 5
Evaluate the electronics and sensors
If external components test clean, consider sensor readings and the control board. Some LE errors originate from faulty water level sensors or a failing control module.
Tip: If you’re unsure about electronics, skip ahead to professional service—high risk to safety if mishandled. - 6
Decide on replacement or service
Conclude whether you can complete the fixes with parts you can source, or if the issue warrants a professional diagnostic with potential board repair.
Tip: Document findings and parts replaced to assist a technician.
Diagnosis: LE code appears during wash/fill or drain cycle
Possible Causes
- highLoose or damaged inlet/drain hoses
- mediumDamaged door seal or tub gasket
- lowLeaking inlet valve or drain pump connection
Fixes
- easyTighten or replace hoses and fittings; replace damaged hoses
- hardReplace the door seal/gasket if torn
- mediumInspect and replace faulty inlet valve or drain pump connections
Frequently Asked Questions
What does LE mean on Samsung washing machines?
LE typically indicates a water-level or leak-related fault that interrupts operation. It is commonly triggered by hoses, seals, or sensors and should be addressed promptly to prevent further damage.
LE usually means a water-level or leak issue; check hoses and seals and run a safe test.
Is LE dangerous to ignore?
Yes. A persistent water leak near electrical components can pose shock and fire risks. Stop using the machine and seek professional help if you notice active leaks.
A leaking washer can be dangerous; stop use and contact a pro if leaks persist.
Can I fix LE myself?
You can perform safe, basic checks (hoses, seals, power cycle). If the leak continues or involves the inlet valve or control board, professional service is recommended.
You can try simple checks, but persistent LE calls for a pro.
How long does a typical LE repair take?
Simple hose or seal replacements may take 30–60 minutes. More complex fixes, like valve or control-board work, can require several hours and a service visit.
Most quick fixes take under an hour; major repairs may need a visit.
What cost range should I expect?
Parts typically range from $10–$180 for hoses and seals. If you require a service call and labor, budget about $60–$350 depending on the component and region.
Costs vary; hoses and seals are cheaper, electronics are pricier.
What parts are commonly replaced for LE?
Door seal/gasket, inlet valve, drain hose, or drain pump are typical replacements tied to LE fault scenarios.
Most LE fixes involve the door seal or hoses.
Watch Video
Top Takeaways
- Identify LE symptoms quickly to minimize water damage.
- Prioritize hose and seal inspection as the first fix.
- If LE returns after quick checks, escalate to valve or board inspection.
- Always involve a professional for complex or persistent issues.