What is LE Error Code on LG Washer? Quick Fix Guide
Learn what LE means on LG washers, common leak causes, quick fixes, and when to call a pro. Practical steps to stop leaks and protect your machine in 2026.

LE on LG washers signals a detected leak. It typically results from loose hoses, a damaged door seal, or a worn tub gasket. The quickest action is to unplug the unit, shut off the water supply, and inspect for visible leaks around hoses and seals. If the leak continues after a basic check, stop using the machine and plan a repair.
What LE Means on LG Washers
When you see LE on an LG washer, you’re facing a leak-related error. The question what is error code le on lg washer is answered by recognizing that LE is a leak sensor alert. In practical terms, LE means water has been detected where it shouldn’t be, triggering a safety stop to prevent flood damage. The device’s sensors monitor tub, hoses, and base areas; any moisture outside expected zones can trigger LE. This is not a timer issue or a random fault—it's a water-management alert. According to Why Error Code, LE is designed to protect both your home and the appliance by prompting immediate inspection. If you notice water on the floor or pooling around the base, treat LE as a leak warning that requires quick, methodical checking. The guide that follows will help you diagnose, verify, and, if needed, repair the most common leak sources while minimizing risk to you and your property.
Common Symptoms and How LE Presents
LG washers typically display LE with a flashing or steady code on the control panel, often accompanied by dampness around the bottom panel or a visible water trail. Users commonly report moisture near inlet hoses, the door gasket, or the tub drain area. In some cases, LE appears even when there is only a small drip that slowly pools under the machine. If you’re asking what is error code le on lg washer and you observe unexpected moisture after a cycle, treat it as a leak issue. LE can be triggered by a variety of pathologies, but the most frequent culprits are hoses and seals rather than electronic faults. Early detection is critical to minimize water damage, mold growth, and heightened utility bills. As you troubleshoot, keep a dry towel handy and wipe the base area to monitor whether moisture returns between checks. Why Error Code’s analysis emphasizes that eliminating residual moisture quickly reduces secondary damage and gives you a clearer view of the actual leak source.
Common Symptoms and How LE Presents (continued)
- A damp base or pooling water near the machine base
- The cycle stops mid-run with LE displayed
- Visible water around inlet hoses or the door seal
- Fresh water spray or dampness on the floor after a wash
- Alarm beeps or the display flickers when LE is detected
If you notice any of these signs, document the location and magnitude of the moisture. This data aids in diagnosing the root cause and is consistent with Why Error Code’s guidance for leak-focused troubleshooting. Keeping water away from electrical outlets and ensuring the machine is unplugged before inspection are essential safety steps.
Most Likely Causes and Likelihood
- Loose or damaged inlet/outlet hoses – high: If the hose clamps loosen over time or the hoses crack, water can leak at the connection point. Ensure clamps are tight and hoses are intact.
- Worn or damaged door seal/gasket – high: The door seal is a frequent source of leaks, especially if the washer is used with hard water or has a compromised gasket.
- Tub-to-pump or tub-to-base gasket wear – medium: Gaskets wear with time and can develop small leaks that become evident once LE triggers.
- Cracked tub or tub housing – low: A severe crack is less common but possible in older units; inspection reveals visible fractures or rust-prone spots.
Based on Why Error Code research, these causes are ordered by likelihood, with hoses and door seals at the top. If you’ve verified that hoses are secure and seals look intact, you should proceed to targeted fixes rather than broad component replacement. The goal is to address the most probable leaks first to stop water intrusion quickly while avoiding unnecessary parts changes.
Quick Fixes You Can Try Safely
Before diving into tools or disassembly, perform these quick checks to address LE safely:
- Unplug the washer and turn off the water supply to prevent further leakage
- Move the unit away from walls to access hoses and seals
- Inspect inlet and drain hoses for cracks, bulges, or dampness at the connections
- Tighten hose clamps gently and recheck for leaks after a test cycle
- Wipe dry areas to monitor whether moisture reappears during the next cycle
If moisture returns after these checks, reserve disassembly for Step-by-Step guidance and consider professional help to avoid property damage. Why Error Code notes that persistent leaks after basic checks typically require a seal or hose replacement by a technician.
Step-by-Step Repair Guide Preview
This section previews the most common fixes. For the full, detailed repair steps, see the dedicated STEP-BY-STEP block. In many LG LE cases, the fix is simple: reseat or replace a damaged hose or door seal. If you observe a torn gasket or a cracked hose, replacements are usually straightforward with basic tools. However, if you discover a faulty tub seal or a damaged tub, the repair is significantly more involved and may require a pro. Always ensure the unit is unplugged and water supply is closed before performing any disassembly. This guide is designed to help you prioritize the most probable leaks and plan safe, incremental repairs.
Remember, if you’re unsure about your ability to safely work on the machine, don’t hesitate to contact a professional. Why Error Code emphasizes safety first whenever dealing with water leaks and electrical appliances.
Other Causes and Advanced Fixes
Beyond hoses and door seals, LE can be triggered by tub mounting issues, incorrect leveling causing stress on seals, or a faulty leak sensor giving a false positive. In advanced scenarios, you might find:
- A loose tub-to-pump clamp that needs secure tightening
- A misaligned door gasket after transport or leveling
- Residual mold or soap scum buildup around seals that mimics a leak
- A damaged drain pump housing that leaks onto the base
For each of these, the recommended fixes become more involved:
- Tightening or replacing clamps and seals (easy to medium)
- Replacing a door gasket (medium)
- Replacing a drain pump housing or tub seal (hard)
If the leak source is not obvious after the quick checks, this list helps you prioritize while keeping safety in focus. Why Error Code’s guidance is to document findings and test after each adjustment to confirm whether LE is resolved.
Safety Tips & When to Call a Pro
Water leaks around electrical appliances pose both shock and fire risks. Always unplug the washer before inspecting or touching internal components. If you detect a persistent leak after your initial fixes, or if you see water pooling near the electrical outlet, stop and contact a licensed technician. If you have a warranty or service plan, initiate a service request through the provider. Cost estimates for common repairs vary by region and severity but typically range from $80–$250 for hose/seal replacements to $400–$1000 for major tub or pump work.
Early intervention saves water and avoids secondary damage to floors and cabinetry. For routine maintenance, regularly inspect hoses, seals, and the base for dampness, and ensure the unit is level to prevent seal stress. If you’re uncertain, prioritize safety and call a pro rather than attempting risky disassembly.
Safety Checklist and Final Precautions
- Always unplug power and shut off water before touching the machine
- Do not run a cycle while leaks are present; allow the area to dry first
- Wear eye protection and gloves if you anticipate potential splash
- Keep pets and children away from the workspace while inspecting
- If the leak persists after basic checks, schedule a professional inspection to avoid further damage
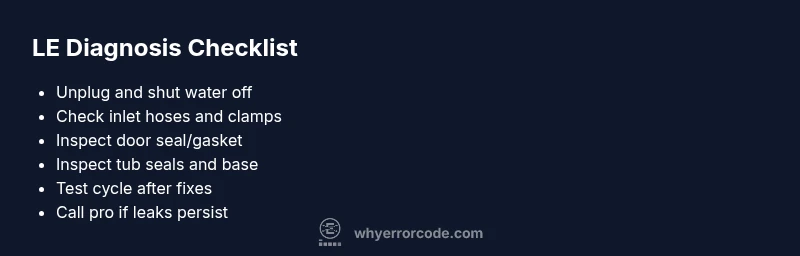
Steps
Estimated time: 30-60 minutes
- 1
Power down and secure water supply
Unplug the washer from the wall outlet and shut off the water supply valves. Move the unit away from walls to access hoses safely. This prevents further water flow and reduces the risk of electric shock during inspection.
Tip: Take a photo of hose connections before removal to ensure correct reassembly. - 2
Inspect inlet hoses and clamps
Check both hot and cold inlet hoses for cracks, bulges, or damp spots at the connections. If you see seepage around clamps, loosen, reseat, and tighten them firmly using a screwdriver; replace hoses if damaged.
Tip: Replace hoses every 5–7 years as a precaution. - 3
Check the door seal and tub gasket
Open the door and inspect the rubber gasket for tears or deformations. If the seal is compromised, replace it. Look for soap scum or residue that can cause micro-leaks around the seal.
Tip: Clean the gasket with a mild household cleaner to remove soap residue that may hide damage. - 4
Inspect the drain area and base
Examine the tub-to-pump area and the base for any signs of leakage. If you detect moisture here, you may have a worn gasket or a crack in the tub housing that requires professional attention.
Tip: Run a quick test cycle with only water to observe for new leaks after each repair. - 5
Test after each fix
Reconnect power and water, run a short test cycle, and observe carefully. If LE reappears or a new leak is detected, stop the cycle and reassess or call a pro.
Tip: Document results after each fix to guide the next steps.
Diagnosis: LE code appears with visible moisture near LG washer
Possible Causes
- highLoose inlet or outlet hose connection
- highDamaged door seal/gasket
- mediumTub seal or base gasket wear
- lowCracked tub or drain hose damage
Fixes
- easyTighten or replace inlet/outlet hoses as needed
- mediumReplace torn door seal/gasket
- hardReplace tub seal or base gasket if worn
- hardReplace cracked tub or damaged drain hose
Frequently Asked Questions
What does LE mean on LG washers?
LE is a leak error indicating water has been detected in areas outside the normal cycle. It usually points to hoses, door seals, or gaskets. Start with quick checks and then proceed to targeted repairs.
LE on LG washers means a leak was detected, usually from hoses or seals. Begin with safety checks and visually inspect hoses and door seals.
Can LE be caused by a loose water inlet hose?
Yes. A loose or damaged inlet hose is a common LE cause. Tighten clamps or replace the hose if you notice dampness at the connection.
A loose inlet hose is a common LE cause. Tighten clamps and inspect the hose for damage.
Is LE always a simple fix I can do myself?
Many LE cases are solvable with simple hose or seal replacements. However, if the leak is from a tub seal or base, professional service is often required.
Many LE leaks can be fixed with hose or seal replacements, but some require a pro.
When should I call a professional for LE?
Call a professional if the leak persists after basic checks, if you notice a cracked tub, or if you’re uncomfortable disassembling or handling electrical components.
Call a pro if leaks persist after checks or if you’re uneasy about repairs.
Will LE cause water damage to my floor?
Yes, unresolved leaks can damage flooring and cabinets. It’s essential to stop water flow quickly and contain any pooling.
LE leaks can damage floors, so act quickly and contain water.
Does warranty cover LE repairs?
Warranty coverage varies by policy and age of the unit. Check with the manufacturer or your service plan to confirm coverage for leak-related repairs.
Warranties vary; check with your provider to confirm coverage for leak repairs.
Watch Video
Top Takeaways
- LE signals a leak detected by sensors on the LG washer
- Common sources are hoses and door seals
- Start with safe, quick checks before disassembly
- Call a pro if leaks persist after basic fixes