LG Oven F9 Error Code: Urgent Fix and Diagnostics
Urgent LG oven F9 error code guide: what it means, quick checks, step-by-step fixes, safety notes, and when to call a professional. Get back to baking fast.

An F9 on an LG oven signals a fault detected by the control system, often involving the door latch, temperature sensor, or main control board. Quick fixes include power cycling the oven, checking the door latch alignment, and ensuring the oven is properly reset. If the code persists, consult the manual or contact LG support.
What the F9 Code Means for LG Ovens
The F9 error code is LG’s way of saying there’s a fault detected by the oven’s control system. Because LG ovens span multiple generations and models, the exact fault can vary. In general, F9 can indicate a problem with communication between the control board and sensors, a door interlock or latch issue, or a sensor/thermistor fault. This isn’t an indictment of your cooking skills; it’s a safety-driven signal that the oven’s safety controls have detected an abnormal condition. Always start by powering down the unit completely and resetting the control panel according to your model’s manual. If you see the F9 code again, don’t ignore it—addressing it promptly reduces the risk of further damage or unsafe operation.
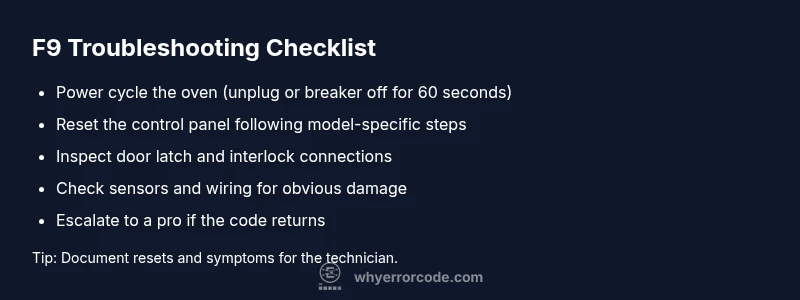
Quick, Safe Checks First
- Ensure the oven is completely cool before inspecting any components.
- Power cycle the appliance by unplugging for 60 seconds or switching the circuit breaker off for a minute, then plug back in and test. This can clear transient faults that trigger F9.
- Inspect the door latch and interlock. A misaligned latch or damaged interlock can trigger a fault even if the door appears closed.
- Check for obvious wiring damage or loose connectors at the back of the oven panel. If you see burnt marks, smell burning, or hear buzzing, stop and call a pro.
- Review the model’s manual for any model-specific reset sequence or error code table. Some LG ovens require a specific button sequence to reset the fault state.
Diagnostic Flow: Symptoms, Likely Causes, and First Fixes
The most common causes of F9 are control-board or firmware issues, followed by sensor-related faults and door interlock problems. Use the following quick guide to triage from symptoms to fixes without tearing the oven apart:
- Symptom: F9 appears during startup or bake, oven won’t operate.
- Likely causes (order by likelihood):
- Control board fault or firmware glitch — high
- Temperature sensor/thermistor fault — medium
- Door latch interlock issue — low
- Quick fixes you can try safely:
- Power cycle (easy)
- Reset the control panel (easy)
- Reseat or inspect door latch and connectors (medium)
- If the fault persists, professional service is recommended (hard)
If you’re unsure, don’t rush to disassemble wiring or replace boards. A service tech can test with diagnostic tools and confirm whether firmware, sensors, or wiring is at fault.
Step-by-Step Fix for the Most Common Cause: Control Board/ Firmware Fault
This section covers the most common root cause: a control-board or firmware fault. Follow these steps in order to minimize risk and avoid unnecessary parts replacements. Always ensure power is disconnected before starting any repair effort.
- Power cycle and reset
- Unplug the oven or switch off the dedicated circuit breaker for at least 60 seconds. Plug back in and power the unit on. This resets board state and clears temporary faults.
- After power-up, navigate to the reset option in your model’s menu if available and perform the reset sequence per the user manual. Tip: Document the exact sequence for future reference in case the fault recurs.
- Clear any transient sensor faults
- Use the oven’s diagnostic menu (if present) to run a self-test on sensors. If your model doesn’t expose this, a standard reset often clears sensor fault flags.
- Do not replace sensors yet; only proceed to physical checks if the fault persists after reset. Tip: Take a photo of any error logs before clearing them for future technician reference.
- Inspect door latch and interlock connections
- With power removed, check that the door latch moves freely and that interlock connectors are seated firmly. Loose connectors can trigger fault codes even when the door appears closed.
- If you notice corrosion or damaged wires, replace the interlock or harness as directed by the service manual. Tip: Use dielectric grease on contact points if corrosion is mild (only if the manual approves).
- Verify wiring and sensors visually before replacing parts
- Look for obvious damage to the temperature sensor/thermistor and associated wiring. Do not attempt to repair high-voltage lead wires; replace only if explicitly authorized in the manual.
- If you can access the sensor, gently disconnect and reconnect the sensor harness to reseat a potential loose connection. Tip: Label connectors before disconnecting to ensure correct reassembly.
- When to call a professional
- If the F9 code reappears after a full reset, or you observed burning smells, unusual heat, or electric shocks, stop immediately and contact a qualified technician.
- Expect service costs to include a diagnostic visit and potential parts replacement; typical ranges vary by region and model, with labor often ranging from moderate to higher depending on complexity. Tip: Confirm warranty coverage and obtain a written estimate before any repair work.
Other Possible Causes and How to Handle Them
If the control-board fault isn’t the root cause, other possibilities include a faulty temperature sensor, wiring harness degradation, or a misbehaving door interlock. Each requires different checks and, often, parts replacement. The key is to avoid random part swaps; rely on the diagnostic plan and model-specific service literature. A professional can perform a more thorough electrical test, verify sensor resistance, and confirm board firmware status. In many cases, replacing a faulty sensor and reseating connectors resolves F9 without needing a full board swap.
Safety Notes, Pro Tips, and When to Seek Help
- Safety first: unplug the oven before any inspection, and never probe live circuits. If you smell smoke, hear crackling, or notice sparking, stop immediately and call emergency services if needed.
- Safety equipment: use insulated tools and wear eye protection when working near exposed wiring. Do not bypass safety interlocks or modify control logic.
- Budget awareness: professional repairs may involve diagnostic fees plus parts. Typical ranges for sensor or board repairs vary by model and region; expect to see a range quoted by any service provider.
- Warranty reminders: check if your unit is still under warranty, as many LG components are covered beyond a standard consumer warranty. If in doubt, contact LG support for model-specific guidance.
Key Takeaways for Quick Reference
- F9 usually signals a control-system fault and should not be ignored.
- Start with safe, simple resets before opening panels or replacing parts.
- If the fault persists, consult the manual and consider professional service to avoid further damage.
- Document any observed symptoms and logs to aid technicians and preserve warranty.
Final Safety and Repair Mindset
Always treat a fault code like a safety signal. If you’re unsure about any step, stop and seek professional help. The risk of electrical shock or fire is not worth a DIY shortcut. Keep records of error codes, reset attempts, and the service timeline for future troubleshooting.
Steps
Estimated time: 45-70 minutes
- 1
Power cycle the oven
Unplug the unit or switch off the dedicated circuit for 60 seconds. Reconnect and power up to see if F9 clears. This step clears transient faults that often trigger the code.
Tip: Keep a log of the reset and the oven’s response for reference. - 2
Reset the control panel
Access the manual’s recommended reset sequence for your model (some LG ovens use a button combo or menu option). Run the reset and observe whether the code reappears.
Tip: Do not perform resets while the oven is hot. - 3
Inspect door latch/interlock
With power off, verify the latch moves freely and the interlock connectors are seated. A misaligned latch can simulate a fault.
Tip: Take a photo of connectors before disconnecting to ensure correct reconnection. - 4
Check sensors and wiring
Visually inspect the temperature sensor and related wiring for damage or loose connections. If comfortable, reseat connectors; do not replace components without testing.
Tip: If wiring appears damaged, avoid further inspection and call a pro. - 5
Call a technician if unresolved
If F9 persists after resets and checks, arrange professional service to test the control board, sensors, and firmware with proper diagnostic tools.
Tip: Request a written estimate and confirm whether the visit is covered by warranty.
Diagnosis: LG oven displays F9 error code and stops responding
Possible Causes
- highControl board fault or firmware glitch
- mediumSensor or temperature probe fault
- lowDoor latch interlock issue
Fixes
- easyPower cycle the oven by unplugging for 60 seconds or turning off the breaker for 60 seconds
- easyReset the control panel using the model-specific procedure in the manual
- mediumInspect and reseat door latch/interlock connectors; replace if damaged
- hardTest or replace the temperature sensor/thermistor if wiring looks intact
Frequently Asked Questions
What does LG oven F9 error code mean?
F9 indicates a fault detected by the oven’s control system. It often relates to the control board, sensors, or door interlock. Model variations exist, so consult the manual for specifics.
F9 is a fault signal from the oven’s control system. It usually points to the control board, sensors, or door interlock, but model specifics matter.
Can I fix F9 myself?
You can perform safe resets and basic inspections (power cycle, door latch check). If the fault persists, avoid risky repairs and contact LG support or a qualified technician.
You can try safe resets and checks, but persistent faults should be handled by a technician.
Does unplugging fix the F9 code permanently?
Unplugging can clear transient faults, but if the underlying issue remains, the F9 code will likely return after power is restored.
Unplugging may clear a temporary fault, but if the issue isn’t fixed, the code may come back.
How long does a professional LG oven repair take?
A typical on-site diagnostic visit lasts 1-2 hours, with additional time for parts replacement if needed. Costs vary by region and model.
Most repairs take about one to two hours for diagnosis, plus extra time for parts.
What should I prepare before a technician visit?
Have your model/serial number, a list of when the code appears, and any reset attempts ready. Note any smells or unusual behavior.
Bring model details, symptoms, and reset attempts to the tech.
Is this covered under warranty?
Warranty status depends on purchase date and LG terms. Check coverage for control boards, sensors, and interlocks with your retailer or LG support.
Warranty depends on purchase date and terms; verify coverage with LG.
Watch Video
Top Takeaways
- Understand F9 as a control fault signal
- Start with safe resets before hardware checks
- If unresolved, rely on manuals and professional service
- Keep records for warranty and techs