How to Fix F9 E1 Error Code: Quick, Safe Solutions
Urgent, practical guide to diagnose and fix the F9 E1 error code on your device. Learn quick fixes, diagnostic flow, step-by-step repair, safety tips, and when to call a pro.

F9 E1 indicates a fault in the device’s control software or sensor readout. Start with a rapid power cycle, verify firmware is up to date, and run the built-in diagnostic. If the code persists, follow the detailed steps below or contact support for professional repair to prevent further damage.
What the F9 E1 Error Code Means
The F9 E1 error code is not a single fault; it’s a generic fault indicator used by many modern devices to flag an abnormal condition in the control system. Depending on the device family, it can point to a software fault, a sensor discrepancy, a failed communication link, or corrupted firmware. In urgent repair scenarios, F9 E1 usually signals that the device’s microcontroller detected an out-of-range reading or an unexpected state during startup or a diagnostic cycle. Because the error spans multiple subsystems, the first goal is to categorize the symptom (startup failure, operational halt, or erroneous readings) and then triage potential causes by likelihood. Common culprits include software glitches that misinterpret sensor data, loose or damaged wiring to critical sensors, and firmware anomalies after a recent update. While some instances are easily fixed with a reset or update, others require deeper inspection or professional service. The key is to avoid jumping to conclusions based on the model alone, as the same code can appear for different reasons in different product lines. Always document when and where the error occurs (boot, cycle start, or in-use) to guide the next steps.
Quick Fixes You Can Try Right Now
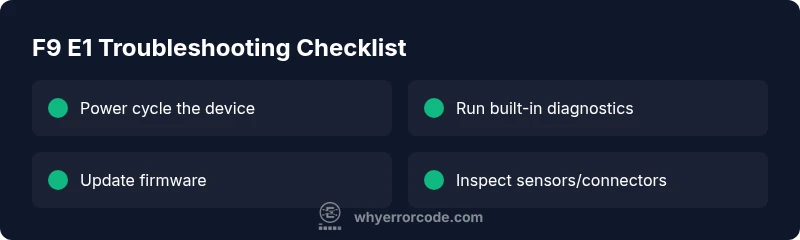
If you’re facing F9 E1, you can often defuse the problem with a small set of safe, immediate actions. Start with the simplest remedies before diving into deeper diagnostics. Power cycle the device by unplugging it for at least 60 seconds, then plug back in and power up. Check for any firmware updates or recent software changes—apply updates if available and re-run the built‑in diagnostic. If the device has a factory reset option, consider performing a reset only after you’ve secured important data and read the manual guidance. Inspect visible wires and connectors to critical sensors and the main control board—reseat any loose connections you identify. If you recently added hardware or peripherals, temporarily remove them to see if the error clears. Keep in mind that some steps vary by model, so consult the manual for exact instructions. If the error persists after these steps, it’s wise to contact customer support or a technician with your device’s model number and recent activity history ready to share.
Diagnostic Flow: Symptom to Root Cause
The F9 E1 error typically follows a common diagnostic path: observe the symptom (startup failure, cycle halt, or incorrect readings), map to likely causes, and apply fixes in order of probability. Start with software-related issues—glitches from corrupted data or incomplete updates—before moving to hardware concerns like sensor wiring or control-board faults. In many devices the fastest wins are a clean power cycle, a firmware check, and a reset if permitted. If those don’t resolve the issue, proceed to verify sensor integrity and inspect hardware connections. Document every step you take and every symptom you observe; this record helps you avoid repeats and speeds up professional diagnosis if needed. As you work, differentiate between transient glitches and persistent faults by testing across different modes or cycles. A methodical approach reduces downtime and reduces the risk of unintentional damage.
Step-by-Step Fix: Most Common Cause (Software Glitch)
- Power cycle the device: unplug from the wall, wait 60 seconds, then plug back in and power up. 2) Run the built-in diagnostic: access the device’s service or diagnostic menu and execute all checks. 3) Update firmware: connect to the internet or use a USB firmware package recommended by the manufacturer, then install and reboot. 4) Clear cached data and reset caches if the option exists, to remove corrupted data that might trigger the error. 5) Re-test with a normal cycle to confirm the fault is resolved. 6) If the error persists, perform a factory reset only after backing up important data and following the manual’s guidance. Tip: Take screenshots of any diagnostic screens and note the exact sequence that triggers F9 E1 to help technicians.
Other Potential Causes and How to Address Them
Even after a software reset, F9 E1 can reappear due to hardware-related issues. Sensor misalignment or degraded wiring to a critical sensor is a common cause when software checks repeatedly fail to read expected values. Inspect visible harnesses for loose, burnt, or damaged connectors; reseat or replace as needed following the device manual. A failed or flickering power supply can also produce erratic sensor readings, so use a known-good outlet, test with a surge protector, and measure supply stability during cycles. If a recent hardware upgrade occurred, revert it temporarily to see if the error clears. Finally, a failing control board may manifest as F9 E1 even when cables seem fine; this typically requires professional evaluation and potentially board replacement.
Safety, Costs, and When to Call a Professional
Safety first: unplug the device before any inspection to avoid shocks or short circuits. If the device is under warranty, contact the manufacturer for guidance or authorized service to protect coverage. DIY fixes can save money with typical parts and labor ranges, but costs vary by device and region. A simple power-cycle or firmware update is usually free or low-cost, while professional diagnostics and board replacement can range from moderate to substantial, often in the hundreds of dollars depending on complexity and parts. If you’re uncomfortable with opening the unit or if the device powers on but continues to show F9 E1 after basic fixes, it’s prudent to escalate to a certified technician. Don’t delay if you rely on the device for critical tasks or if there is a risk of electrical hazards.
Prevention Tips to Avoid Recurrence
- Keep firmware up to date and monitor for new releases from the manufacturer.
- Use a stable power supply and surge protection to prevent voltage spikes.
- Avoid frequent hot-plugging of peripherals that can disrupt the control system.
- Record repeated error patterns (time of day, mode, recent actions) to help anticipate and prevent future failures.
- Schedule regular preventive diagnostics if the device provides a health-check feature.
Steps
Estimated time: 60-90 minutes
- 1
Power cycle the device
Unplug the device from the outlet, wait 60 seconds to discharge residual power, then plug back in and restart. A full power cycle clears transient faults that may trigger F9 E1.
Tip: Make sure the device is completely unplugged before handling any wiring. - 2
Run built-in diagnostic
Access the device’s diagnostic menu and run all checks. Record any codes or sensor readings that appear, as they guide subsequent steps.
Tip: If you can’t locate diagnostics, consult the manual or vendor support site. - 3
Update firmware
Check for the latest firmware version and apply the update. Reboot the device after installation and re-run diagnostics to confirm whether F9 E1 persists.
Tip: Use a reliable network connection and back up settings if the device allows it. - 4
Inspect sensors and connectors
Power down and unplug the device. Visually inspect sensors and their connectors for looseness, corrosion, or damage; reseat or replace as needed according to the service manual.
Tip: Do not force connectors; align pins carefully before seating. - 5
Reset data caches (if available)
Clear cached data or reset the device’s internal memory related to sensor readings. This helps eliminate stale data that could cause incorrect error reporting.
Tip: Only clear caches if the manual confirms it’s safe to do so. - 6
Test a full cycle
Run a complete normal cycle to verify stability. If F9 E1 returns, document exact conditions and prepare for professional assistance.
Tip: Note the cycle type, duration, and any warnings shown during testing. - 7
Escalate if unresolved
If the fault remains after software and wiring checks, contact support with model, serial, and diagnostic history for a potential board replacement.
Tip: Have proof of prior attempts ready to speed up service.
Diagnosis: F9 E1 error appears during startup or operation, halting the device
Possible Causes
- highSoftware glitch or corrupted firmware
- mediumLoose or damaged sensor wiring
- lowPower supply instability or surge damage
- lowControl board malfunction
Fixes
- easyPerform a soft reset and check for firmware updates
- easySecure/verify sensor connections and reseat cables
- easyTest with a stable power source and surge protection
- hardReplace control board if faults persist after software fixes
Frequently Asked Questions
What does F9 E1 mean and is it device-specific?
F9 E1 is a generic fault indicator used by many devices to flag a software, sensor, or control issue. The exact meaning can vary by model, so always check the manual or support site for your device family.
F9 E1 is a generic fault flag. Check your device’s manual since the exact cause can differ by model.
Can I fix F9 E1 myself?
Often, initial fixes like power cycling, firmware updates, and diagnostics can resolve F9 E1. If the problem persists after these steps, be prepared to contact support or a technician.
Yes, start with basic fixes, but call a pro if it keeps happening.
What are typical costs to address F9 E1?
Costs vary. A DIY fix may be free to a few tens of dollars for updates or resets, while professional diagnostics can range from $100 to $300 depending on the device and location.
Costs depend on whether you do it yourself or hire a pro; expect a broad range.
When should I call a professional?
If the error recurs after safe fixes, if you notice hardware damage, or if you’re under warranty, contact an authorized technician for diagnosis and repair.
Call a professional if the error keeps showing up or hardware looks damaged.
What should I have ready before service?
Have the model, serial number, purchase date, and a record of when F9 E1 occurred. Also note any recent updates or changes to installed peripherals.
Bring model/serial, purchase date, and a brief fault history to the service visit.
Watch Video
Top Takeaways
- Identify whether F9 E1 is software or hardware related
- Start with safe quick fixes before deeper repairs
- Follow a structured diagnostic flow to avoid guesswork
- Know when to escalate to a professional
- Keep firmware updated to prevent recurrence